Opinion & Analysis
Getting started with basic club repair, with tips from Tom Wishon
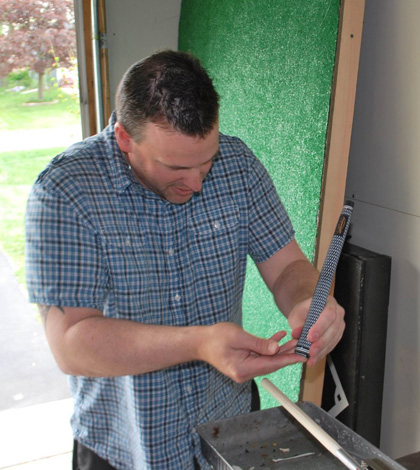
My journey into tinkering with golf clubs started small. A bottle of nail polish, nail polish remover and a simple “how-to” video on how to add new paint fill to a golf club.
Soon after, I found myself at the local hobby store purchasing a variety of model paints in every color I could find. Before I knew it, I found myself stamping, torching, applying gun blue, coffee grounds and motor oil finishes to my wedges.
As fun as it was, what I am about to share with you isn’t about custom finishes or paint fills. I am going to help you get started with the basic needs for the average player to get started re-gripping your own clubs. I am also going to share the basic needs for minor club repairs and club building at the hobbyist level.
In the past, I always had my local pro shop install new grips and shafts for me. I figured it was easier to just pay someone to do the work rather than purchase all the equipment I needed to do it myself. As time went on, I found that my grips tended to feel very different after each re-grip — one time they would feel too thin and the next they seemed too thick. It was frustrating to say the least.
The final straw for me was when I had a new grip put on a driver and requested a standard grip with seven wraps of build-up tape (I prefer a mid-size grip but with a firm feel). But when I picked up my club, it felt very thin. I asked the club tech if the grip felt like seven wraps and he agreed that there was no way it could be. He then took my club to the back, removed the grip and discovered only two wraps of tape. That was enough motivation for me to take the time and learn how to do it myself.
So who am I to give advice on what is needed for club building? After all, I can tell you that I am not a professional club builder — I don’t build clubs for a living, and I don’t work in a golf pro shop. I perform all my own work on my clubs in a small work area located in my garage. So why should you listen to what I have to share when it comes to building clubs? Because I had the pleasure of speaking with Tom Wishon on this very matter.
Wishon has decades of experience in the field designing golf clubs, and is also a master club builder and fitter. We spoke in detail on all the necessities needed to do basic club building and repair and I am going to share his wisdom with you.
Before you start you need to ask yourself:
What are the essential tools needed for club repair?

According to Wishon, the answer to the question depends on what club repair tasks the person wants to perform.
That’s why I’m going to break down the tools needed for club repair into two different sections: basic repairs and advanced repairs. At the end of the story, I share tips from Wishon that will help aspiring club builders cut through the rookie mistakes of club building.
Basic Repairs
Tools Needed:
- At least a 4-to-6-foot long sturdy workbench.
- Heavy duty bench vise with 4-inch jaws.
- Shaft vise clamp.
- Razor blade knife with a hook blade.
- Heat gun.
- Strong blade knife.
- Two-inch-wide roll of masking tape.
- Two-inch-wide two-way grip installation tape.
- Calipers.
- Catch pan.
- Grip solvent or mineral spirits.
All operations will be performed on your work bench, seeing that this will be your primary work area. If space is ample, it is better to go with a 6-foot long work bench. Your vise will be top mounted and should have at least a 4-inch jaw — be sure to use a shaft vise clamp when using the vise to hold shafts. This will prevent the metal jaws from damaging any paint or graphics that the shaft may have.
Mount your catch pan beneath your shaft vise. The catch pan will help keep your work area clean from grip solvent drippings and will aid in recycling the solvent.
Wishon believes it is better and easier to install grips with an air compressor. However, it is something that club makers only do when they have a lot of business, because of the cost of the compressor and the special nozzle device required to attach to the air hose to blow the grips on with the compressed air. If a person already has an air compressor, buying the nozzle and installing grips that much is cleaner than using grip solvent.
I have seen and heard my share of horror stories on clubs that have been ruined due to shabby work: short cuts, carelessness and a lack of knowledge. I have also had my own experiences of sub-par work performed on my gear. I once had a 3 wood re-shafted and explained that I did not want an extension placed in the butt end of the grip.
After receiving the 3 wood, I noticed that my grip felt odd. It felt as though there was a seam in it. I cut the grip off to find that not only did the club builder place an extension in my shaft, but that he used a piece of a broken shaft to extend it rather than using a real extension. That was enough to push me toward learning how to do shaft pulls and installs.
Advanced Repairs
Tools Needed:
- A reasonable quality graphite shaft puller tool.
- A Lock-Tite shaft holder.
- Heavy duty leather work gloves.
- A 1-by-30-inch small belt sander.
- A 48-inch ruler.
- An abrasive shaft cut off wheel to mount to a 5- or 6-inch bench grinder.
- Small butane torch.
- A stiff wire brush wheel.
- Bamboo skewers cut in half lengthwise.
- Cut up squares from a cardboard box, at 4-by-4.
- OVERNIGHT CURE Two-part shafting epoxy with a lap shear strength of at least 3,000 psi.
- An assortment of ferrules for 0.335 parallel, 0.355 taper tip and 0.370 parallel shafts.
- An assortment of tip weights in different weights (2 grams, 4 grams, 6 grams, 9 grams) in different sizes.
- One-half-inch wide roll of lead tape.
- A 14-inch fulcrum Lorythmic or Prorythmic swingweight scale.
As you venture into a more detailed roll of a club builder, you will soon learn how valuable leather work gloves are — just ask any builder who has accidentally touched a heated hosel with a bare hand.
Working with a propane torch works fine, but its flame is larger and hotter than a small butane torch, and therefore is easier to burn the paint at the base of the hosel on metal woods, or to scorch the metal surface of the hosel. Heat guns will work as well, although Wishon said using one for softening the epoxy takes much too long, and it is difficult to control where the heat goes on the hosel to prevent scorching the paint at the base of the hosel on metal woods.

For prepping the tips of shafts, Wishon recommended a small belt sander, which he said is best for roughing up all shaft tips.
“(For experienced club makers) The small belt sanders are inexpensive and do the job so much faster and more consistently,” Wishon said.
But he said that beginning club builders should rough up the tips of graphite shafts by hand using strips of 100 grit cloth back sand paper. This is better for beginning club makers to do until he or she learns the “touch” required to abrade a graphite shaft tip using the belt sander. To prevent sanding too much off a graphite shaft tip with a belt sander, the use of a TRizac belt is often better better. However, with practice the club maker can use the 100 grit sanding belt to rough up the tip of graphite shafts.
Wishon also recommends abrading the tip of steel shafts with a small belt sander with 100 grit or medium grit sanding belts, because even for beginners hand sanding steel shafts is tedious, time consuming and more difficult.
The 1-by-30 belt sander can also be used to finish ferrules to make the bottom of the ferrule flush to the top of the hosel.
“Doing this requires the belt on the small belt sander to be switched to one of the special ferrule turning belts offered by the larger component supply companies,” Wishon said. “The best ferrule turning belt is the BLUE fabric belt sold by some of the larger component repair supply companies.”
Ferrules can also be finished using narrow strips of 180 grit cloth back sandpaper, followed by wipe finishing the ferrule with a paper towel wetted with acetone. Wishon describes this simple process:
“The club is secured in the vise clamp in the vise with the club head end protruding out toward the club maker. Protective tape is wrapped around the very top of the hosel to prevent the sandpaper from scratching the top of the hosel. As like buffing shoes with a cloth, the sandpaper is used to sand the bottom of the ferrule flush to the top of the hosel, followed by steel wool rubbing the ferrule to smooth the sanding scratches, followed by an acetone wipe to restore the shine of the plastic ferrule. Thin protective gloves should be worn when using acetone.”
Abrasive cut off wheels are the best way to cut any shaft, whether steel or graphite, Wishon said.
“A rotating tubing cutter can be used to cut steel shafts, but really, they are a real pain in the a** to use, they wear out quickly and they cannot be used on graphite shafts of you will splinter and damage the graphite shaft., Wishon said. “Bench grinders are cheap.”
Also, acquiring a stiff wire brush wheel to put on the other end of the bench grinder is recommended.
“This is used to de-burr the steel shafts after they are cut with the abrasive cut off wheel that would be mounted to the other end of the bench grinder.” Wishon said.
When choosing epoxy, you want an OVERNIGHT CURE two-part shafting epoxy with a lap shear strength of at least 3,000 psi.
“It is OK to have fast cure epoxy for quick jobs, but only buy the fast cure epoxies from reputable club making suppliers and NOT, NOT, NOT from a hardware store,” Wishon said. “While there are some hardware fast cure epoxies that can work, unless you know for sure they have adequate lap shear strength, you are risking a lawsuit by using any epoxy that you do not know is made with an adequate lap shear strength.”
Tips From A Master
So what can we expect as a beginner?
According to Wishon, he said that simple mistakes can and will occur in our first few attempts and these can be and not limited to the following:
- Over-sanding the tip end of graphite shafts in preparation for shaft installation. “Only a very light sanding to rough all surfaces of the tip is necessary.”
- Over heating the hosel to soften the epoxy for shaft removal to the point the metal or paint or both are scorched. “With the lower temperature butane torch it is FAR easier to control the amount of heat and the location of the flame to avoid overheating.”
- Not fully wetting both the inside of the grip and all surfaces of the grip tape before trying to install the grip. This lack of solvent will allow the grip to get “stuck” and does not slide fully on the shaft.”
- Not being sure that the grip is fully pushed all the way on the shaft so that the butt of the shaft meets the very end of the grip.
- Using too much epoxy in the hosel and on the tip end of the shaft when the shaft is installed. “Only a thin coating of epoxy is required on all surfaces of the shaft and on all surfaces of the hosel walls. If too much epoxy is used, most all of it ends up being pushed up the inside of the tip of the shaft, which presents the risk of it breaking loose later on to cause a rattle in the shaft. Also, too much epoxy adds to the weight of the head and could cause your final swing weight to be higher than what you wanted.”
- Not roughing up the tip of STEEL shafts enough, and then having the head come off the shaft in play. “Steel shafts are tough as nails. The chrome plating on them is very tough and wants to resist sanding. So you can be rough with your tip sanding on steel shafts and never worry about damaging the shafts.”
- Improper cutting of graphite shafts so they develop a split lengthwise. “When using an abrasive cut off wheel, as the wheel is about to cut fully through the shaft, always ROTATE the shaft a little to prevent this problem.”
- Not measuring the two parts of the epoxy accurately enough or not mixing the two parts thoroughly enough and then not having the epoxy cure to proper hardness and strength.
- When shaft cutting, measure TWICE and then cut only ONCE!
Practice… Practice… Practice and More Practice
If you have the time and extra money, attending one of the week-long club making and club repair schools that are offered by Golf Works and Mitchell Golf will definitely shorten the learning curve a lot and will also give the beginning club maker a good dose of confidence in the development of his skills.
When the time comes where the beginning club builder feels confident and a sense of skill have developed, “DO NOT do any club work for golfers who are not a close friends or family members until you get GOOD at all the workbench skills,” Wishon said.

“It takes 50 good jobs to overcome the damage that can be done to your reputation from one bad job done to the wrong player’s clubs,” Wishon said. “Do not allow yourself to get what we call “sophomore-itis” in your club making. What we mean is that it is VERY common for a person to get overconfident and think they are a top-quality club maker when in reality they do not know as much as they think they do.”
Taking the plunge from player to club builder can be a hesitant one. From my experience I can say this much, it’s not as hard as you think. You don’t need to spend a fortune to get started. Start small with simple re-grips.
If the time comes and you want to proceed a little further into club building, don’t be afraid to make mistakes. Mistakes are going to happen, it’s a part of the learning process. During my first shaft install, I was so excited that I forgot to place the ferule on the shaft before installing the head.
But stick with it, because after all is said and done, there is nothing more rewarding than playing with gear that YOU built.
Opinion & Analysis
Brandel Chamblee PGA Championship Q&A: Rose’s huge McLaren risk, distracted LIV pros and why Aronimink suits the bombers

PGA Championship week is here, and Brandel Chamblee did not hold back in our latest discussion ahead of the season’s second major.
In our 2026 PGA Championship Q&A, golf’s leading analyst made the case that PIF pulling LIV’s funding has left its players competing in a state of confusion, called Justin Rose’s mid-season equipment switch a huge risk at 45, and explained why Aronimink will be a bombers’ delight this week.
Check out the full Q&A below.
Gianni: With the PIF confirming that they’re pulling funding from LIV at the end of the season, what impact do you expect that to have on the LIV players competing at the PGA Championship?
Brandel: I would imagine that they have all been thrown into a state of confusion, and will be distracted, not knowing where they are going to play next year and not knowing exactly their road back to either the DP World Tour or the PGA Tour. Or in Rahm’s case, being tied to a sinking ship for the next few years, likely playing for pennies on the dollar in events that no one cares about or watches.
I doubt this would put him in the best frame of mind to compete at his highest level. Keeping in mind, however, that majors are the only time that LIV disciples get to play in events that matter, so never disregard the motivation they have to prove to the world they are still relevant.
Gianni: Justin Rose switched to McLaren Golf equipment mid-season while playing some of the best golf of his career. What do you make of the change?
Brandel: I don’t really know what to make of Rose switching equipment. It seems a huge risk on his part, even though it is likely, in my opinion, that the clubs he’s playing are similar, if not the exact grinds, to what he was playing previously, with a McLaren stamp on them.
Having said that, at best, it is a distraction when he seemed to be as dialed in with his game as any 45-year-old could be and trending in the majors to perhaps do something that would definitely put him in the Hall of Fame. At worst, given the possibility that these clubs aren’t just duplicates of his old set stamped with McLaren on them, he’s made an equipment change that would take time, and 45-year-old athletes don’t have the time to do such things.
Gianni: Aronimink has only hosted a handful of professional events since it hosted the 1962 PGA Championship. What kind of test does it present, and does a course with less recent major championship history tend to level the playing field?
Brandel: Even though Aronimink has only hosted a handful of meaningful professional events, it has been fairly discerning in who can win there. When Keegan Bradley won the BMW Championship on the Donald Ross masterpiece in 2018, he was the 2nd best iron player on tour coming into that week. When Nick Watney won the AT&T at Aronimink in 2011, he was 2nd in strokes gained total coming into the week.
In 2020, Aronimink hosted the KPMG Championship, and Sei Young Kim won. On the LPGA that year, she was first in greens in regulation, putts per green in regulation, and scoring average on the way to being the LPGA player of the year. And then there is the 1962 PGA Championship won by Gary Player, who eventually became just one of a few players to win the career grand slam on the way to winning 9 majors. It is a formidable test, and if it’s not softened by rain, it will bring out the best in the upper echelons of the game.
Gianni: Is there a specific hole at Aronimink that you think will do the most to decide the winner?
Brandel: The hardest hole at Aronimink in each of the three tour events that have been played there since 2010 has been the long par-3 8th hole, with the par-4 10th being the second hardest, so most of the carnage will happen around the turn, but with the par-5 16th offering opportunities for bold plays and the tough closing holes at 17 and 18, the finish is likely to be frenetic.
Gianni: The PGA Championship has always sat in the shadow of the other majors. What does the ideal PGA Championship look like in your eyes, and what would it take for it to carve out its own identity?
Brandel: The PGA Championship, to whatever degree it suffers from the comparison to the other three majors, is still counted just as much when adding them up at the end of one’s career. Almost 1/3 of Nicklaus’ major wins were the five PGA Championships he won. Walter Hagen won 11 majors, five of which were PGA Championships.
Tiger Woods twice in his career won back-to-back PGA Championships, and those four majors count just as much as the other 11 he won. The PGA may not have the prestige of the other three, but it carries the same weight. Having said that, I preferred the identity that it had as the last major of the year.
Gianni: You nailed your Masters picks. Rory won, Scottie finished solo second, and Morikawa surged to a tie for seventh. Who are your top 3 picks for the PGA Championship and why?
Brandel: I am not a huge fan of majors played on golf courses that have been shorn of most of the trees, although I understand some of the agronomic reasons for doing so and of course the ease with which it allows members to play after errant drives. However, at the highest level, it all but eliminates any strategy off the tee and turns professional golf into an even bigger slugfest. That means that it will likely be a bomber’s delight this week, but fortunately, Scottie Scheffler is long enough to play that game and straight enough to play it better than anyone else.
The major championships give us very few surprises anymore, going back to the beginning of 2012, so the last 57 majors played, the average world rank of the winners has been better than 15th in the world. So look at the highest ranked and longest drivers who are on form coming into the PGA Championship who also have great short games as the surrounds at Aronimink are very challenging. That’s Scottie Scheffler by a mile and then McIlroy and Cameron Young with a far bigger nod towards DeChambeau than I gave him at the Masters.

In this episode of the Club Junkie Podcast, we dive into one of the most interesting flatstick releases of the year with a full review of the new TaylorMade SYSTM 2 putters. After spending time on the greens, I break down what makes this design stand out, where it performs, and why it has me completely torn between loving it and fighting it. If you are into feel, alignment, and consistency, this is one you will want to hear about.
We also take a look at some of the putters in play on the PGA Tour last week. From familiar favorites to a few surprising setups, there is always something to learn from what the best players in the world are rolling with under pressure.
To wrap things up, I walk through the process of building a set of JP Golf Prime irons paired with Baddazz Gold Series shafts. From component selection to performance goals, this is a deep dive into what goes into creating a unique custom set and why this combo has been so intriguing.

This year my 50th birthday. Gosh, where has the time gone?
As a teenager in rural Missouri, some of my junior high and high school years felt interminable. Graduation seemed light years away. But the older I get, the faster life seems to fly by.
I’m also increasingly aware of my mortality. My dad died recently. Earlier this year, a friend and fellow PGA of America professional and I were texting about our next catch-up. The next message I received was news of his unexpected passing at 48. Shortly after, a woman I dated in college succumbed to cancer at 51.
Certainly, one can share perspective at any age. Seniors help freshmen, veterans guide rookies. But reaching this milestone feels like as good a time as any to do one of those “what would I tell my younger self?” articles.
I’ve had a uniquely varied career in golf. I started as a 27-year-old, average-length-hitting, 14-handicap computer engineer and somehow managed to turn pro before running out of money, constantly bootstrapping my way forward. I’ve won qualifiers and set venue records in the World Long Drive Championships, finished fifth at the Speedgolf World Championships, coached all skill levels as a PGA of America professional, built industry-leading swing speed training programs for Swing Man Golf, helped advance the single-length iron market with Sterling Irons®, caddied on the PGA TOUR and PGA TOUR Champions, and played about 300 courses across 32 countries.
It’s been a ride, and I’ve gone both deep and wide.
So while I can consult and advise from a lot of angles, let me keep it to a few things I’d tell the average golfer who wants to improve.
1. Think About What You Want
Everyone has their own reason for picking up a golf club.
Oddly, as a professional athlete, I’m not internally driven by competition. That can be challenging, as the industry currently prioritizes and incentivizes competition over the love of the game.
For me, I love walking and being outdoors. Nature helps balance my energy. I prefer courses that are integrated into the natural beauty of their surroundings. I’m comfortable practicing alone. I’m a deep thinker, and I genuinely enjoy investigating the game, using data and intuition to unearth unique, often innovative insights. I’m fortunate to be strong and athletic, so I appreciate the chance to engage with my abilities. Traveling feels adventurous. I could go on.
You don’t have to overthink it like I do. For you, it might be as simple as hitting balls to escape work, hanging out with friends, and playing loosely with the rules and the score.
The point is to give yourself permission to play for your own reasons, and let that be enough.
But if improvement is your goal, thinking about your destination—and when you want to get there—is important, because it dictates the steps you need to take. When I set out to go from a 14-handicap to the PGA TOUR as quickly as possible, the steps I needed were very different from those of a working golfer trying to break 90 in six months. That’s also different from someone who just wants a few peaceful hours outside each week, away from work or family.
None of these goals are better than the others, but each requires a different plan that you can work backward from.
2. There Are Lots of Things That Can Work
One of the challenges of golf is that, although there are rules for playing, there aren’t clear, industry-wide standards for how to best play the game. There’s a lot of gray area.
You might hear a top coach or trainer insist that a certain move is the best way to swing or train. Then you dig a bit deeper and, much to your confusion and frustration, another respected coach or trainer says something completely different. I don’t think anyone is trying to confuse you—at least I hope not. It’s just where the industry is right now.
You have to be careful with advice from tournament pros, too. They might be great at scoring, but they’re also human and sometimes just as susceptible as amateurs to believing things that don’t really move the needle. Tour players might describe what they feel, but that’s not always what they’re actually doing when assessed with technology.
I recently ran a test on my YouTube channel (which connects to my GolfWRX article “How to use your hands in the golf swing for power and accuracy”), and, interestingly, two of the most commonly taught hand actions produced the worst results in the test.
Coaches can certainly help. If you find someone you connect with to help navigate, that’s great. But there are many ways to get the ball in the hole. In the current landscape, you may need to seek multiple opinions, think critically, and use your own intuition to discern what seems true and whose advice resonates with you.
I’d recommend seeking someone who is open-minded and always learning, because things constantly change. Absolutes like “correct” or “proper” should raise a red flag. AI can be useful, but it tends to confidently repeat popular advice, so proceed with caution.
3. Get Custom Fit
If you’re serious about becoming a better player, getting custom fit is hugely important. There’s no sense fighting your equipment if you don’t have to. Most better players get fit these days and, if they don’t, they’re usually skilled enough to work around clubs that aren’t ideal.
If you plan to play for a long time, it’s worth spending a little more upfront to get something that truly fits you and your game, rather than continually buying and discarding equipment.
Equipment rules haven’t really changed significantly since the early 2000s. To stay in business, manufacturers keep pushing those limits. If you pull a bunch of clubs and balls off the rack and test them, you’ll find differences. I’ve tested two new drivers and seen a 30-yard total distance gap. Usually, the issue isn’t bad equipment; it’s that the combination of components simply isn’t the best fit.
It’s like wearing a new pair of floppy clown shoes. Sure, they’re shoes—but you won’t sprint your best in them compared to track shoes that fit perfectly.
Be wary of what’s called custom fitting, too. Sometimes the term is used as a marketing strategy rather than an actual fitting. In some retail settings, fitters may be incentivized to steer you toward higher-priced components. That doesn’t automatically mean it’s not the best fit, but you should be aware of potential biases.
I learned a version of this lesson outside of golf. Years ago, I bought a tennis racquet at a big box store from a seemingly knowledgeable employee who thought it would suit me best. The racquet gave me tennis elbow, and I spent months recovering with rest and acupuncture. The next season, I invested more time and money to find what actually fit me, and I walked away with something amazing that I still play with years later.
So if you’re going to get fit, be smart about it.
Find someone you believe has deep knowledge—possibly with certifications, but not necessarily. Make sure there’s a wide inventory across many brands. Check recent reviews for the individual fitter if possible. Make sure you trust that the fitter has your best interests at heart. If they’re wearing a hat or shirt with a specific brand’s logo, proceed with caution. Unless you specifically want a certain brand or look, be wary of upsells, especially if two options perform nearly the same.
Also, while golf is called a sport of integrity, there’s a thread of manipulation in the industry. I once drafted an equipment article for an industry magazine, structured just like one of their previous popular stories, with matching word count and great photos. The assistant editor loved it; it was useful to readers and required little work on his part. But the editor-in-chief nixed the story. When I asked why, I was told it was because I wasn’t an advertiser. It turned out the article I’d modeled mine after was a paid ad cleverly disguised as editorial content.
I really dislike games, clickbait, and fear-based manipulation. I hope this changes, but golfers deserve to know it exists.
4. Distance and Strategy Matter
There’s a real relationship between how far you hit the ball and your scoring average, even at the PGA TOUR level.
I experienced this early in my pro career. I started as a power hitter, swinging in the high 120s and breaking 200 mph ball speed with a stock driver.
Back then, some instructors advised swinging at 80%, so I tried slowing down for more accuracy. That worked fine on shorter, tighter courses. But on longer setups, I was coming into greens with too much club, and par 5s stopped being

RBC Heritage Tour Report: More minis, course-specific setups, Spider & GTS launches

Justin Rose WITB 2026 (April): Full WITB breakdown with new McLaren irons

Best fairway woods of 2026: The most versatile fairway woods + the most forgiving fairway woods

Gary Woodland’s winning WITB: 2026 Texas Children’s Houston Open

What’s the story behind Webb Simpson’s custom-stamped irons?

Cadillac Championship Tour Report: Spieth’s sizable changes, McLaren Golf launches, and more

The 24 players who can win the Masters

Rory McIlroy’s winning WITB: 2026 Masters

Kristoffer Reitan’s winning WITB: 2026 Truist Championship

J.J. Spaun’s winning WITB: 2026 Valero Texas Open


Alex Fitzpatrick WITB 2026 (May)
Driver: Ping G440 LST (9 degrees) Shaft: Fujikura Ventus Black 6 X 3-wood: TaylorMade Qi4D (15 degrees) Shaft: Fujikura Ventus...

Kristoffer Reitan’s winning WITB: 2026 Truist Championship
Driver: Ping G440 Max (9 degrees) Shaft: Mitsubishi Tensei 1K White 60 TX 3-wood: Ping G440 Max (15 degrees) Shaft:...


WITB Time Machine: Rory McIlroy’s winning WITB, 2021 Truist Championship
Rory McIlroy’s victory at the 2021 Wells Fargo Championship 2021 (now the Truist Championship) marked a significant return to form,...


Collin Morikawa WITB 2026 (May)
Driver: TaylorMade Qi4D LS (8 degrees) Shaft: Mitsubishi Diamana D+ Limited 60 TX 3-wood: TaylorMade SIM Tour (14 degrees) Shaft:...
-
 Equipment2 weeks ago
Justin Rose WITB 2026 (April): Full WITB breakdown with new McLaren irons
-
 Equipment1 week ago
What’s the story behind Webb Simpson’s custom-stamped irons?
-
 Equipment2 weeks ago
Cadillac Championship Tour Report: Spieth’s sizable changes, McLaren Golf launches, and more
-
Whats in the Bag3 days ago
Kristoffer Reitan’s winning WITB: 2026 Truist Championship
-

 Whats in the Bag1 week ago
Cameron Young’s winning WITB: 2026 Cadillac Championship
-

 Whats in the Bag3 weeks ago
Nelly Korda WITB 2026 (April)
-

 Equipment2 weeks ago
Justin Rose on the switch to McLaren Golf, learnings from previous equipment moves
-

 Tour Photo Galleries2 weeks ago
Photos from the 2026 Cadillac Championship
Greg Pickett
Jan 4, 2015 at 9:17 pm
Over 40 years in club repairs and club building , even built a club with my own name. Worked for Bert Dargie company in Memphis when I was 16 years old . Had my own business doing over $500,000 books show it , closed business when times got tough in Memphis , but looking to go back in if I can find a partner , don’t want to do it all myself. Anyone interested E – mail me . Pickett.golf@att.net .
Katharine Merical
Aug 21, 2014 at 9:09 pm
You already know thus drastically with regards to the following subject, created myself singularly ponder over it out of a great number of diversified aspects. Its similar to individuals are not interested with the exception of it is something to perform with Woman coo! Your own personal things superb. Constantly handle it down!
Forsbrand
Oct 7, 2013 at 3:21 pm
Love the fact the guy heating the putter head has no safety glasses on, especially when there is another article on here talking about having the right safety equipment!
Timanator
Sep 21, 2013 at 1:31 pm
Great article, thanks for taking your time to spell it all out.
Joe Golfer
Jul 22, 2013 at 3:49 pm
Would definitely recommend that folks measure the amount of the two parts needed for the epoxy, the base and the activator.
20 years ago, one could almost eyeball it, as the two parts had basically the same viscosity/consistency as eachother.
Nowadays one part is much more fluid than the other with the modern epoxies. If one pours out two similar-looking size amounts on a piece of paper prior to mixing, you WILL be getting it wrong, and you’ll probably end up with a clubhead that very gradually begins slipping off your customer’s shaft over time, leaving a gap between hosel and ferrule.
Little measuring cups with graduated lines for measuring are needed to make sure you have equal amounts of Part A and Part B of your epoxy prior to mixing. Just eyeballing it won’t work nowadays.
Lance Dahl
Jul 7, 2013 at 10:53 am
Nice write up Kadin. Thus should be very helpful for folks on here.
Kadin Mahmet
Jun 28, 2013 at 12:01 pm
Yes, a spine finder can also be found at a decent price as well.
Kridian
Jun 28, 2013 at 3:21 am
I think a Spline Finder should be on one of those lists.
Andrew
Jun 27, 2013 at 12:31 pm
Great read, thouroughly enjoyed that.
I’ve done my own grips for awhile now and have been looking at doing some shaft replacements and this certainly gives me a boost of confidence that I can do them.
Chuck
Jun 27, 2013 at 11:09 am
Very nicely done.
A comment, and a couple of questions.
First, a high-quality club ruler (Mitchell Golf’s is the one I recommend) is the first place that I’d spend a little (very little) extra money. SO much more easy than a standard 48″ ruler. Nobody thinks about it, until they have owned and used a good golfclub-specific ruler.
Second; what’s “A reasonable quality graphite shaft puller tool…”? Brands and models, please. That type of tool is fraught with a bunch of designs that are cuaght up in competing patent-violation claims. There ought to be a good, cheap shaft puller for less than $400. The best one I ever saw was the Silvestri product, which was chased out of business years ago.
Third; what are “bamboo skewers split lengthwise” used for? I was thinking of using them to spear olives for a martini. But not for golf club repair.
Also; it was GREAT advice to skip the plumbing-style rotating pipe/shaft cutters. They ARE a pain in the butt. Literally. Get a cutoff saw or a cutoff wheel for a grinder motor. Just do it.
Kadin Mahmet
Jun 28, 2013 at 12:00 pm
Thanks for taking the time to comment. Bamboo skewers are cut in half and can be used to apply epoxy to shafts and heads. The shaft puller I use,wasI purchased from Golf Works for $75 and works great.
Joe Golfer
Jul 22, 2013 at 3:42 pm
Thanks. I was wondering about those bamboo skewers myself.
I generally use popsicle sticks, split in half lengthwise, but have improvised with many things in the past.
tiger168
Jun 26, 2013 at 3:54 pm
Love the articles, the journey itself is the ultimate payback. I just started building my work bench last winter. One thing I told myself is the caring for the environment. Since club repair really require lots of chemicals in the old way of doing it. I am on my journey to find my own way to better club repair by not using as much chemical as possible. Such as using air to remove and install grips and who says you must use chemical to secure the grips. And heat gun is not as friendly as good old natural gas torch. Looking at all the packaging and stuff around the parts and materials for preparing and containing club repairing parts/materials, it’s really sad how wasteful they are; and unnecessary. Many GolfWRXers do minor club repair and even inventing/building their own tools/ways which are just awesome to read and share. I love this web site/forum for all of us to share and experience and setting higher goals as a golfer. Only when you start doing club repairs, then I have found myself playing golf at a different level then my buddies who do not. I now have a lie/loft adjust machine as the next step of my journey. Oh, BTW, I bought everything used, except supplies, thanks for the WRX classified sections and I hate eBay!!! LOL… Craigslist is the way to go!!! Thanks WRX…
Kadin Mahmet
Jun 26, 2013 at 3:41 pm
Thank you all for the kind words, I really appreciate that! I’m glad you liked it. This was a fun topic to cover and speaking with Tom Wishon was a pleasure. His reputation as a Master in the industry proceeds him!
Sean Matheson
Jun 26, 2013 at 3:26 pm
Definitely a very helpful article. Up in Canada, components and service can tend to be very expensive in stores, so having the know how could pay off greatly in the long run.
Mr. Blair M. Phillips
Jun 26, 2013 at 11:43 am
I’ve been repairing, rebuilding and restoring older persimmon woods for about 5 years now. I’ve learned so much from others. This type of article helps those who prefer todays metal woods and graphite shafts. I was taught that,” •Not roughing up the tip of STEEL shafts enough” can cause a “failure in the field” but I have been guilty of “too much epoxy is used, most it ends up being pushed up the inside of the tip of the shaft, which presents the risk of it breaking loose later on to cause a rattle in the shaft and too much epoxy adds to the weight of the head and could cause your final swing weight to be higher than what you wanted.” I’ll have to make a mental note of that and make sure that in the future, I don’t use too much epoxy.
Max
Canada
bonneaustein
Jun 26, 2013 at 11:35 am
I love tinkering with equipment. I actually use the side of a grinding wheel to lightly abrade steel stafts while continually rotating the shaft.
hayzooos
Jun 26, 2013 at 1:06 am
Nice article Kadin, very well put together. I used to do simple stuff a few years back, but since moving to Chicago, don’t have all the right gear. Looking forward to getting back into it soon and will certainly reference this article!
Photo artist
Jun 25, 2013 at 9:47 pm
Excellent article. Great starting point for anyone looking to get into club repair.