
Equipment
How to remove an OEM adjustable sleeve for later use


Most golf equipment companies offer metal woods with adjustable features that allow golfers to change the loft, lie and face angle of the clubs. These clubs are made to be easy to adjust, but there are hurdles for golfers who wish to change the shaft of an adjustable club.
All of the current metal woods on the market that offer loft and face angle adjustability do so through an adapter or sleeve that is called an “adjustable tip.” So if golfers want to change the shaft of their adjustable clubs, they need to do one of two things:
- Buy another adjustable tip and install it on the new shaft.
- Remove the adjustable tip from the old shaft and install it on the new one.
Buying another adjustable tip is the best plan of action for golfers who want to try a new shaft, because it will allow them to compare the results of the shafts quickly and easily. But they’re not as cheap as many golfers might think — most OEM adjustable tips sell for between $25 and $40 each.
That’s why a lot of golfers, especially those who know the current shaft in their adjustable club isn’t right for them, might prefer to save the money and have their old adjustable tip put on their new shaft.
But removing an adjustable tip can be difficult due largely to the fact that the ferrule (on which most OEM’s print the loft adjustments) on can be ruined ruined in the process. That’s why I am going to share with you one method that I have found to work very well.
Supplies Needed
- Club Shield Paste (Jelly like substance that prevents burn marks)
- Small washers and a small screw
- Shaft extractor
- Bore Brush
- Torch or Heat Gun
- Small Strip of Cotton
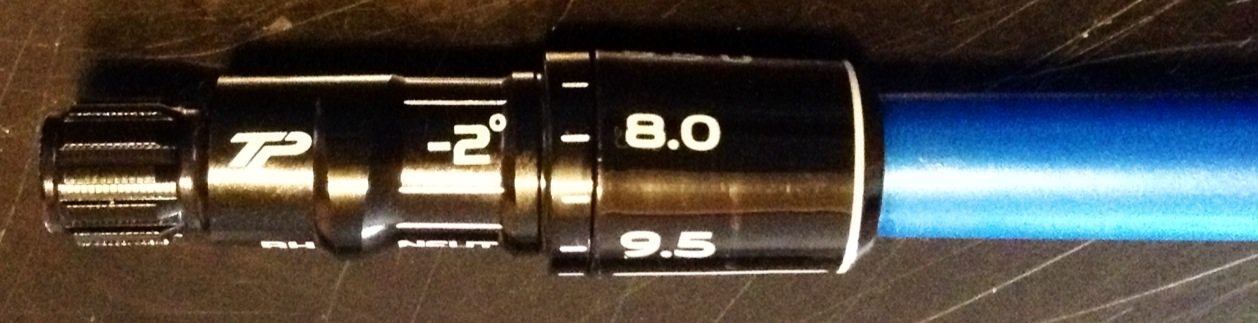
Prep
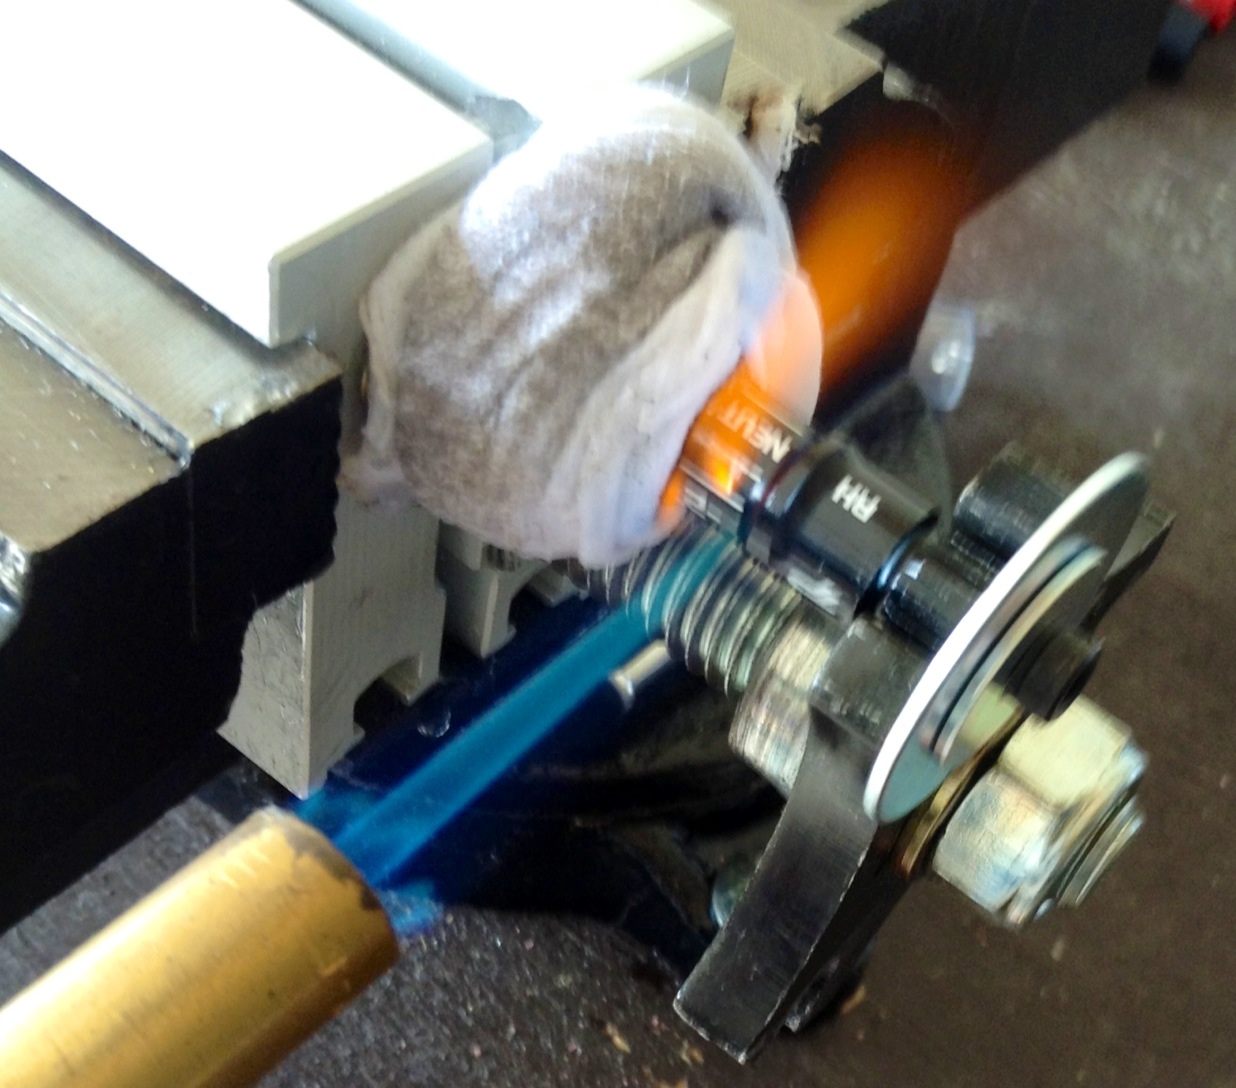
Apply the Club Shield Paste all around the ferrule. Place the washers on the small screw, and thread them into the tip of the sleeve. Secure your shaft in the shaft extractor. Take the small strip of cotton and soak it in some water and then wrap it around the ferrule. The club shield paste and wet cotton strip will protect the ferrule from heating up and getting damaged.
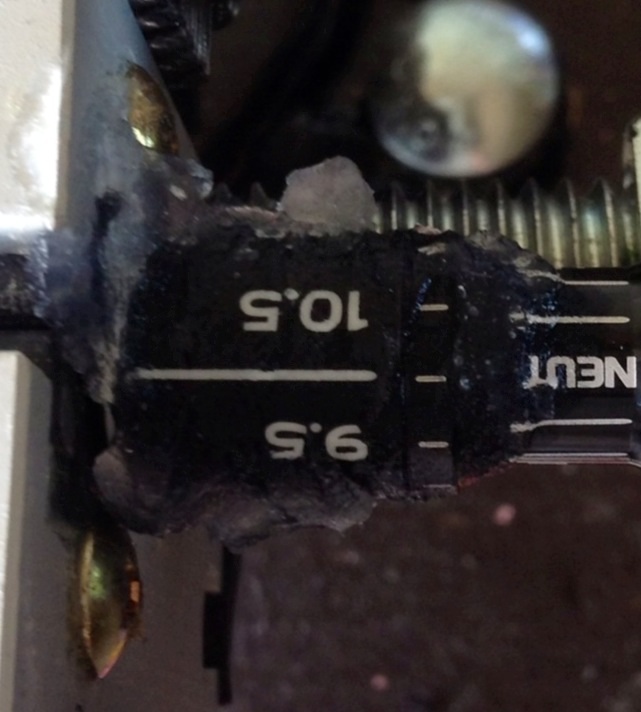
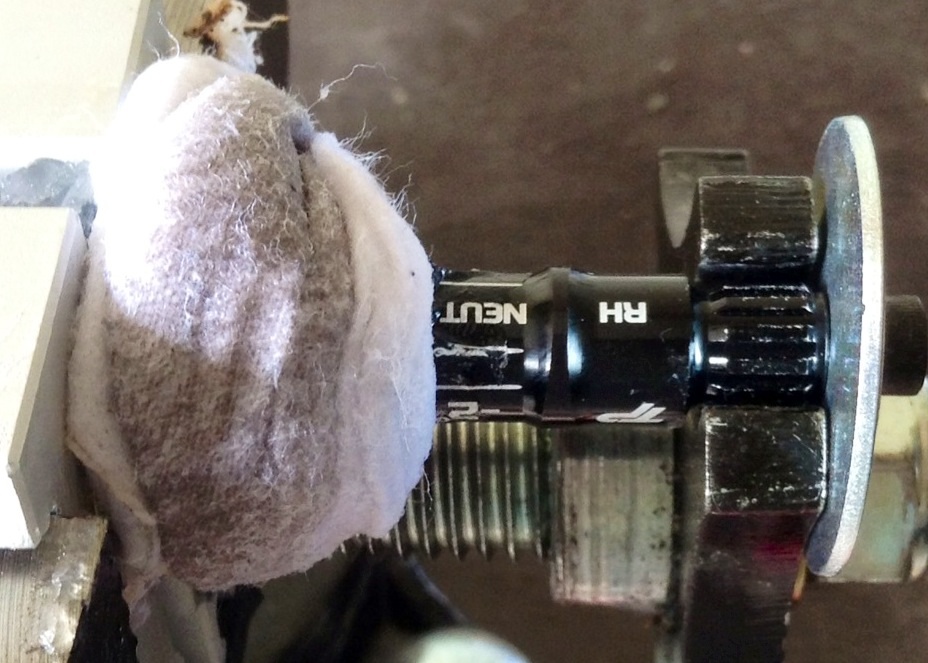
Step 1
Position the shaft extractor firmly against the washers to start just as you would to the head of a club for typical removal.
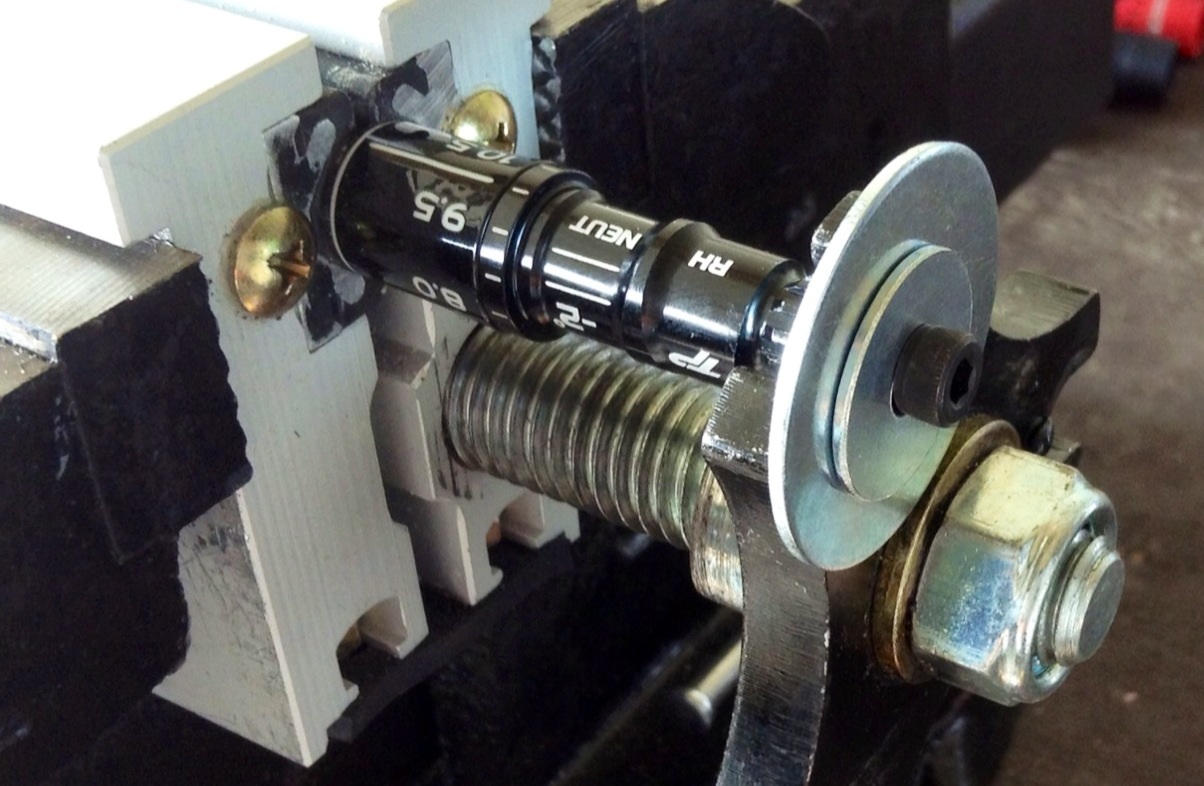
Step 2
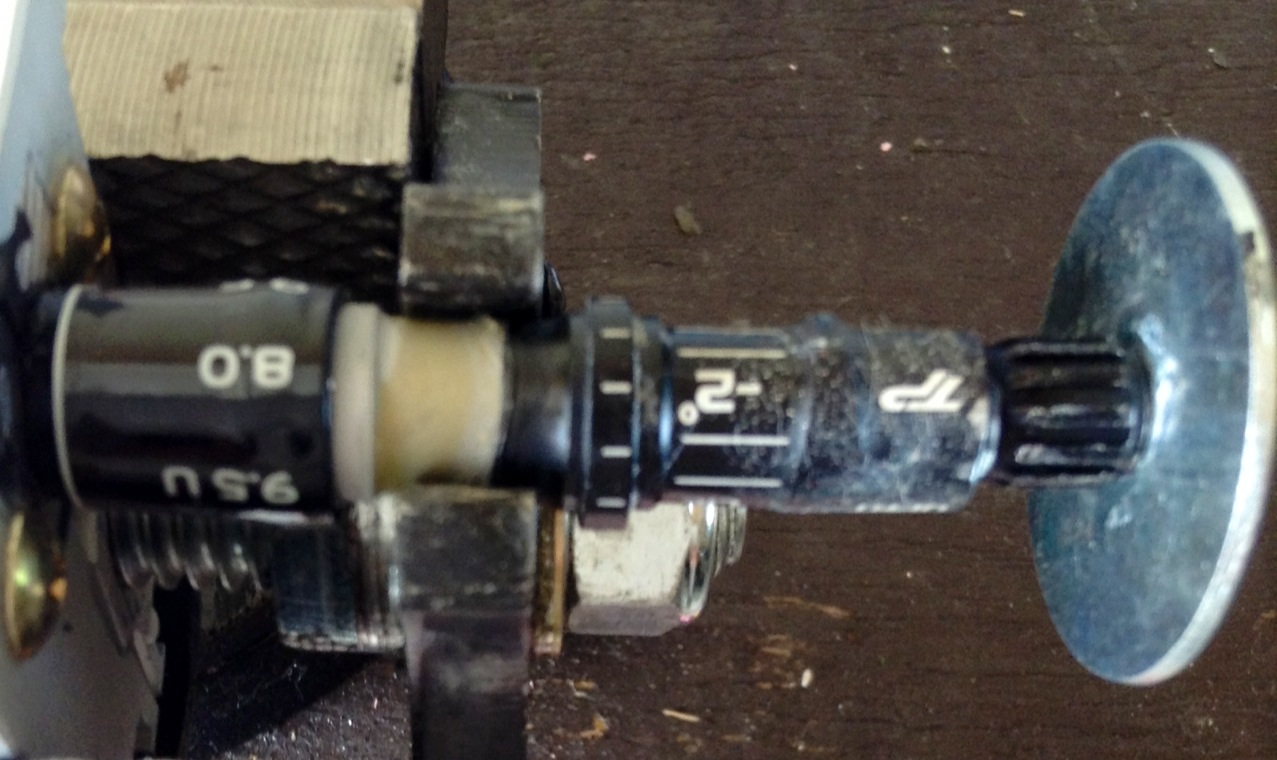
Apply heat to soften the epoxy and slowly apply pressure to the washers as you would when removing a club head (patience is the key for success). Slowly continue repeating this process. After a few applications, the adjustable tip will start to slide off the shaft. When there is enough room between the tip and the ferrule, reposition the shaft extractor to the top of the tip and continue to remove.
Step 3
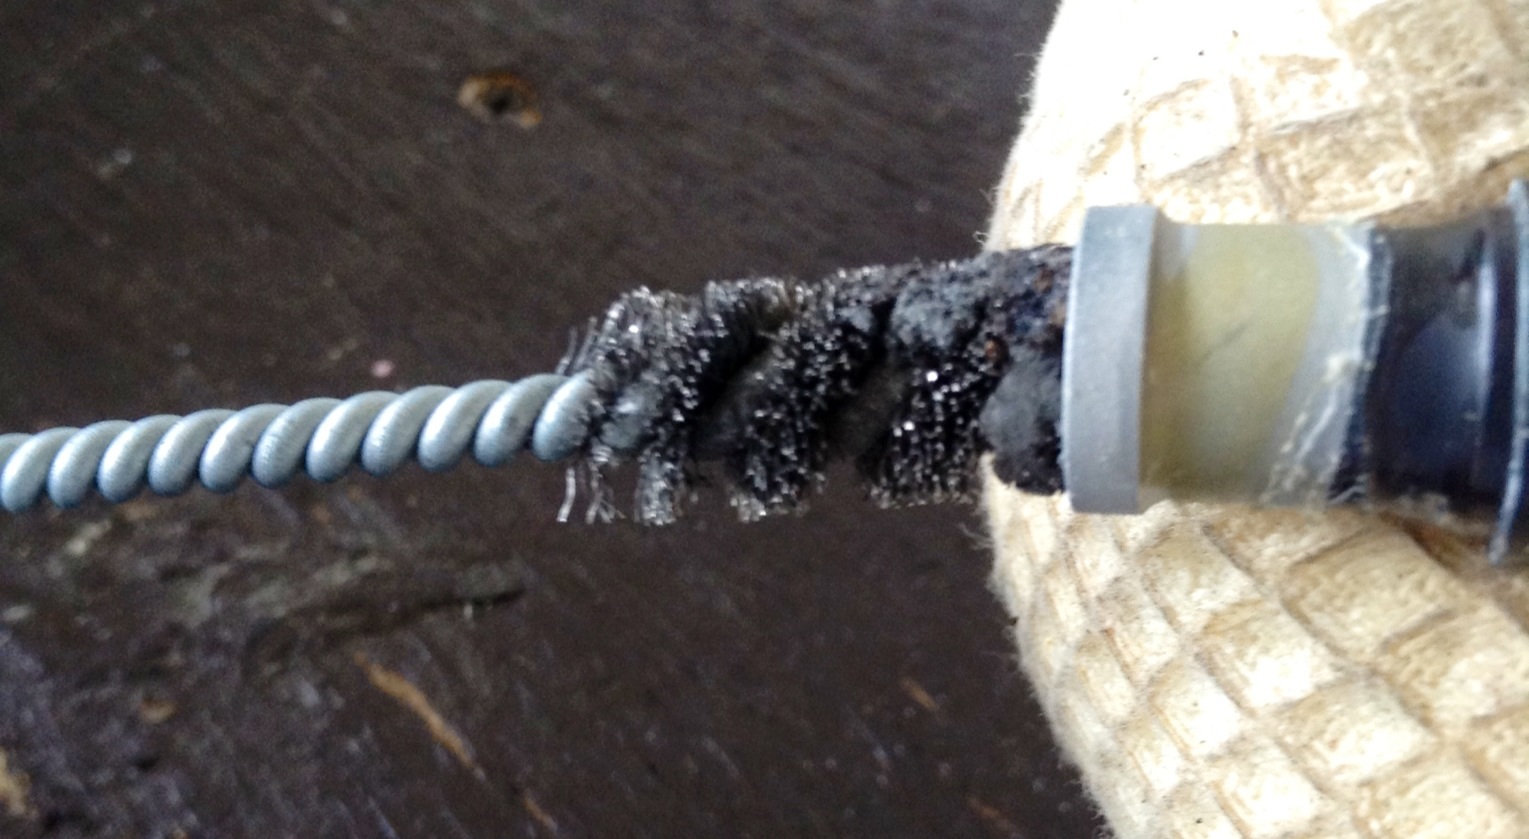
Once the tip is off, clean the inside of it with your hosel brush. It is best to do so while the epoxy is still heated and soft.
Step 4
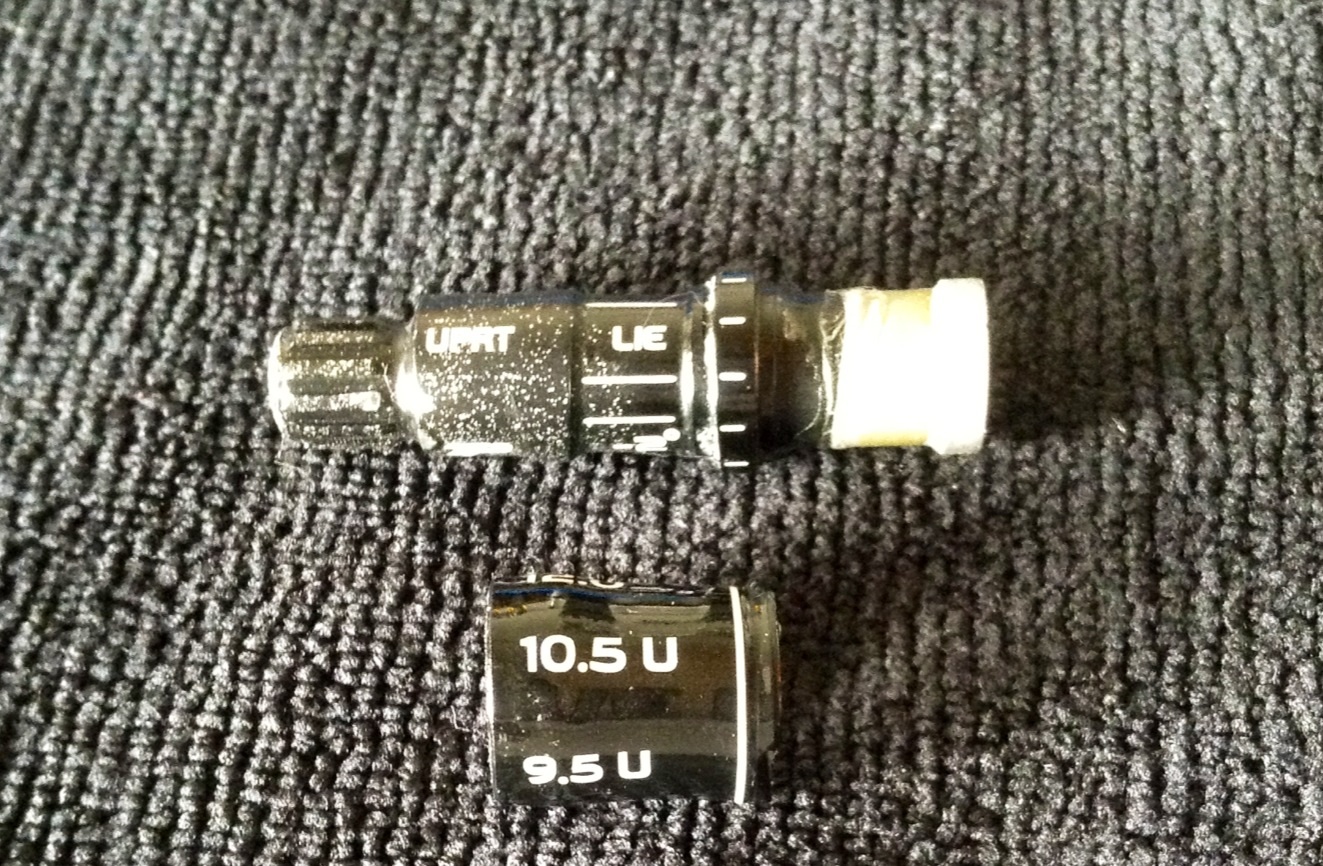
Remove the cotton strip and slide off the ferrule. Note: You may want to clean up your tip and ferrule before installing it onto the new shaft.
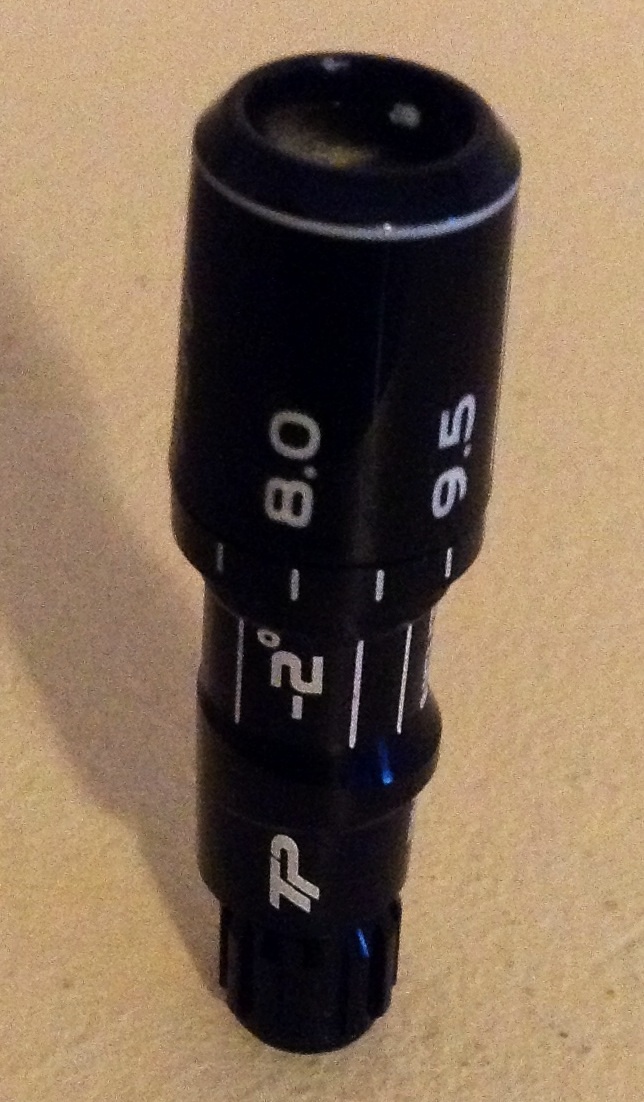
There are many ways to skin a cat. This process has yielded the best results for me. Take your time and you will be able to save most tips through this process.




Equipment
Putters that never made it: Check out some of the best tour builds that didn’t make the cut

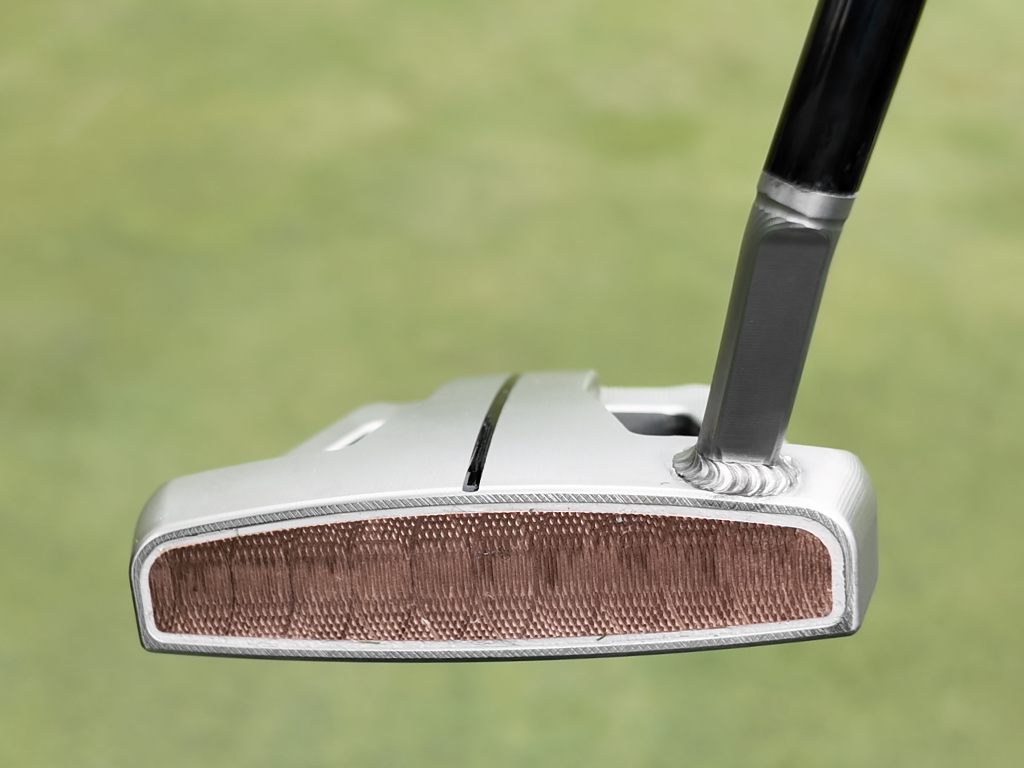
Arguably, the best perk of being a professional golfer on the PGA Tour is the ability to request or even just be handed pretty much any club you could think of. It happens more often than you think, usually with putters around the practice green from one event to the next. Come Wednesday, the Tour bags lining the edge of the putting surface become resting places for fallen flatsticks that never made the cut.
So let’s take a look at some of the best we’ve seen out on Tour this year that never made it to the competition. (You may notice none of Hideki Matsuyama’s custom Scotty Cameron putters made this list. There are too many.)
Let’s start with this custom Damascus Milled Odyssey Rossie made for Ryo Hisatsune. Featuring a single line and the short-slant hossel, we’ve seen plenty of Number 7 and jailbird heads featuring the Damascus Milled insert, but this is the first and only one we’ve spotted in a Rossie. Hisatsune primarily putts with an Odyssey Black Series iX #9, but we have seen him recently with a TaylorMade TP Collection SOTO, so there could be potential that the Damascus Milled Rossie could end up in the bag.

Everyone wants to be Cameron Young right now. We’ve had Justin Thomas and Tom Hoge both game the Scotty Cameron 9.5R prototype. Well, for the PGA Championship, Brooks Koepka nearly joined that list after requesting the same style of putter, with the full-length alignment line. But the Scotty Cameron reps took the request a step further and made one specially for Koepka with a Teryllium insert, similar to one in his previous Newport 2 gamers. The reason why this one didn’t go into play, though? Because it was too heavy.

Harry Hall was the third-best putter on Tour last year, so when Bettinardi made him a custom proto, you know it was going to be good. The custom BB28 blade features VDF face milling, a custom-welded single-bend shaft, and the owner’s initials – HH – on the sole of the putter. Hall, who usually games an Odyssey O-Works #7 W, has dabbled with a TaylorMade Spider Tour X already this year. Maybe there’s a chance this Bettinardi might make his bag.

Honestly, this one doesn’t need a description. It’s Kieth Mitchell’s custom Scotty Cameron Napa. One Scotty Cameron face stamp, two Scotty Dogs, two Scotty Cameron 7-Point Crowns and one Circle T. That is all. Oh, except for the Cashmere Cameron headcover.

Finally, and just for fun, how about we pour one out for this TaylorMade Spider Tour X made for Scottie Scheffler in its new torched finish. It’s unlikely we’ll see a putter change anytime soon from the best golfer in the world. In fact, he hit just two putts with it on the Harbour Town practice before going back to his trusty gamer.


Driver: Titleist GT3 (9 degrees) Buy here.
Shaft: Aldila Rogue Silver 130 M.S.I. 70 TX


3-wood: TaylorMade Qi35 (15 degrees)
Shaft: Fujikura Ventus Blue 7 X

7-wood: TaylorMade Qi35 (21 degrees)
Shaft: Fujikura Ventus Blue 8 X

Irons: Grindworks PR-202 (4), Grindworks PR-101A (5-PW)
Shafts: True Temper Dynamic Gold Tour Issue X100


Wedges: Cleveland RTX6 Tour Rack (52-10 Mid), Titleist Vokey Design SM10 (56-08M), SM11 (60-04T)
Shafts: True Temper Dynamic Gold Tour Issue S400


Putter: Scotty Cameron Tour Rat 1.5 Tour Prototype


Ball: Titleist Pro V1x
Grips: Golf Pride MCC


In our forums, our members have been discussing their favorite major winning irons used by Tiger Woods. WRXer ‘golferdude54’ kicks off the thread saying:
“Mizuno MP 14/29. Titleist 681T. Nike Forged Blades. TaylorMade P7TW.
Among these irons that helped Tiger win 15 majors, which is your favorite in terms of looks?”
And our members have been naming their favorites and why in response.
Here are a couple of posts from the thread, but make sure to check out the entire discussion and have your say at the link below.
- SwingBlade: “I prefer the early blades he played and the more recent TM TW’s especially because after Tiger had his major behavioral setbacks, part of Nikes support payback was making Tiger play a Nike putter and cease using his beloved uniquely customized Scotty putter.”
- ProjectX: “This (Nike Forged Blades) and there’s not even a close second.”
Entire Thread: “Which of Tiger’s major winning irons are your favorite? – GolfWRXers discuss”

Justin Rose WITB 2026 (April): Full WITB breakdown with new McLaren irons

RBC Heritage Tour Report: More minis, course-specific setups, Spider & GTS launches

What’s the story behind Webb Simpson’s custom-stamped irons?

Cadillac Championship Tour Report: Spieth’s sizable changes, McLaren Golf launches, and more

Kristoffer Reitan’s winning WITB: 2026 Truist Championship

Cameron Young’s winning WITB: 2026 Cadillac Championship

Aaron Rai’s winning WITB: 2026 PGA Championship

Nelly Korda WITB 2026 (April)

Justin Rose on the switch to McLaren Golf, learnings from previous equipment moves

Photos from the 2026 PGA Championship


Patrick Reed WITB 2026 (May)
Driver: Titleist GT3 (9 degrees) Buy here. Shaft: Aldila Rogue Silver 130 M.S.I. 70 TX 3-wood: TaylorMade Qi35 (15 degrees)...

Aaron Rai’s winning WITB: 2026 PGA Championship
Driver: TaylorMade M6 (9 degrees) Shaft: Aldilda Synergy Blue 70 TX 3-wood: TaylorMade Qi10 (15 degrees) Shaft: Fujikura Ventus Blue...


Michael Block WITB 2026 (May)
Driver: TaylorMade Qi4D (9 degrees) Shaft: Fujikura Ventus Black VeloCore+ 5 X 3-wood: TaylorMade Qi4D (15 degrees @14.25) Shaft: Mitsubishi...


Bryson DeChambeau WITB 2026 (May)
Driver: Krank Formula Fire Pro (6 degrees) Shaft: Project X Prototype 3-wood: Krank Formula Fire (10 degrees) Shaft: LA Golf BAD...
-
 Whats in the Bag3 weeks ago
Kristoffer Reitan’s winning WITB: 2026 Truist Championship
-
Whats in the Bag2 weeks ago
Aaron Rai’s winning WITB: 2026 PGA Championship
-
 Tour Photo Galleries3 weeks ago
Photos from the 2026 PGA Championship
-
 Equipment3 weeks ago
GolfWRX Launch Report: 2026 Titleist GTS drivers
-

 Equipment2 weeks ago
PGA Championship Tour Report: Fitzpatrick, Koepka among big-name putter switches for Aronimink
-

 News2 weeks ago
WITB Time Machine: Phil Mickelson’s winning WITB, 2021 PGA Championship
-

 Equipment2 weeks ago
Which of Tiger’s major winning irons are your favorite? – GolfWRXers discuss
-

 Equipment2 weeks ago
Lead Tape Report: Adjusting the swingweight of the Wanamaker Trophy


chester event hire
May 15, 2014 at 3:24 am
I actually do consider all of the strategies you’ve got offered on your own submit. They are extremely convincing all of which will surely perform. Even so, your posts are far too speedy to begin with. May well you please prolong these a little bit out of next occasion? Was looking for article.
Golfer X
Sep 6, 2013 at 8:14 pm
You young guys have it way too easy. In my day, we played golf with the VC shooting at us. No time to waggle…
Regis Staley
Sep 5, 2013 at 9:00 pm
I’ve probably removed and re-used 20-30 tip adaptors. Mostly TM .Best result I’ve achieved is to use a torch and focus the flame on the very tip- The more pinpoint the better. The heat migrates up the adaptor at a reduced intensity. I can get sufficient epoxy breakup in less than a minute. Then if necessary Golfsmith or Billy Bobs sells just the plastic collar for about $4. You can either melt or cut off the damaged collar.
Freddy V.
Sep 5, 2013 at 9:58 pm
Seriously…spend the 20-30 bucks for a new TM tip or another 5 for a new ferrule. Trying to save the plastic tips are a waste of time and NEVER come off without damage in some form to the plastic. Stores don’t do it for 2 reasons. 1 the chance of pulling it cleanly is slim to none and if they gaurantee they can do it, they are on the hook for damage. 2. It takes more time to do and costs almost the same as a new tip. Kind of like paying 3-5 bucks to save a grip when it cost that much for a new grip. Don’t let this article fool you into thinking it is a flawless process. The plastic always gets damage on a TM tip because the plastic melts at a lower temp than the epoxy used by TM. Goodluck regardless.
Cody_gateway
Aug 14, 2014 at 1:43 pm
Freddy V sounds like the type of person with no patience. this tip worked out great don’t let this hot head tell you otherwise
Linkerpan
Sep 5, 2013 at 12:34 am
Both Golf Galaxy and Golfsmith have ruined the adaptor on my Callaway. The lesson I learned is that if you buy a new shaft, you buy a new adapter. I hope all store managers print this article and quiz the employees later.
cha4218
Sep 5, 2013 at 9:18 am
I guess it all depends on who is working on it. I recently had the adaptor for my Nike Covert Tour taken out and installed in another shaft. A guy named Tom (Paramous, NJ) did a killer job on it. I couldn’t thank him enough. Kudos to him at Golf Galaxy.
Ross Bailey
Sep 4, 2013 at 5:49 pm
I would recommend using a heat gun and not an open flame to get the
adaptor hot enough to remove. The rest of the sequence is great.
Ga
Sep 4, 2013 at 5:27 pm
9 out of 10, that plastic degree sleeve gets melted. They should just make it out of aluminum. I don’t understand why they didn’t.
Chester
Sep 4, 2013 at 1:46 pm
I work at a golf store, and run the club tech department. I’ve found that heat gun is much more tip friendly when it comes to saving the plastic ferrule on the TM adaptors, although I do cover the plastic with heat shield as well. I recommend pointing the heat gun away from the ferrule, and towards the tip to avoid melting the ferrule at all. The tips that are first time pulls from the manufacturers are much easier pull, than 2nd time installs that potentially use stronger bonding glue. Great article though.
Kadin Mahmet
Sep 4, 2013 at 2:00 pm
Thank You! I agree first time pulls are much easier.
Mo
Sep 5, 2013 at 3:28 am
That’s not necessarily true. It also depends on the kind of epoxy used and how much of it got to seal up the very top of the adaptor. For example, if, in this case of the TM adaptor, if the adaptor is fairly stuck on with a lot of hardened, strong epoxy near the top, no amount of heat shield or wrapping is going to break the bond of the epoxy enough to be able to pull that thing off safely without melting the numbers on the plastic, let alone the plastic itself.
It all depends on the amount of epoxy, what kind of epoxy and how much of the hard epoxy was used to make the shaft really hold firm inside the adaptor.
At some point the adaptors will become cheap enough like ferrules, as this is where everything is headed, and, they will also have figured out a way to do away with the plastic so we don’t keep ruining these things.
Mateo
Sep 4, 2013 at 12:11 pm
Not bad. You should never use a blowtorch though. Use a heat gun to avoid damaging the tip. The tip that was pulled is not the same as the tip in the final picture. You can see the damage to the paint in the second to last picture. Looks like he pulled the old switcharoo.
🙂
leif
Sep 4, 2013 at 1:09 pm
Actually, that is the Hear Shield residue still on the tip after it dried…just need to wet it down and wipe it off.
leif
Sep 4, 2013 at 1:10 pm
Heat Shield…sorry.
Joe Golfer
Sep 5, 2013 at 12:08 am
Yes, I think Golfworks.com sells that stuff to protect hosels and such that are painted, so I can see why it would be used here.
If using a torch, use Butane and not Propane, as butane burns at a lower temperature.
A heat gun will work, but it sometimes seems like it takes forever to get the job done. And some epoxies simply won’t break down with a heat gun, so then you wind up resorting to the torch anyway.
Mateo
Sep 4, 2013 at 3:21 pm
Oh. Didn’t think of that. I don’t use heat shield because I’ve never really needed to. 😉
Kadin Mahmet
Sep 4, 2013 at 1:11 pm
Thanks for taking the time to read and post…
This is the tip that was removed…
“Note: You may want to clean up your tip and ferrule before installing it onto the new shaft.”
I see now that it’s a little vague. I clean the tip and use a “sharpie” style marker to touch up any scratches or paint blems.
Deck
Sep 4, 2013 at 2:22 pm
Heat shield is a wonderful thing. You might want to try it. Agree with the above poster. Residue. Have you ever used it before you comment on it?
Mateo
Sep 4, 2013 at 3:22 pm
Don’t use it because I don’t need to. Only amateurs do. Lol
kirk
Sep 4, 2013 at 11:49 am
any golf store can remove to tip and put onto another shaft
Brian
Sep 4, 2013 at 12:02 pm
Actually, ‘many’ stores will not remove the tip and put it onto another shaft. Either because they don’t know how, have had an issue with customer being satisfied with the result, or just prefer not to. Good to have this bit of ‘how-to’ available when the stores won’t do it.
Kadin Mahmet
Sep 4, 2013 at 1:14 pm
The shops in my area will not provide this service though a lot of shops will.
The idea behind this topic was geared towards the DIY’er
Thanks for taking the time to post! 🙂
kirk
Sep 4, 2013 at 2:48 pm
well every store around me will do this, rather pay some 10-15 bucks,than n screw around doing in my self
AJ Jensen
Sep 4, 2013 at 4:10 pm
And I’d rather do it myself. This was a great step-by-step article for a guy like me.
AJ Jensen
Sep 4, 2013 at 11:46 am
OK, for what it’s worth, I’m giving this one the award for “How-To Article of the Year.” Very well done, sir.
Kadin Mahmet
Sep 4, 2013 at 1:06 pm
Thanks AJ ! I appreciate that!