Instruction
Learn to hit a draw in 2 easy steps
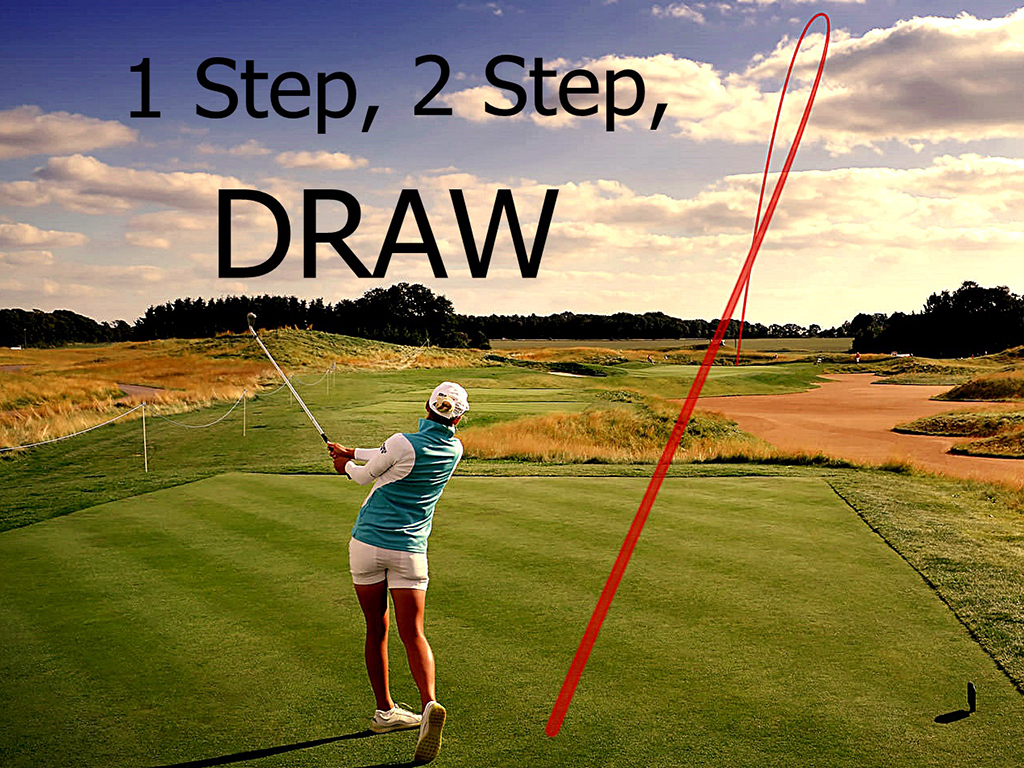
For most club golfers, a ball that curves from left to right is common, but most golfers would prefer to move the ball the other way, or what’s described as a “draw” shot. By definition, a draw is when the ball starts to the right of the target line and curves left toward the target (for a right-handed golfer).

To really understand how to hit this shot, a golfer should know two things: club path, and what’s called the face-to-path relationship.
- Club path: This is the direction that the club head is traveling through impact in relation to the target line. The variations are in-to-out (moving right of target), out-to-in (moving left of target) and neutral (moving straight at the target).
- Face-to-path: This is the direction that the club face is pointing in relation to the club path at impact. To hit a draw, golfers need to produce an in-to-out club path (rightward) with a club face that is pointing leftward, or closed to the club path.
A good analogy I like to use for hitting a draw shot is imagining a right-footed soccer player bending a ball around a wall. As the player strikes the soccer ball, the foot will be traveling in a rightward direction in relation to the goal. The part of the foot that is striking the ball, however, will be pointing to the left of this in order to create the curve.
That’s the science! Now for two easy steps to help you start hitting draw shots.
Step 1: Creating a face that is closed to an in-to-out club path
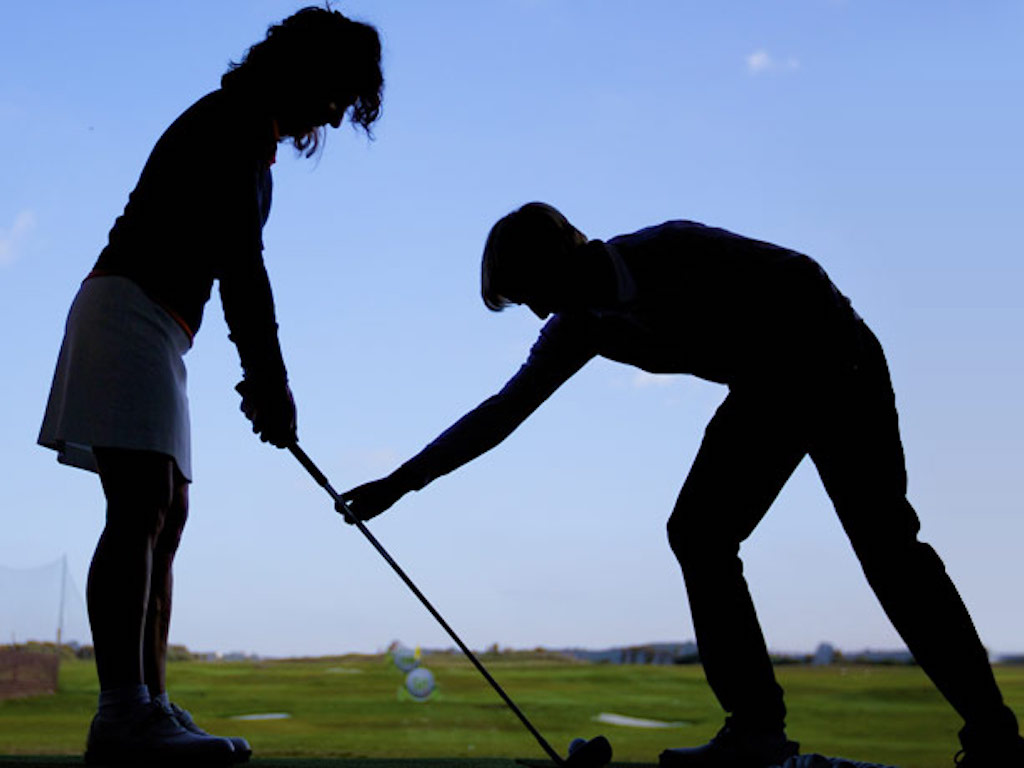
The first thing to do is place a headcover in the position shown in the picture below (note: the photo is setup for a right-handed golfer). With the headcover in mind, strike some golf balls without striking the headcover. A careful positioning of the headcover will encourage you to deliver the club head on an in-to-out path.
Make an out-to-in delivery, and your headcover will be flying down the range!

Continue to hit balls while avoiding the headcover, while at the same time attempting to create a ball flight that is curving from right to left. Once this is achieved, you can be pretty sure that you are delivering a club face that is closed to an in-to-out club path.
“But sir, I don’t want to hook it,” you might be saying. I don’t want you to either, so here comes the next step.
Step 2: Controlling club face alignment
From modern day launch monitors, we have learned that the club face is the main influence on the starting direction of the ball. This changes slightly at times, but for simplicity let’s say that the ball will start pretty much where the club face is aiming at impact. Assuming centered contact, curve will then be produced as a result of the relationship that the face has with the club path. In this case, the closed relationship with the club path will create a right-to-left curve.
A draw shot starts right of the target line, and this means that the club face must be pointing to the right of the target line at impact. It sounds counterintuitive, but yes, a draw shot needs a club face that is OPEN to the target line at impact.
To practice this, place an alignment stick in the ground and attempt to hit balls that start to the right of the alignment stick and curve back to the left, toward the target. This exercise will help you explore the relationship of an in-to-out path with a closed face, with specific attention to starting the ball to the right of the target.

An important concept to understand
In both of the shots below, the club path is moving 5.2 degrees to the right (in to out). However, the key difference is the face angle.
Shot 1

In Shot 1, the face angle is pointing 1.2 degrees left of the target line (meaning the ball starts left of the target line).
Shot 2

In Shot 2, the face angle is pointing 2 degrees right of the target line (meaning the ball starts right of the target line).
In both shots, a closed face-to-path relationship was created. The key in the second shot, however, was that the club face was pointing right of target at impact, thus allowing the ball to start right and curve back toward the target.
What are the advantages of this exercise?
You may notice that ZERO technical information regarding positions or movements has been given. Instead, examples of task constraints have been provided.
“A task constraint is a boundary That encourages the learner to emerge with certain behaviors.”
Although that may sound complex, in simple terms the constraint of the headcover and alignment stick allow golfers to self discover how technique evolves from the exercise, as opposed to deliberately thinking about it. Within motor learning research, there is a ton of evidence for this type of constraints-led learning.
Unfortunately, your friends may not allow you to place your headcover by your ball in your Saturday match. With this in mind, try not to become reliant on the constraints and vary between using and not using them in practice.
Before you hit the range, remember: Club face pointing to the right and the path pointing farther to the right!

There may be no more painful affliction in golf than the “yips” – those uncontrollable and maddening little nervous twitches that prevent you from making a decent stroke on short putts. If you’ve never had them, consider yourself very fortunate (or possibly just very young). But I can assure you that when your most treacherous and feared golf shot is not the 195 yard approach over water with a quartering headwind…not the extra tight fairway with water left and sand right…not the soft bunker shot to a downhill pin with water on the other side…No, when your most feared shot is the remaining 2- 4-foot putt after hitting a great approach, recovery or lag putt, it makes the game almost painful.
And I’ve been fighting the yips (again) for a while now. It’s a recurring nightmare that has haunted me most of my adult life. I even had the yips when I was in my 20s, but I’ve beat them into submission off and on most of my adult life. But just recently, that nasty virus came to life once again. My lag putting has been very good, but when I get over one of those “you should make this” length putts, the entire nervous system seems to go haywire. I make great practice strokes, and then the most pitiful short-stroke or jab at the ball you can imagine. Sheesh.
But I’m a traditionalist, and do not look toward the long putter, belly putter, cross-hand, claw or other variation as the solution. My approach is to beat those damn yips into submission some other way. Here’s what I’m doing that is working pretty well, and I offer it to all of you who might have a similar affliction on the greens.
When you are over a short putt, forget the practice strokes…you want your natural eye-hand coordination to be unhindered by mechanics. Address your putt and take a good look at the hole, and back to the putter to ensure good alignment. Lighten your right hand grip on the putter and make sure that only the fingertips are in contact with the grip, to prevent you from getting to tight.
Then, take a long, long look at the hole to fill your entire mind and senses with the target. When you bring your head/eyes back to the ball, try to make a smooth, immediate move right into your backstroke — not even a second pause — and then let your hands and putter track right back together right back to where you were looking — the HOLE! Seeing the putter make contact with the ball, preferably even the forward edge of the ball – the side near the hole.
For me, this is working, but I am asking all of you to chime in with your own “home remedies” for the most aggravating and senseless of all golf maladies. It never hurts to have more to fall back on!
Over the last couple of decades, golf has become much more science-based. We measure swing speed, smash factor, angle of attack, strokes gained, and many other metrics that can really help golfers improve. But I often wonder if the advancement of golf’s “hard” sciences comes at the expense of the “soft” sciences.
Take, for example, golf instruction. Good golf instruction requires understanding swing mechanics and ball flight. But let’s take that as a given for PGA instructors. The other factors that make an instructor effective can be evaluated by social science, rather than launch monitors.
If you are a recreational golfer looking for a golf instructor, here are my top three points to consider.
1. Cultural mindset
What is “cultural mindset? To social scientists, it means whether a culture of genius or a culture of learning exists. In a golf instruction context, that may mean whether the teacher communicates a message that golf ability is something innate (you either have it or you don’t), or whether golf ability is something that can be learned. You want the latter!
It may sound obvious to suggest that you find a golf instructor who thinks you can improve, but my research suggests that it isn’t a given. In a large sample study of golf instructors, I found that when it came to recreational golfers, there was a wide range of belief systems. Some instructors strongly believed recreational golfers could improve through lessons. while others strongly believed they could not. And those beliefs manifested in the instructor’s feedback given to a student and the culture created for players.
2. Coping and self-modeling can beat role-modeling
Swing analysis technology is often preloaded with swings of PGA and LPGA Tour players. The swings of elite players are intended to be used for comparative purposes with golfers taking lessons. What social science tells us is that for novice and non-expert golfers, comparing swings to tour professionals can have the opposite effect of that intended. If you fit into the novice or non-expert category of golfer, you will learn more and be more motivated to change if you see yourself making a ‘better’ swing (self-modeling) or seeing your swing compared to a similar other (a coping model). Stay away from instructors who want to compare your swing with that of a tour player.
3. Learning theory basics
It is not a sexy selling point, but learning is a process, and that process is incremental – particularly for recreational adult players. Social science helps us understand this element of golf instruction. A good instructor will take learning slowly. He or she will give you just about enough information that challenges you, but is still manageable. The artful instructor will take time to decide what that one or two learning points are before jumping in to make full-scale swing changes. If the instructor moves too fast, you will probably leave the lesson with an arm’s length of swing thoughts and not really know which to focus on.
As an instructor, I develop a priority list of changes I want to make in a player’s technique. We then patiently and gradually work through that list. Beware of instructors who give you more than you can chew.
So if you are in the market for golf instruction, I encourage you to look beyond the X’s and O’s to find the right match!
Most pros take months, even years, to win their first tournament. Lottie Woad needed exactly four days.
The 21-year-old from Surrey shot 21-under 267 at Dundonald Links to win the ISPS Handa Women’s Scottish Open by three shots — in her very first event as a professional. She’s only the third player in LPGA history to accomplish this feat, joining Rose Zhang (2023) and Beverly Hanson (1951).
But here’s what caught my attention as a coach: Woad didn’t win through miraculous putting or bombing 300-yard drives. She won through relentless precision and unshakeable composure. After watching her performance unfold, I’m convinced every golfer — from weekend warriors to scratch players — can steal pages from her playbook.
Precision Beats Power (And It’s Not Even Close)
Forget the driving contests. Woad proved that finding greens matters more than finding distance.
What Woad did:
• Hit it straight, hit it solid, give yourself chances
• Aimed for the fat parts of greens instead of chasing pins
• Let her putting do the talking after hitting safe targets
• As she said, “Everyone was chasing me today, and managed to maintain the lead and played really nicely down the stretch and hit a lot of good shots”
Why most golfers mess this up:
• They see a pin tucked behind a bunker and grab one more club to “go right at it”
• Distance becomes more important than accuracy
• They try to be heroic instead of smart
ACTION ITEM: For your next 10 rounds, aim for the center of every green regardless of pin position. Track your greens in regulation and watch your scores drop before your swing changes.
The Putter That Stayed Cool Under Fire
Woad started the final round two shots clear and immediately applied pressure with birdies at the 2nd and 3rd holes. When South Korea’s Hyo Joo Kim mounted a charge and reached 20-under with a birdie at the 14th, Woad didn’t panic.
How she responded to pressure:
• Fired back with consecutive birdies at the 13th and 14th
• Watched Kim stumble with back-to-back bogeys
• Capped it with her fifth birdie of the day at the par-5 18th
• Stayed patient when others pressed, pressed when others cracked
What amateurs do wrong:
• Get conservative when they should be aggressive
• Try to force magic when steady play would win
• Panic when someone else makes a move
ACTION ITEM: Practice your 3-6 foot putts for 15 minutes after every range session. Woad’s putting wasn’t spectacular—it was reliable. Make the putts you should make.
Course Management 101: Play Your Game, Not the Course’s Game
Woad admitted she couldn’t see many scoreboards during the final round, but it didn’t matter. She stuck to her game plan regardless of what others were doing.
Her mental approach:
• Focused on her process, not the competition
• Drew on past pressure situations (Augusta National Women’s Amateur win)
• As she said, “That was the biggest tournament I played in at the time and was kind of my big win. So definitely felt the pressure of it more there, and I felt like all those experiences helped me with this”
Her physical execution:
• 270-yard drives (nothing flashy)
• Methodical iron play
• Steady putting
• Everything effective, nothing spectacular
ACTION ITEM: Create a yardage book for your home course. Know your distances to every pin, every hazard, every landing area. Stick to your plan no matter what your playing partners are doing.
Mental Toughness Isn’t Born, It’s Built
The most impressive part of Woad’s win? She genuinely didn’t expect it: “I definitely wasn’t expecting to win my first event as a pro, but I knew I was playing well, and I was hoping to contend.”
Her winning mindset:
• Didn’t put winning pressure on herself
• Focused on playing well and contending
• Made winning a byproduct of a good process
• Built confidence through recent experiences:
- Won the Women’s Irish Open as an amateur
- Missed a playoff by one shot at the Evian Championship
- Each experience prepared her for the next
What this means for you:
• Stop trying to shoot career rounds every time you tee up
• Focus on executing your pre-shot routine
• Commit to every shot
• Stay present in the moment
ACTION ITEM: Before each round, set process goals instead of score goals. Example: “I will take three practice swings before every shot” or “I will pick a specific target for every shot.” Let your score be the result, not the focus.
The Real Lesson
Woad collected $300,000 for her first professional victory, but the real prize was proving that fundamentals still work at golf’s highest level. She didn’t reinvent the game — she simply executed the basics better than everyone else that week.
The fundamentals that won:
• Hit more fairways
• Find more greens
• Make the putts you should make
• Stay patient under pressure
That’s something every golfer can do, regardless of handicap. Lottie Woad just showed us it’s still the winning formula.
FINAL ACTION ITEM: Pick one of the four action items above and commit to it for the next month. Master one fundamental before moving to the next. That’s how champions are built.
PGA Professional Brendon Elliott is an award-winning coach and golf writer. You can check out his writing work and learn more about him by visiting BEAGOLFER.golf and OneMoreRollGolf.com. Also, check out “The Starter” on RG.org each Monday.
Editor’s note: Brendon shares his nearly 30 years of experience in the game with GolfWRX readers through his ongoing tip series. He looks forward to providing valuable insights and advice to help golfers improve their game. Stay tuned for more Tips!

Peter Malnati WITB 2025 (August)
Peter Malnati what’s in the bag accurate as of the Wyndham Championship. More photos from the event here. Driver: Titleist...

Cameron Young’s winning WITB: 2025 Wyndham Championship
Driver: Titleist GT2 (9 degrees, A1 SureFit setting) Buy here. Shaft: Mitsubishi Tensei 1K Pro Orange 70 TX 3-wood: Titleist...


Camilo Villegas WITB 2025 (July)
Camilo Villegas WITB accurate as of the Wyndham Championship. Villegas was undecided on a 3-wood when we shot his bag. ...

WITB Time Machine: Brandt Snedeker’s winning WITB, 2018 Wyndham Championship
Brandt Snedeker fired a final-round 65 at the 2018 Wyndham Championship to outlast Webb Simpson and C.T. Pan. His 5-under...
Dave Dudus
Sep 5, 2016 at 10:06 am
Works for me! Thanks.
Phillip Akers
Oct 15, 2015 at 6:10 pm
Class article, clear, concise and a change to read some factual information which is backed up by evidence….contrary to some ‘established’ coaches.
Pingback: Learn the draw in 2 easy steps
Wayde
Oct 2, 2015 at 10:14 am
A good tip is to buy a pool noodle (they’re dirt cheap); cut it in half, put one half over your alignment stick to protect it from the golf ball , and use the other half on the ground to form your swing path. It makes for a very strong visual.
Shakers97
Sep 26, 2015 at 7:10 am
Whatever you do don’t have your club face open to the club path or you’ll be in a world of sh………
KK
Sep 25, 2015 at 5:20 pm
Great article, great summary!
AJ
Sep 25, 2015 at 11:45 am
What about Angle of Attack? How does that play into hitting a draw? Is this to assume the AoA for the drills is 0? If I hit up with a driver vs hitting down with an iron what difference does this make? I hear so much about AoA, I’m curious how this plays a role into hitting a draw. Thanks.
Thomas Devine
Sep 25, 2015 at 12:19 pm
HI AJ…great question (and references the D plane). In theory, your swing direction could be zero and with a negative AoA, an ‘in to out’ path could be achieved. Does that make sense? The reason for the headcover in this exercise is due most slicers having a swing direction that is excessively left. In order to change, it is advantageous to attempt to move the swing direction rightwards.
Jan
Sep 25, 2015 at 6:33 am
Hi, thanks for a great article. I’m struggling with the club face part. Feel that I can’t “leave” it open compared to the target line and in the same time have a free release. I have to hold it so to say… If I release the club freely, I hit a pull-fade. Could it be a problem with my grip, that it’s too strong?
Best regards
Jan from Sweden
Thomas Devine
Sep 25, 2015 at 12:15 pm
Hi Jan….I would not like to comment on your grip without seeing it. However, practising with the alignment stick should help you achieve the desired impact alignment for a draw. One exercise I would try is trying to start the ball as far right as possible to still curve it back leftwards. This will allow you to explore the necessary movements to achieve an open to target line club face with a path that is further right!
John-Michael
Sep 24, 2015 at 8:42 pm
I’ve been working on trying to hit a draw lately. The way I’ve been practicing hitting a draw is by closing my stance and swinging down my bodyline. Is practicing the way you detailed in the article a better method in learning how to hit a draw?
Rickard
Sep 25, 2015 at 5:58 am
This might produce what looks like a draw but in reality is a pull-draw (most of the time). It’s a bit old school, but hey, whatever works!
I find these types of draw shots tend to lack the height and softness compared to a proper/modern draw, i e clubface relative open and altered swing path i relation to target line.
The forward press also should be used, moving the ball backwards to promote inside path (relative to ball) should increase forward shaft lean as you open the face.
Ball further back, more open face and hence more forward shaft lean, to create desired curvature and launch direction.
Does it make sense? 🙂
John-Michael Fawley
Sep 25, 2015 at 9:45 am
Yes it does.
Thomas Devine
Sep 25, 2015 at 12:11 pm
Hi John-Michael….sure what you have mentioned can help you achieve and ‘in to out’ path with closed face….however just remember that if you return your club head aiming towards the target (at impact), then the ball will start online and curve left…using the alignment stick will for sure help you return the club face open to the target 🙂
Tom
Sep 24, 2015 at 3:30 pm
This is my natural ball flight. Next article can you do how to hit a fade(cut) shot of which I can’t manage to save my life.
JMcDonough
Sep 24, 2015 at 4:43 pm
I second that.
Jack Slicer
Sep 24, 2015 at 5:55 pm
you take the same drill and do it in the opposite direction…
DatSliceDoe
Sep 24, 2015 at 3:00 pm
Been working on this all season with my teaching pro. Have yet to consistently get this to work with longer clubs. I get the sensation of an in to out path, but leaving the face open is something I’ve struggled with. I just feel that I need to flip my arms over to hit a draw. Guess opposites attract, so I’ll need to practice on leaving the face more open.
Thomas Devine
Sep 24, 2015 at 5:00 pm
If you are confident you are achieving an in to out path, then the alignment stick will for sure help you with your face control. Spend some time starting it to the right and trying to bring it back. Good luck!
Rickard
Sep 25, 2015 at 6:07 am
Make sure that as you move ball back in stance (and path) you apply an appropriate forward press, ideally with an open face.
I stuggle a bit with this as well and for me it is my fear of forward press will result in pull hooks.
But with a soft inside path, a little bit closed body setup at impact (relation to target line, to keep away the pull) and open face it actually produced a high soft draw, even with a 3-i.
When I manage to sequence it correctly, that is! 🙂
Steve Whitehead
Sep 24, 2015 at 2:43 pm
Had a lesson with Tom recently and he had me hitting a real nice draw shot with a good clean contact on the ball by the end of the session. Great coach and highly recommended.
Fred
Sep 24, 2015 at 12:44 pm
This clear presentation is quite helpful. And I assume doing just the opposite will result in a fade starting left and moving back to the target.
Thomas Devine
Sep 24, 2015 at 4:58 pm
Absolutely Fred…change the positioning of the headcover for the fade. We want to create the opposite club path (out to in). And then go through the same process, however look to start the ball to the left of the stick and curve it right 🙂
Tom Stickney
Sep 24, 2015 at 11:54 am
Good work
Thomas Devine
Sep 24, 2015 at 4:56 pm
Thanks Tom