
Opinion & Analysis
Building Golf Clubs at Home: The Essential Tips, Tricks and Tools

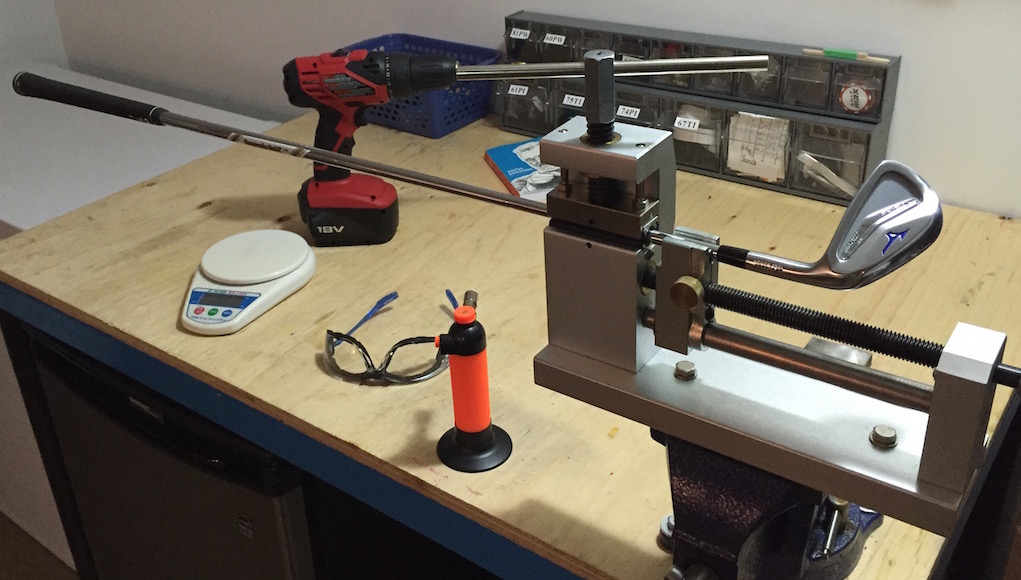
Like so many others I got into club building out of necessity and curiosity. As a kid, I loved to take anything and everything apart — from skateboards to old lawnmowers — so when I starting playing golf clubs were next. It started small, learning how to grip clubs with a Black & Decker workmate with my dad, and then slowly I moved into the more intricate aspects of building clubs. I’ve always joked that I was probably the only 16-year-old who asked for a lie-loft machine for his birthday.
In this article, I’m going to share with you my favorite tips, tricks and tools that I’ve used as a professional golf club builder. I hope to benefit those interested in building their own golf clubs at home, as well as relay valuable information about club building in general to knowledge-hungry GolfWRXers.
Overview
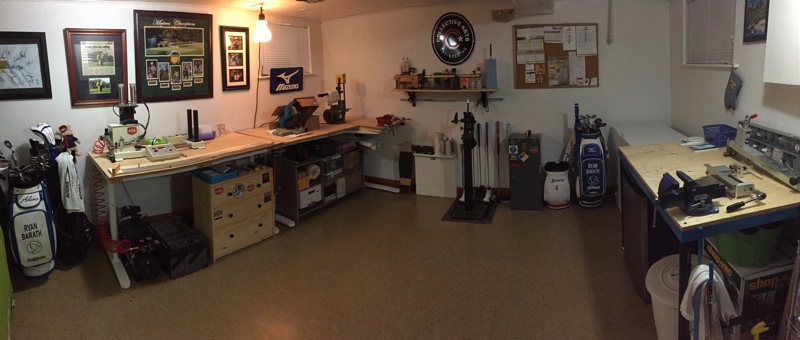
My basement build shop.
One of the most important things about building clubs is doing it properly with the right tools, and doing it safely. After setting up up multiple build shops over the years, from small hobby shops to large multi-station build shops, having the opportunity to build my own home shop from the ground up was something I always looked forward to. My shop is in my basement, and because of the limited space, it was imperative to find as many space saving-solutions as possible.
Like many people with a hobby they are passionate about, I look forward to one day having a stand-alone garage for all of my tools (and maybe a hitting net), but for now my basement gets the job done. I’m lucky to have access to a much large machine shop where I do wedge grinding, finishing and sand blasting, which are all jobs that make a lot more noise and create a lot more dust. I can’t get away with doing those things in a confined space, but we’ll touch on that later.
Although not a tool, arguably the most important piece of equipment is the work bench. Having a quality workbench is needed because of the amount of abuse that it will take over its lifespan. Also, just like a great kitchen design, you need counter space and a good workbench provides that. Dropping a clubhead (especially a driver or fairway wood with nice paint job) can be costly. The next extension of the workbench is a good vice that has been properly attached to the bench with bolts. Like I’ve said in previous articles, I believe when you do something you should take the time to do it properly. I once saw a vice screwed into a workbench with 1.25-inch screws, and as soon as someone went to use the vice it ripped out and took a club with it.
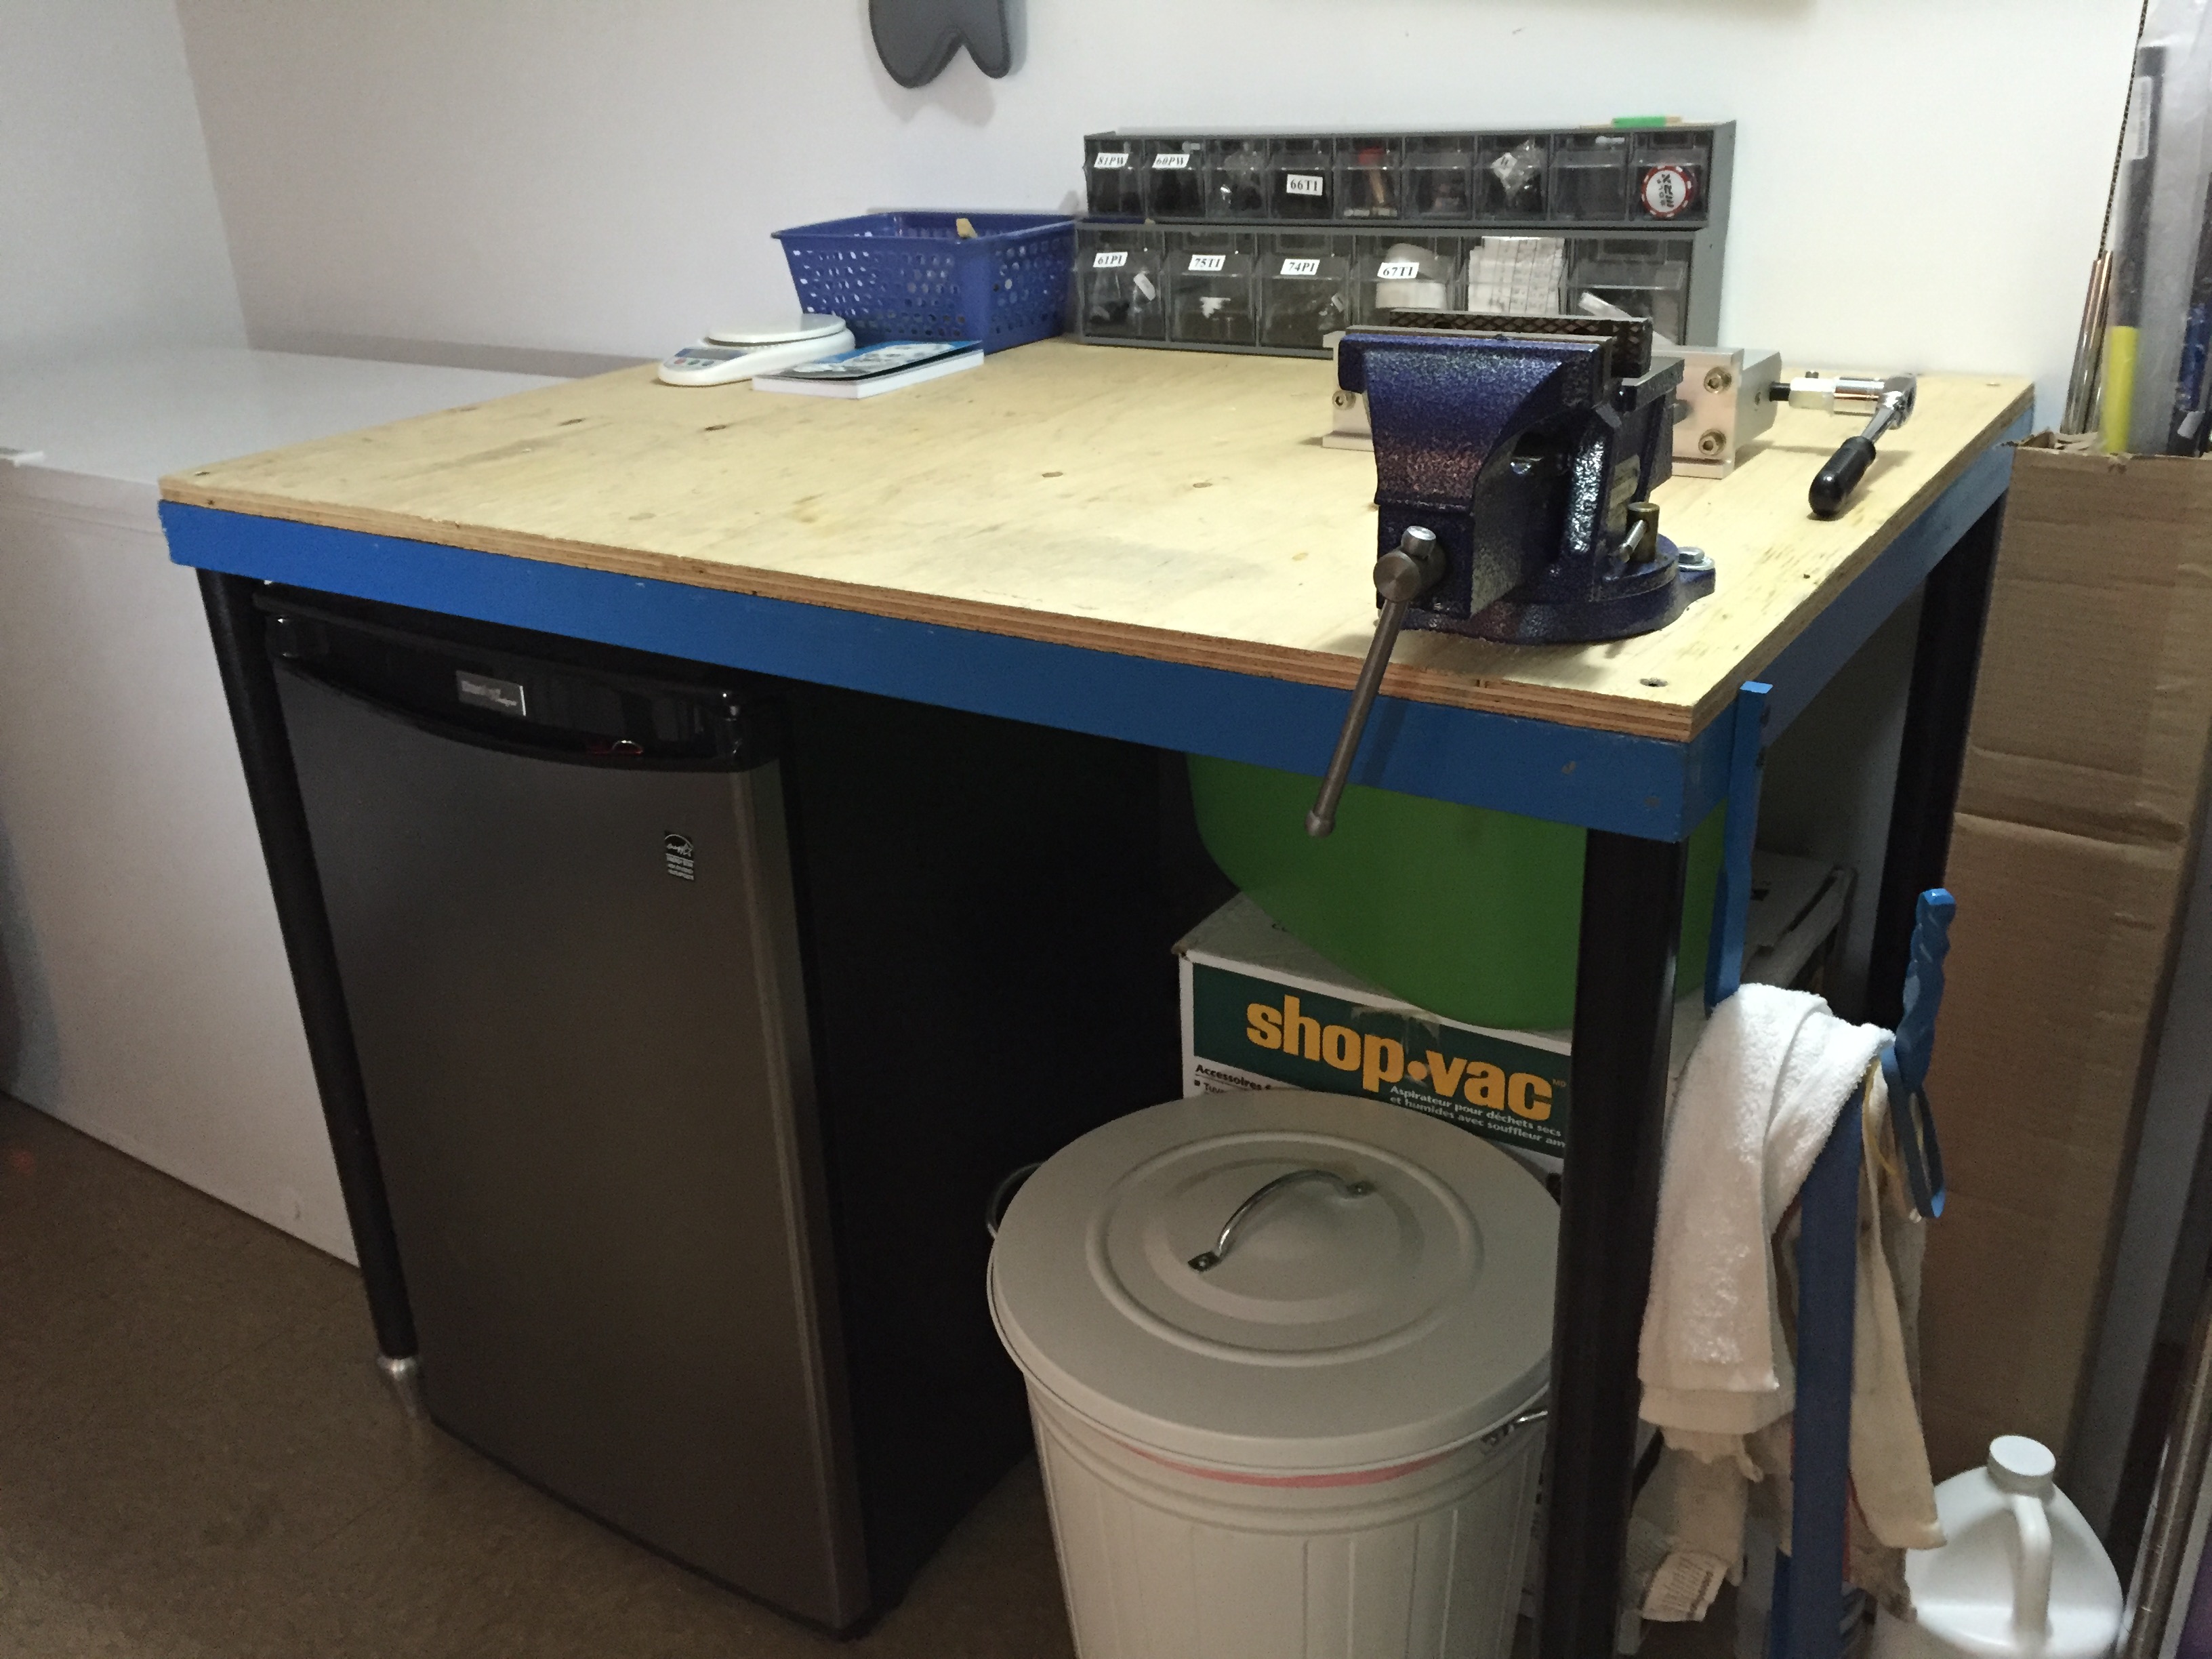
My workbench setup… with vice and a convenient beer fridge.
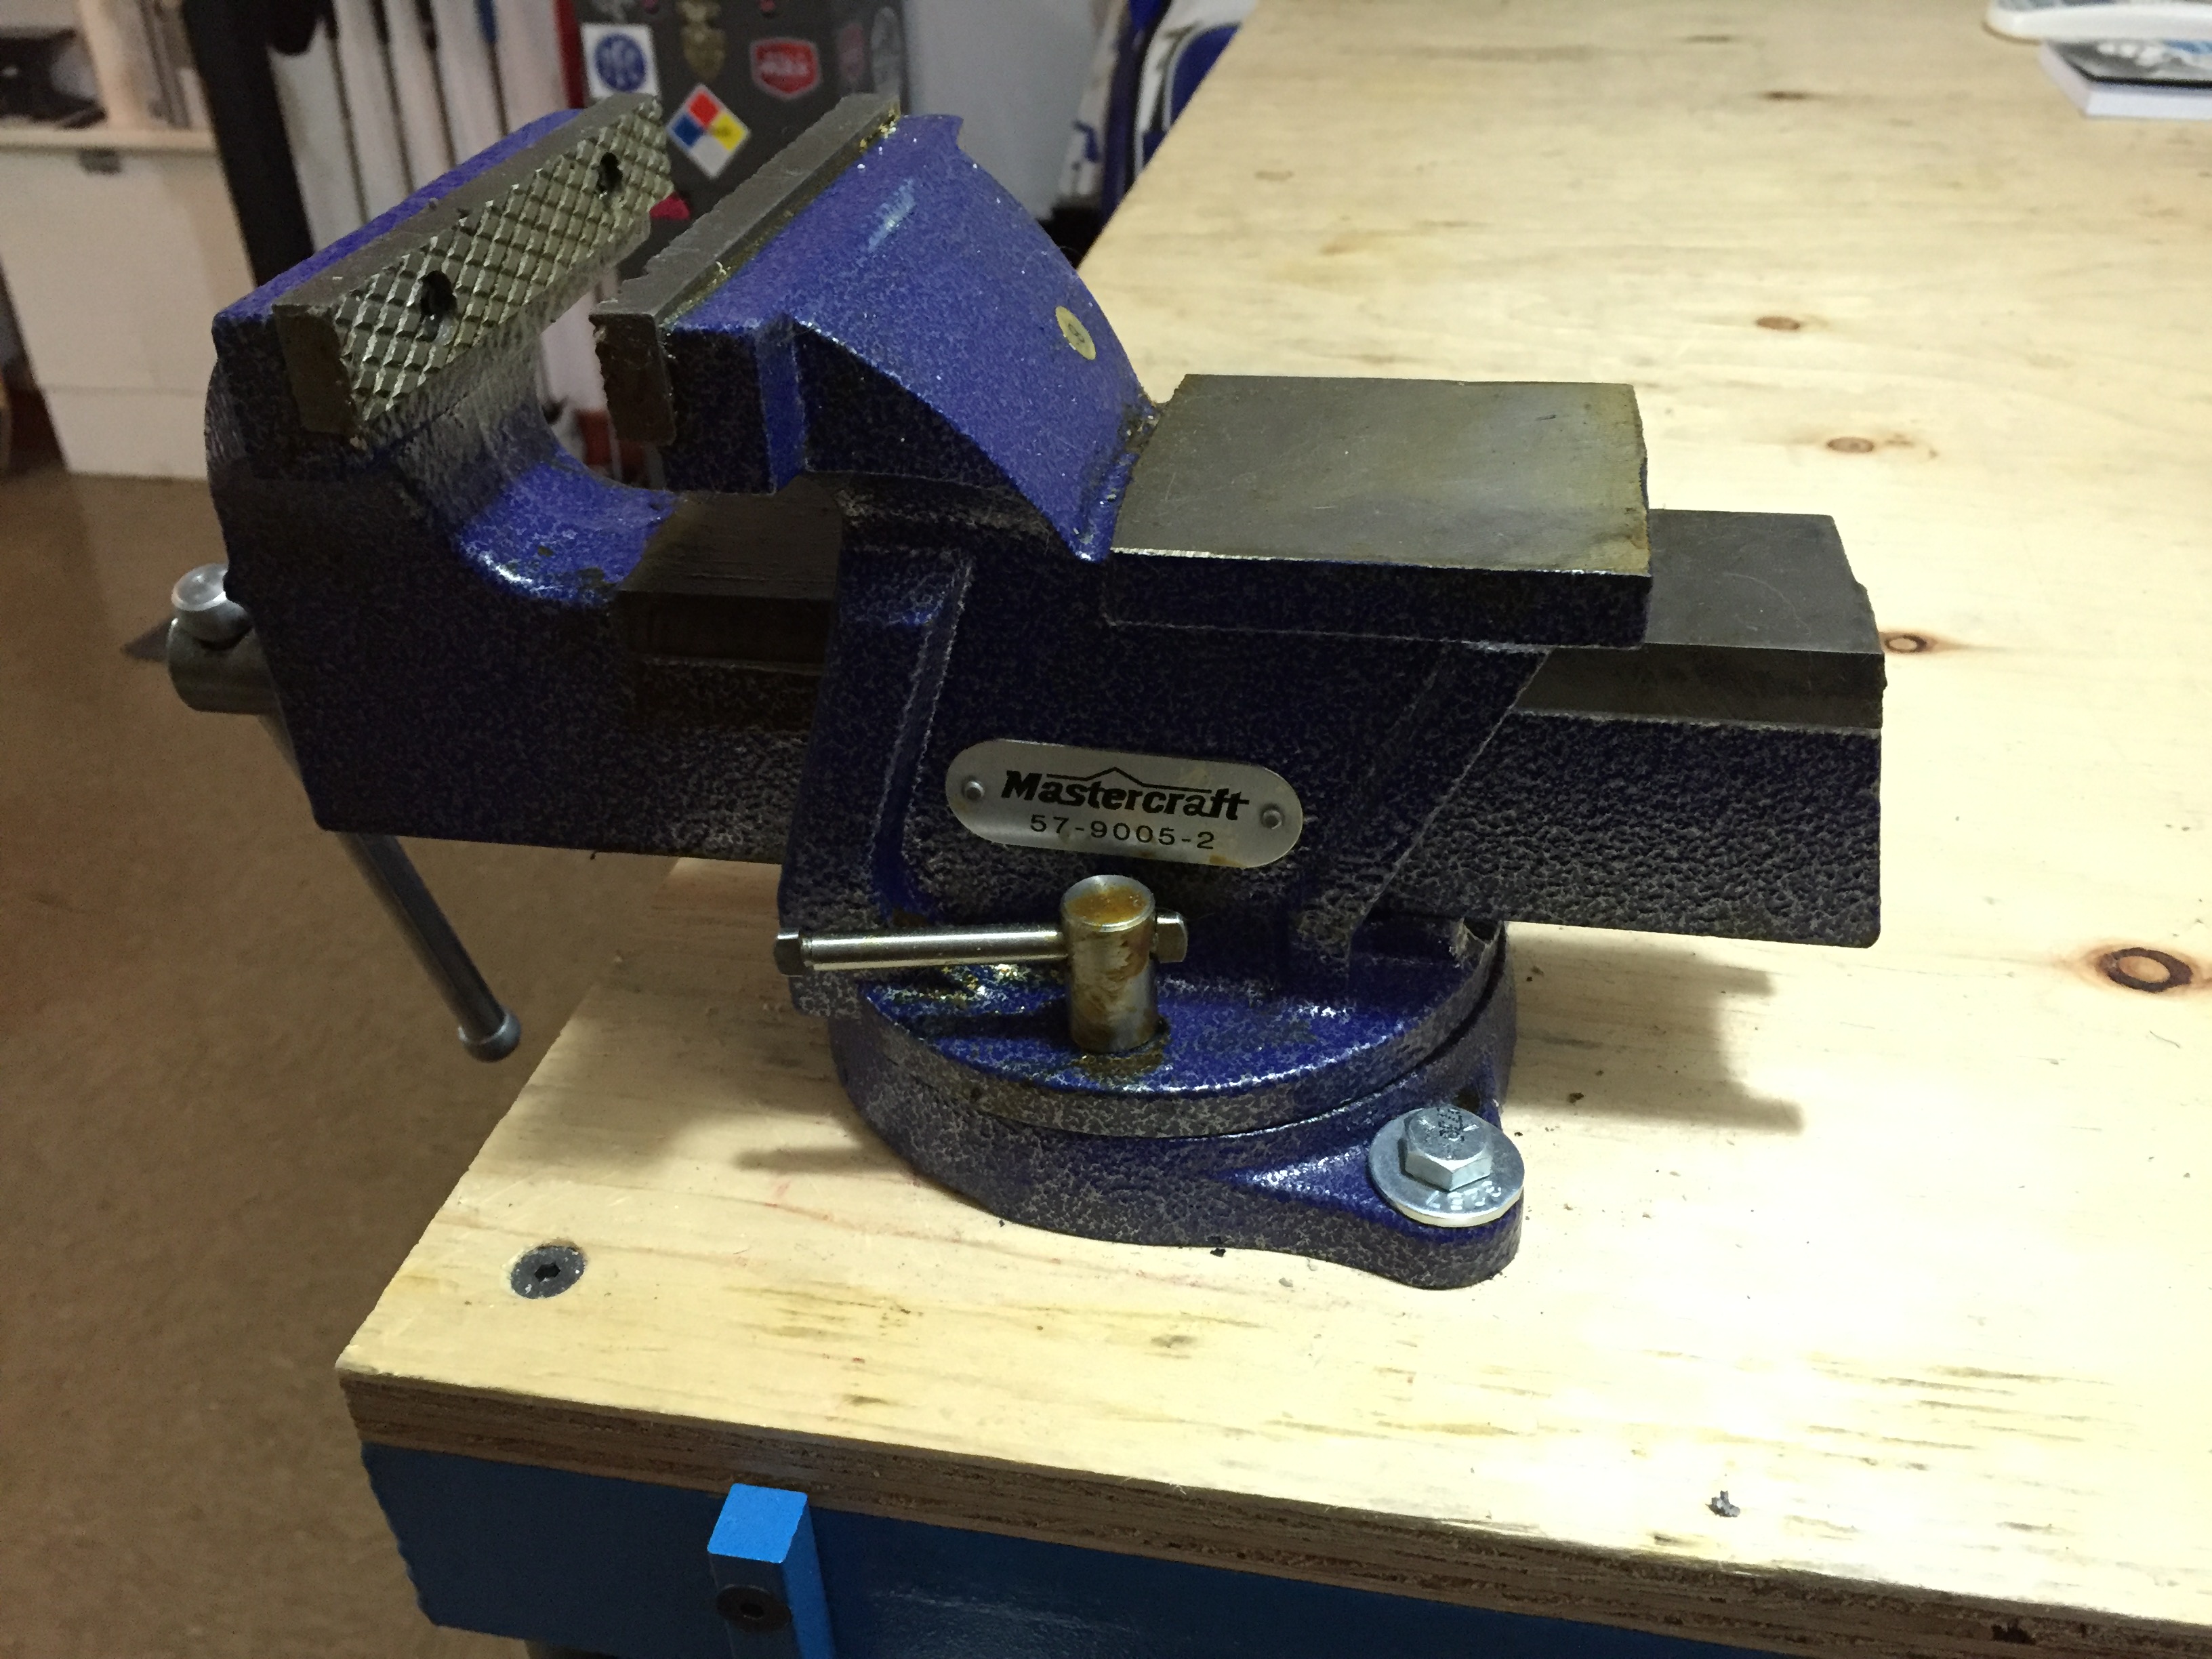
My 5-inch vice with 90-degree pivot properly mounted.
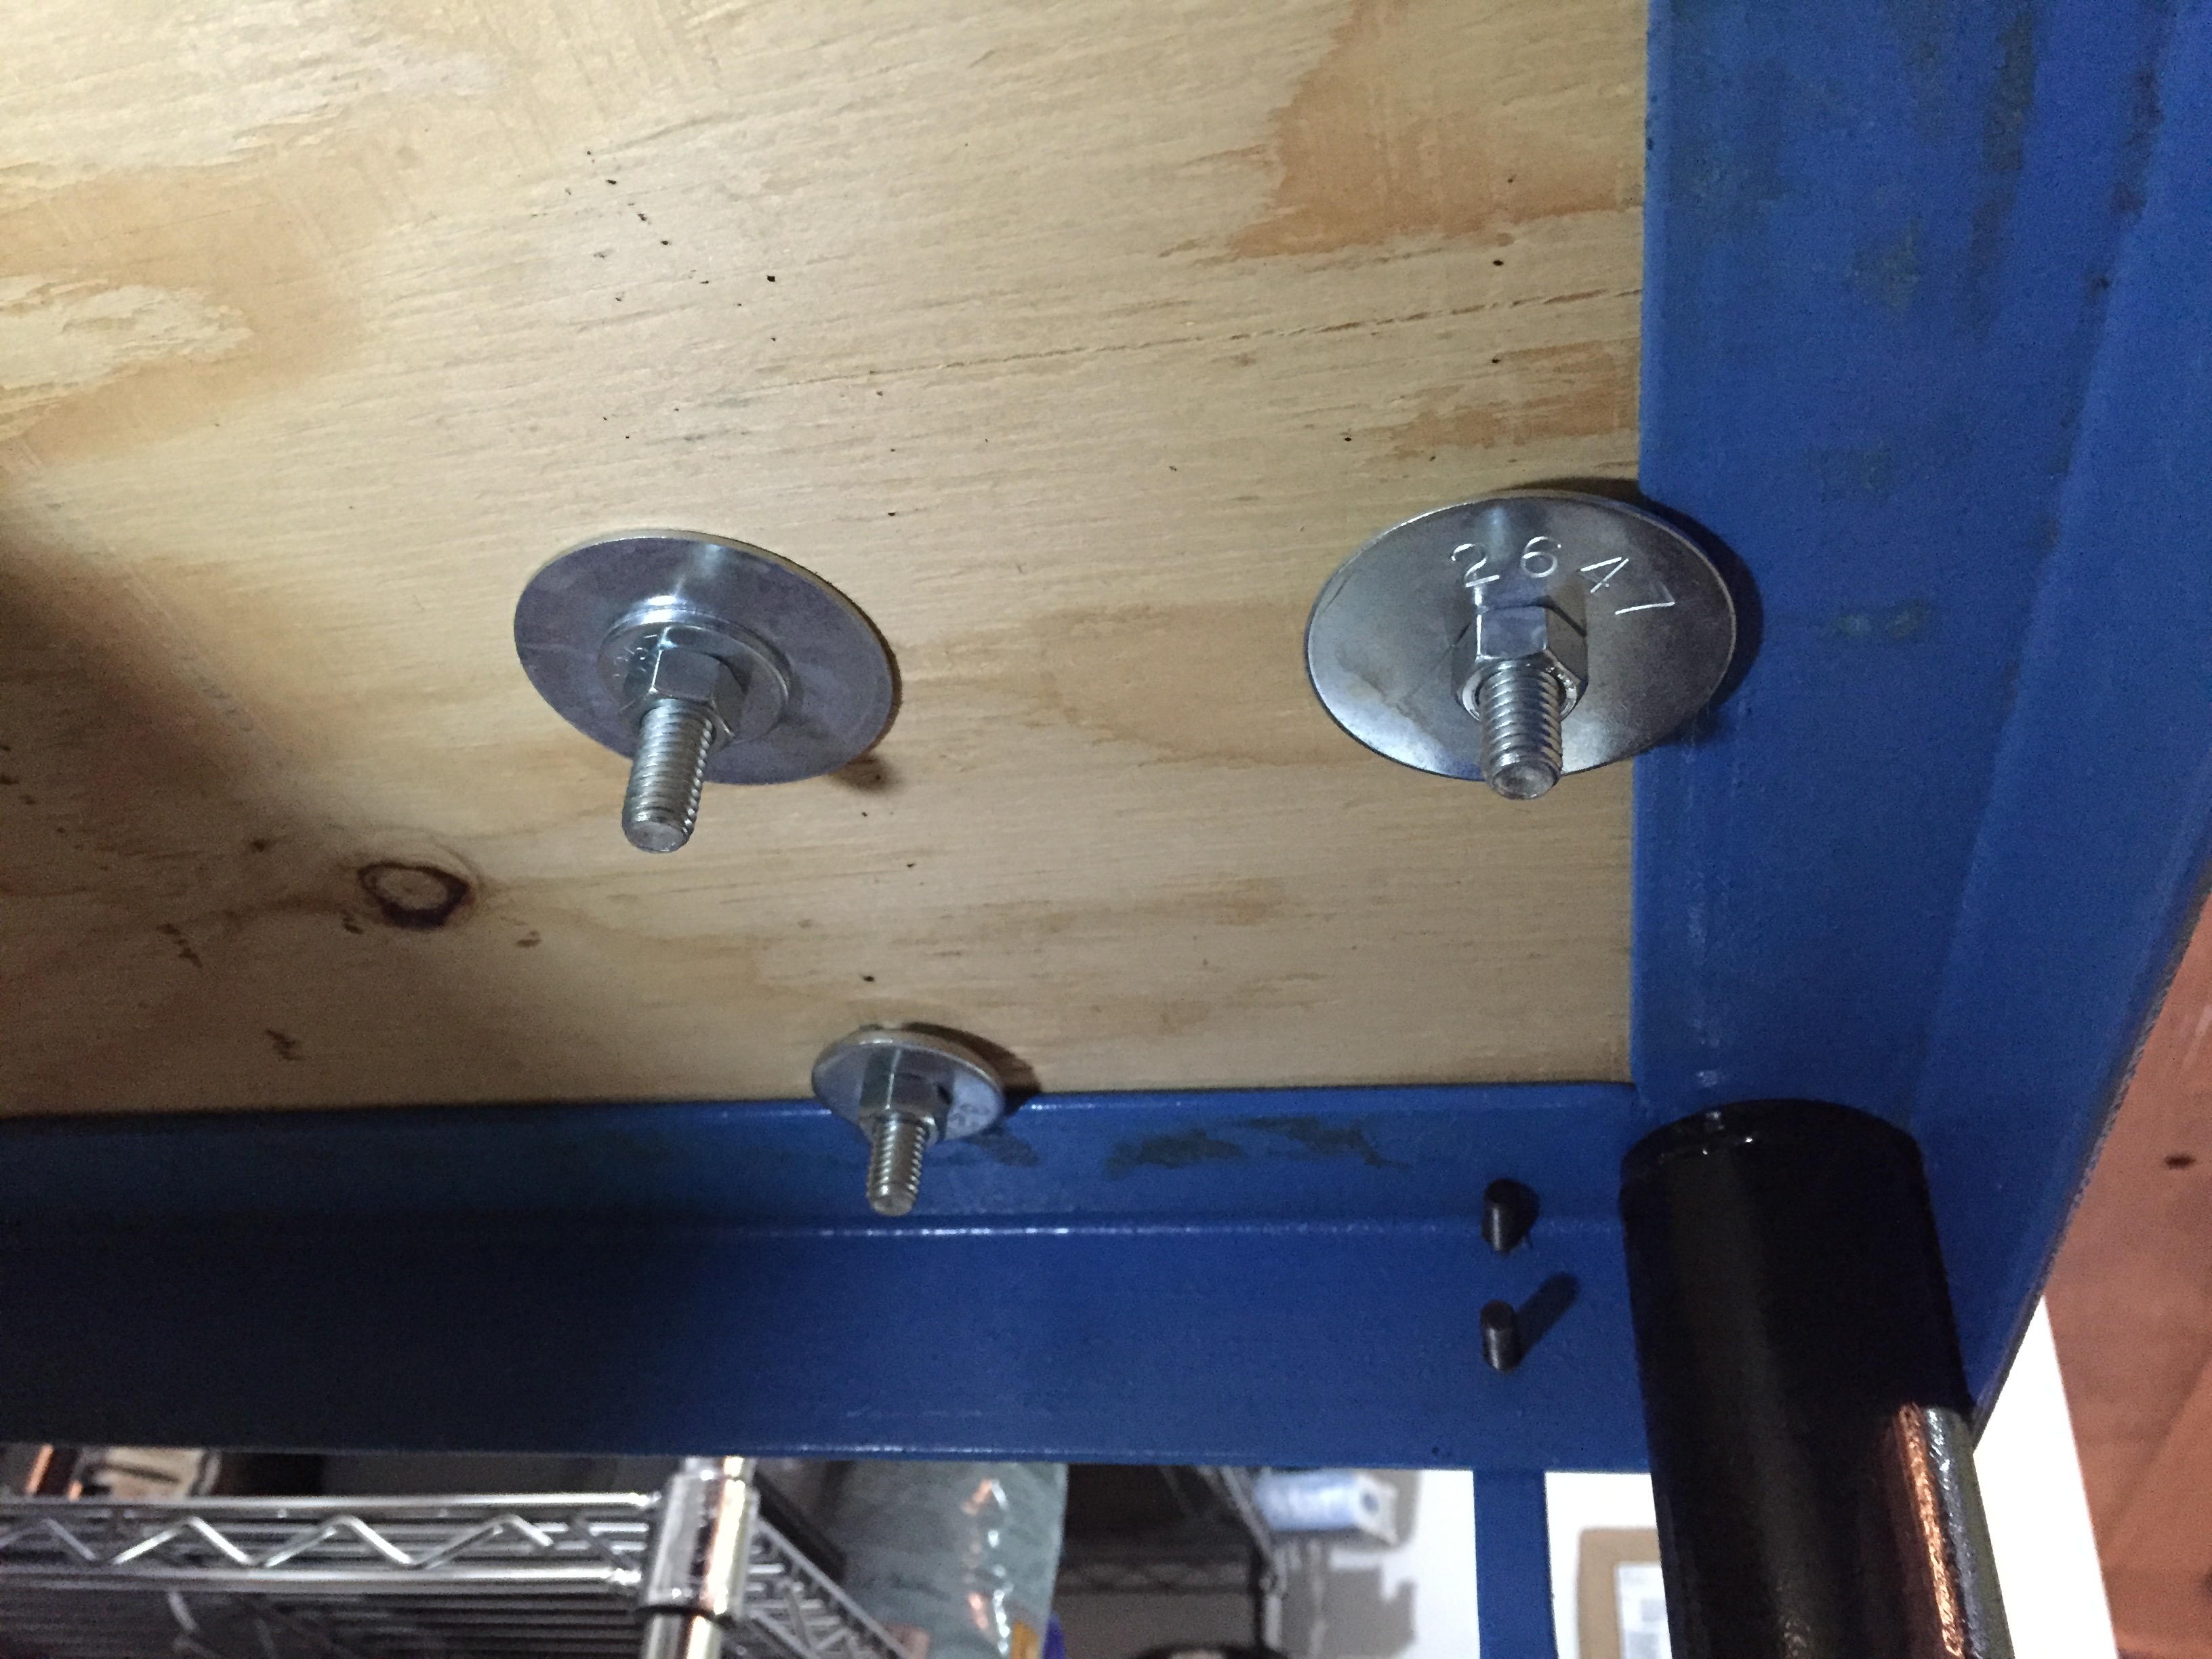
A demonstration of how to properly secure a vice through the a table top using bolts and washers.
Not every surface needs to be as stable as a full-scale industrial workbench, but having counter space is important. My personal solution to this was IKEA (honestly, who doesn’t love IKEA?). I recommend checking out Ikea Hacks (just Google it) for space-saving tips. If your space is really limited or needs to be multi-use, flip-up table ends are a perfect solution. As much as I like finding quick solutions to problems, it’s way more satisfying to build things yourself if possible. That way, at the end of the project, you have something that is exactly the way you wanted it.
As seen in the pictures below, I re-purposed two Ikea BEKAN desk bases from the As-Is section into a full workbench after getting a 4-foot by 8-foot piece of 0.75-inch plywood cut to size. This saved me hundreds of dollars and got me close to 30 square feet of counter space to mount other tools including my bench ruler, chop saw, belt sander and frequency machine. And since these desk bases have adjustable heights, I was able to get them to a comfortable workbench height.
There are lots of kits available online to build benches to fit almost any space. Get creative, and customize it to your needs.
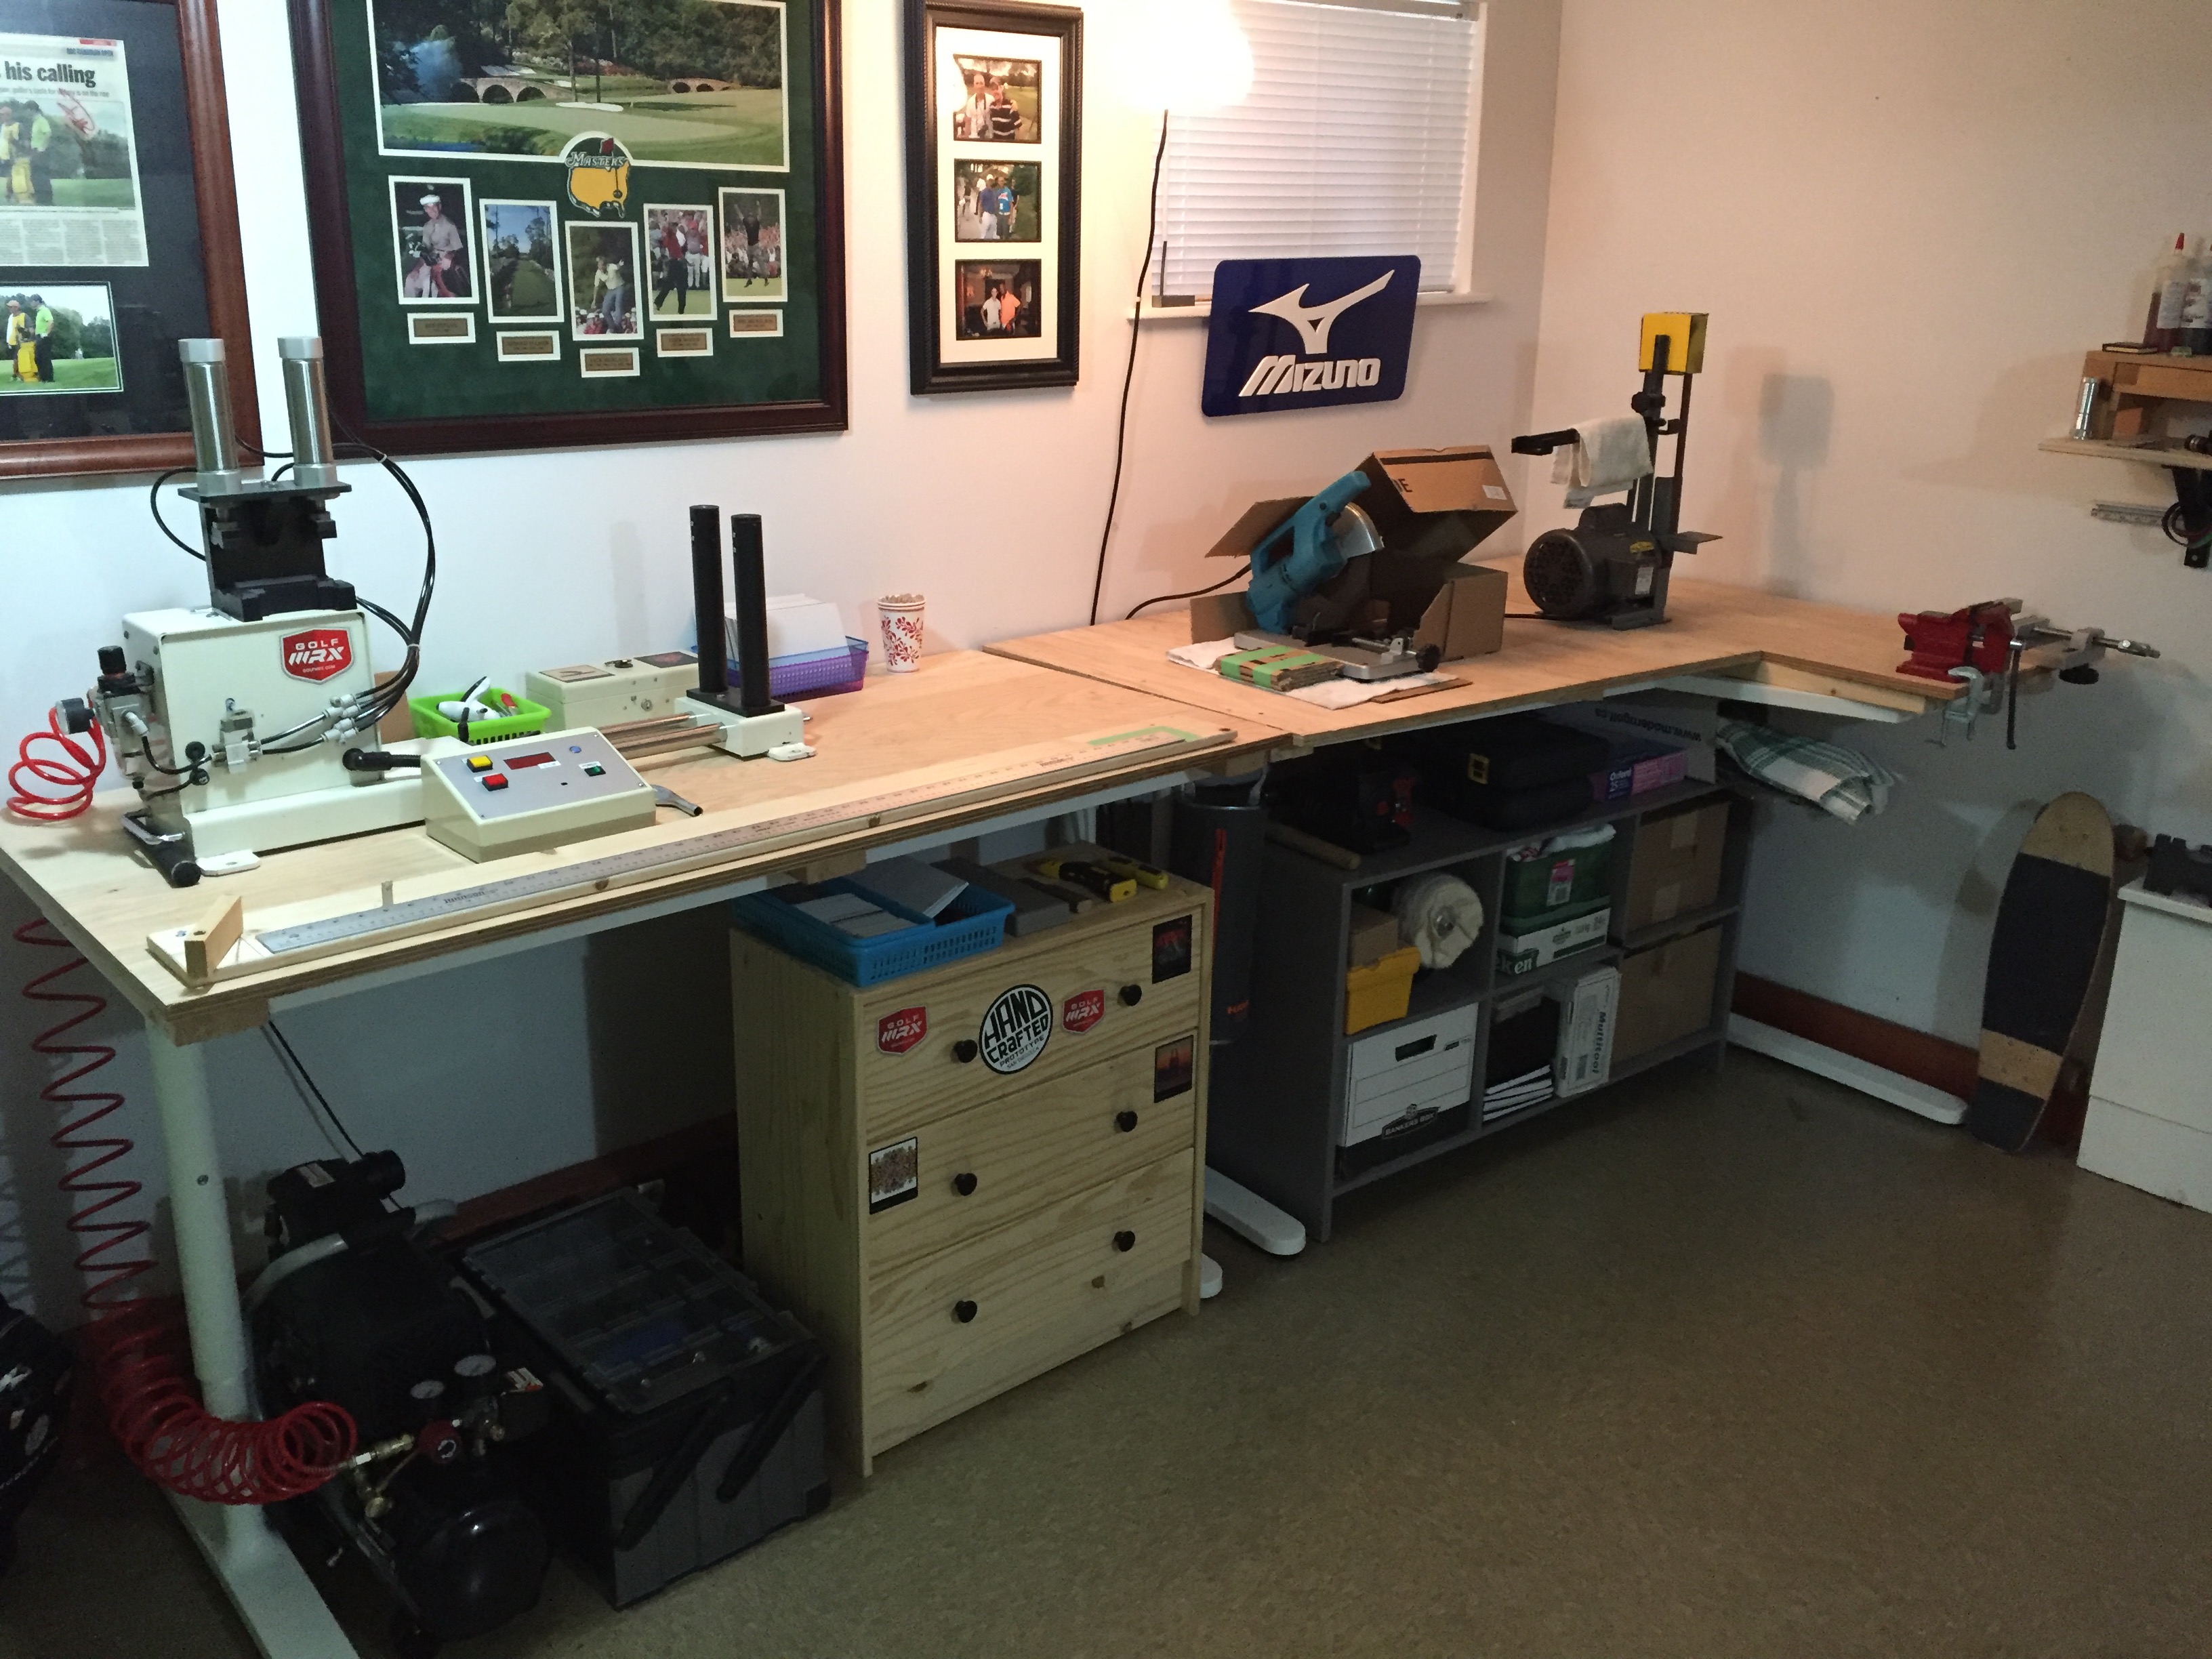
My work table built on Ikea BEKANT bases.
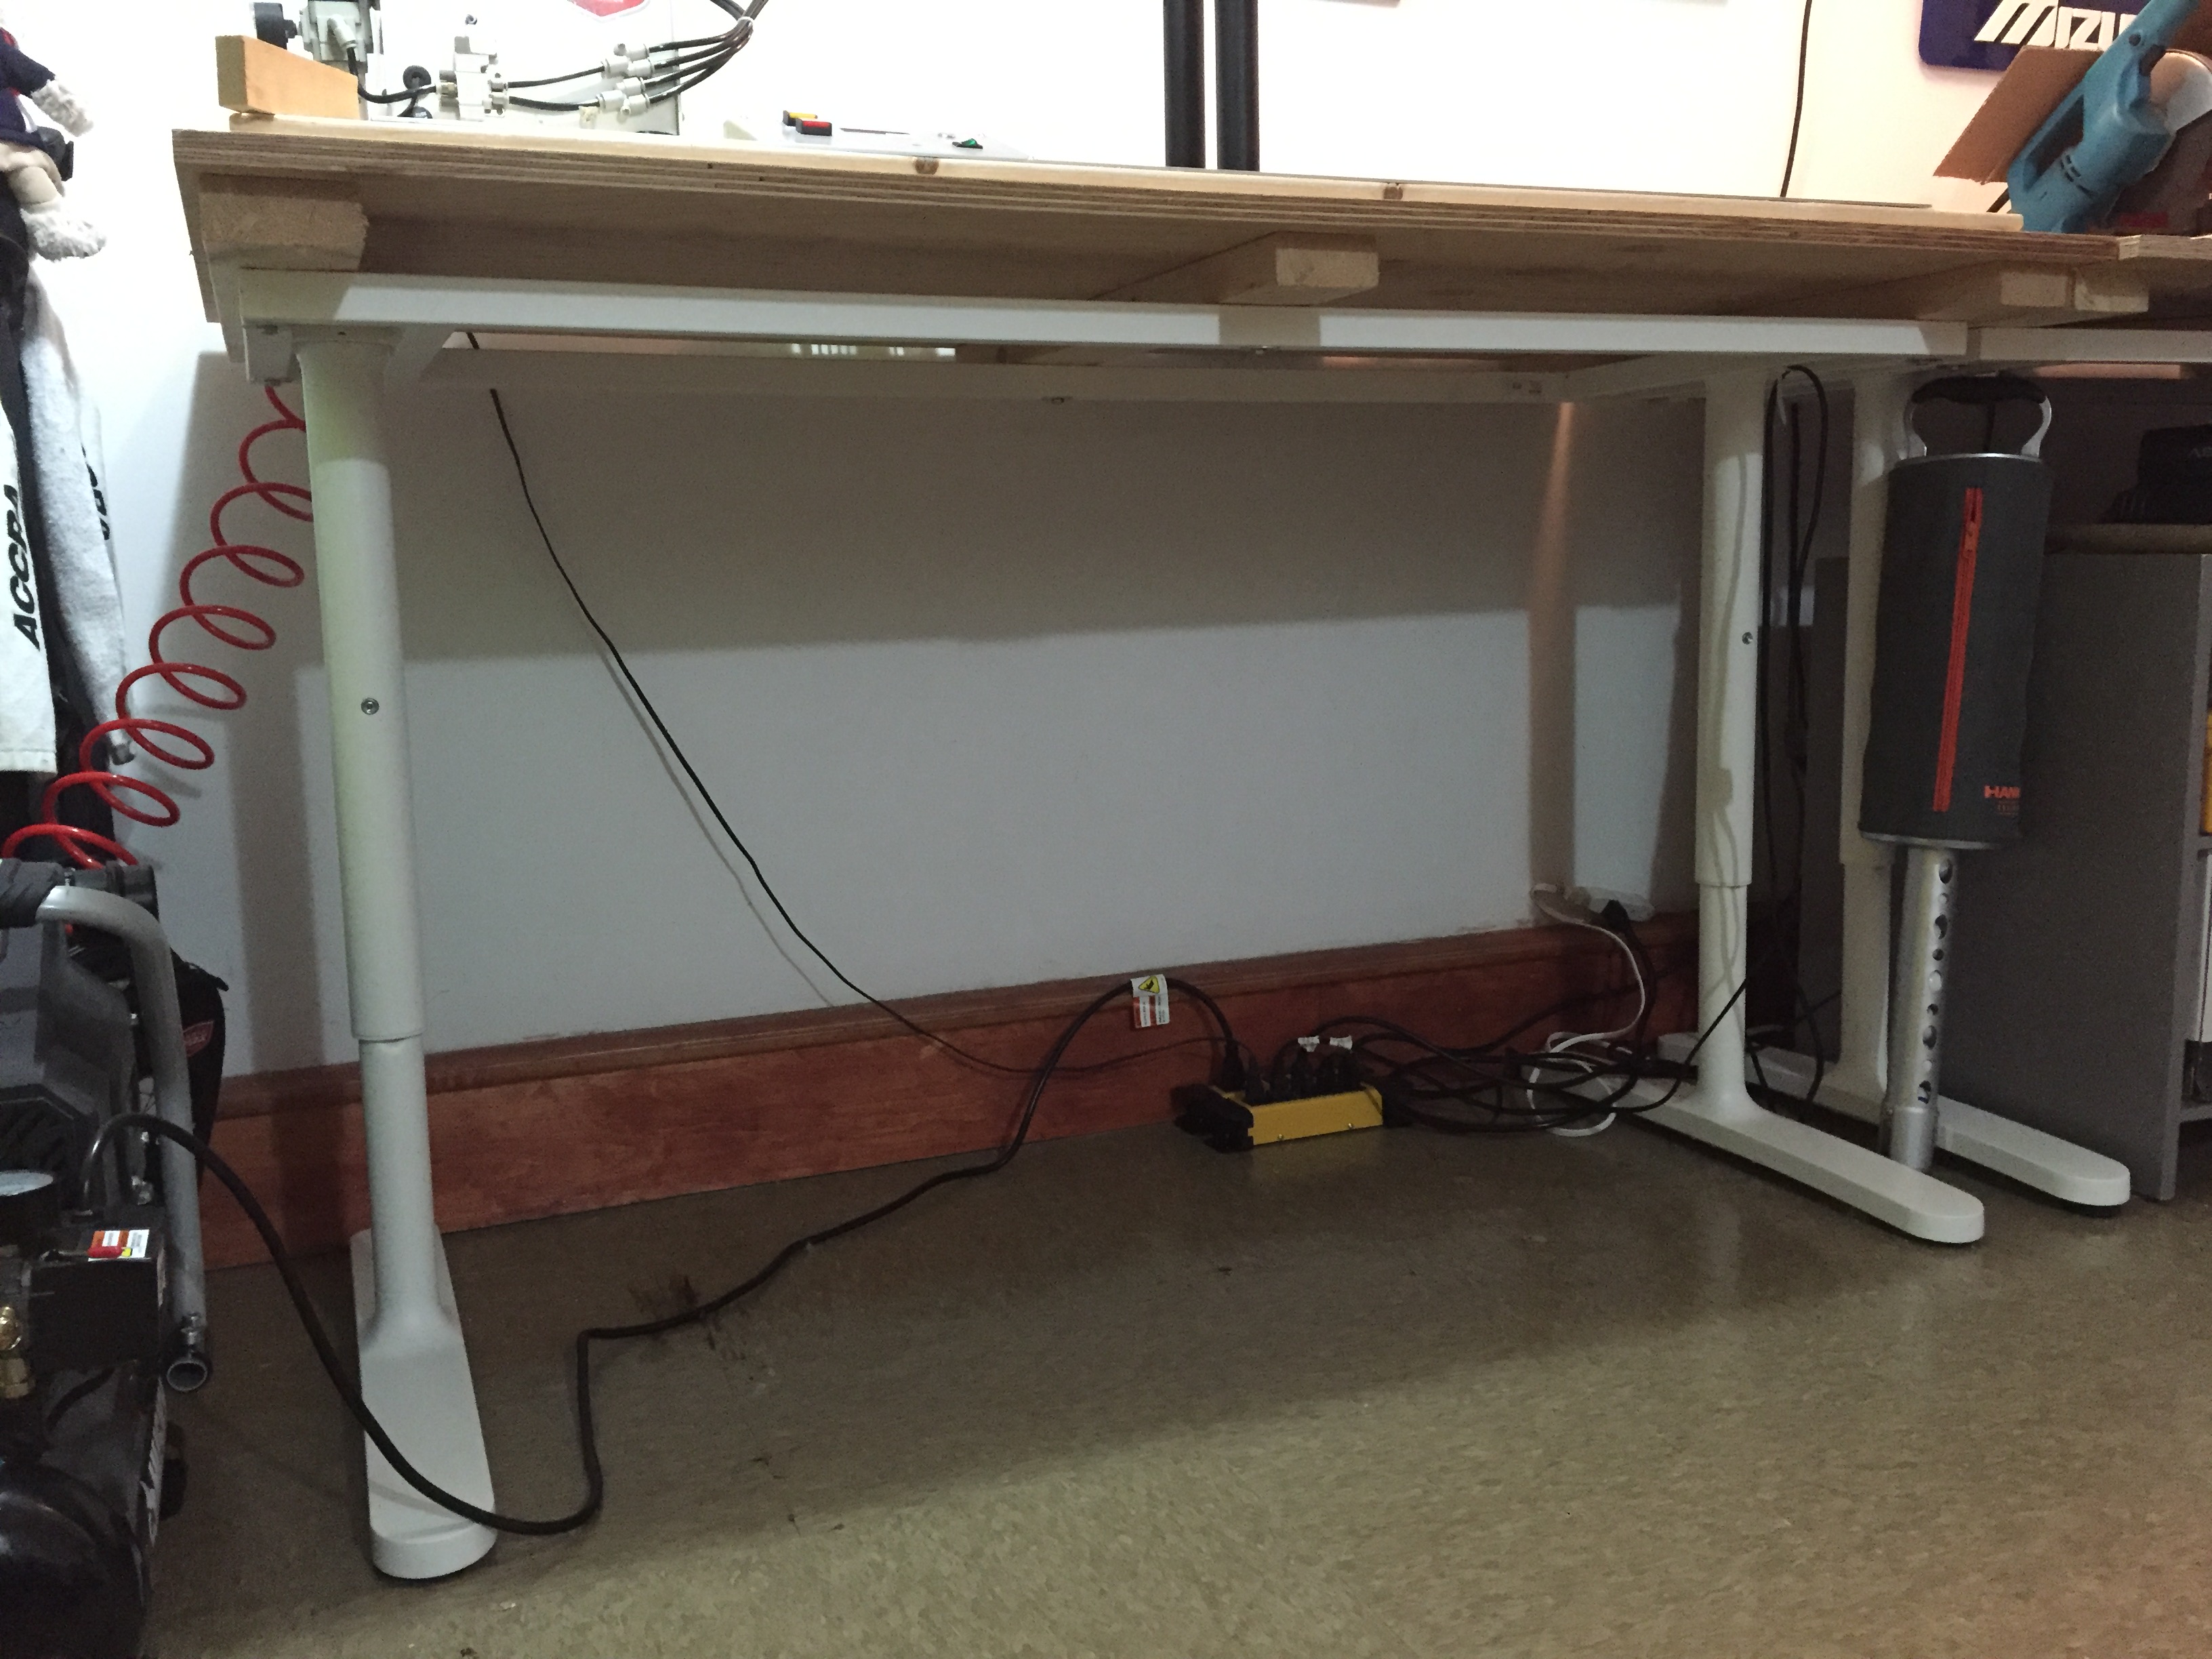
The top was secured with screws to the 2×4’s.
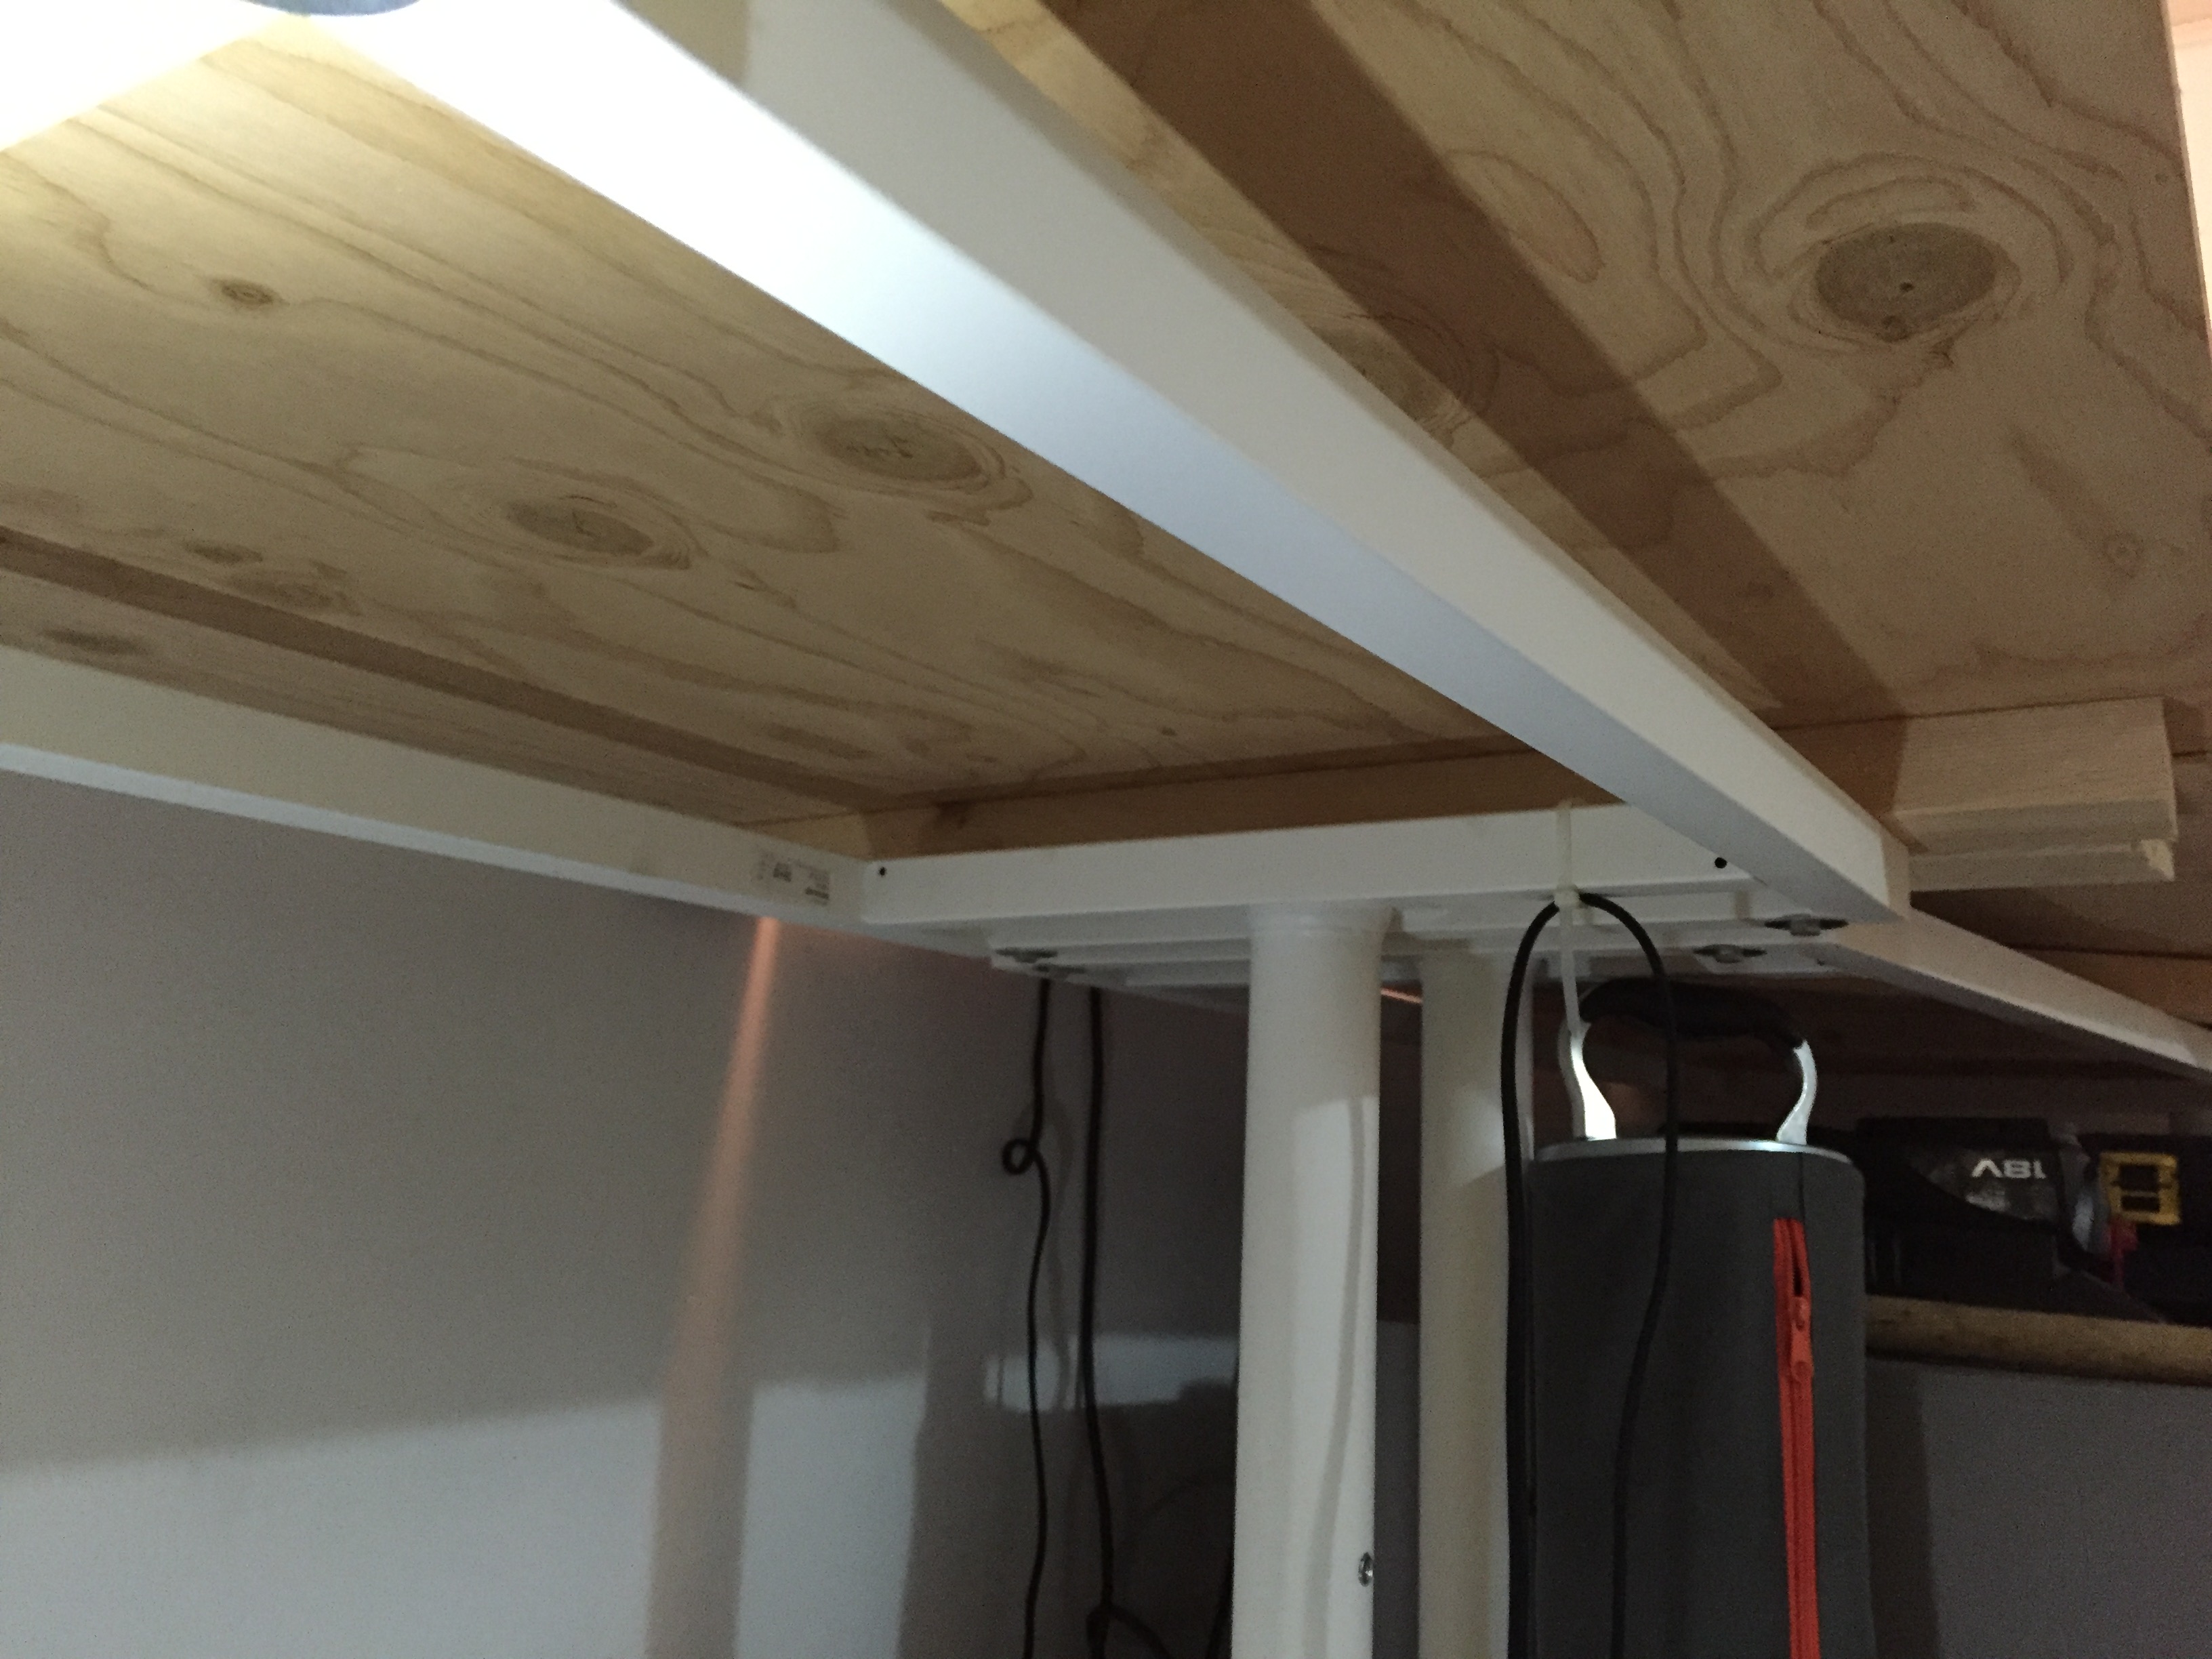
Lagbolts through preexisting holes in the frame hold the top to the base.
One of the other things that’s very important is organization. Having a few small organizational tools can make a difference: think storage bins, trays and component drawers, which are especially useful for ferrules and tip weights. Make sure to put labels on them, too, so it’s always easy to find what you need.
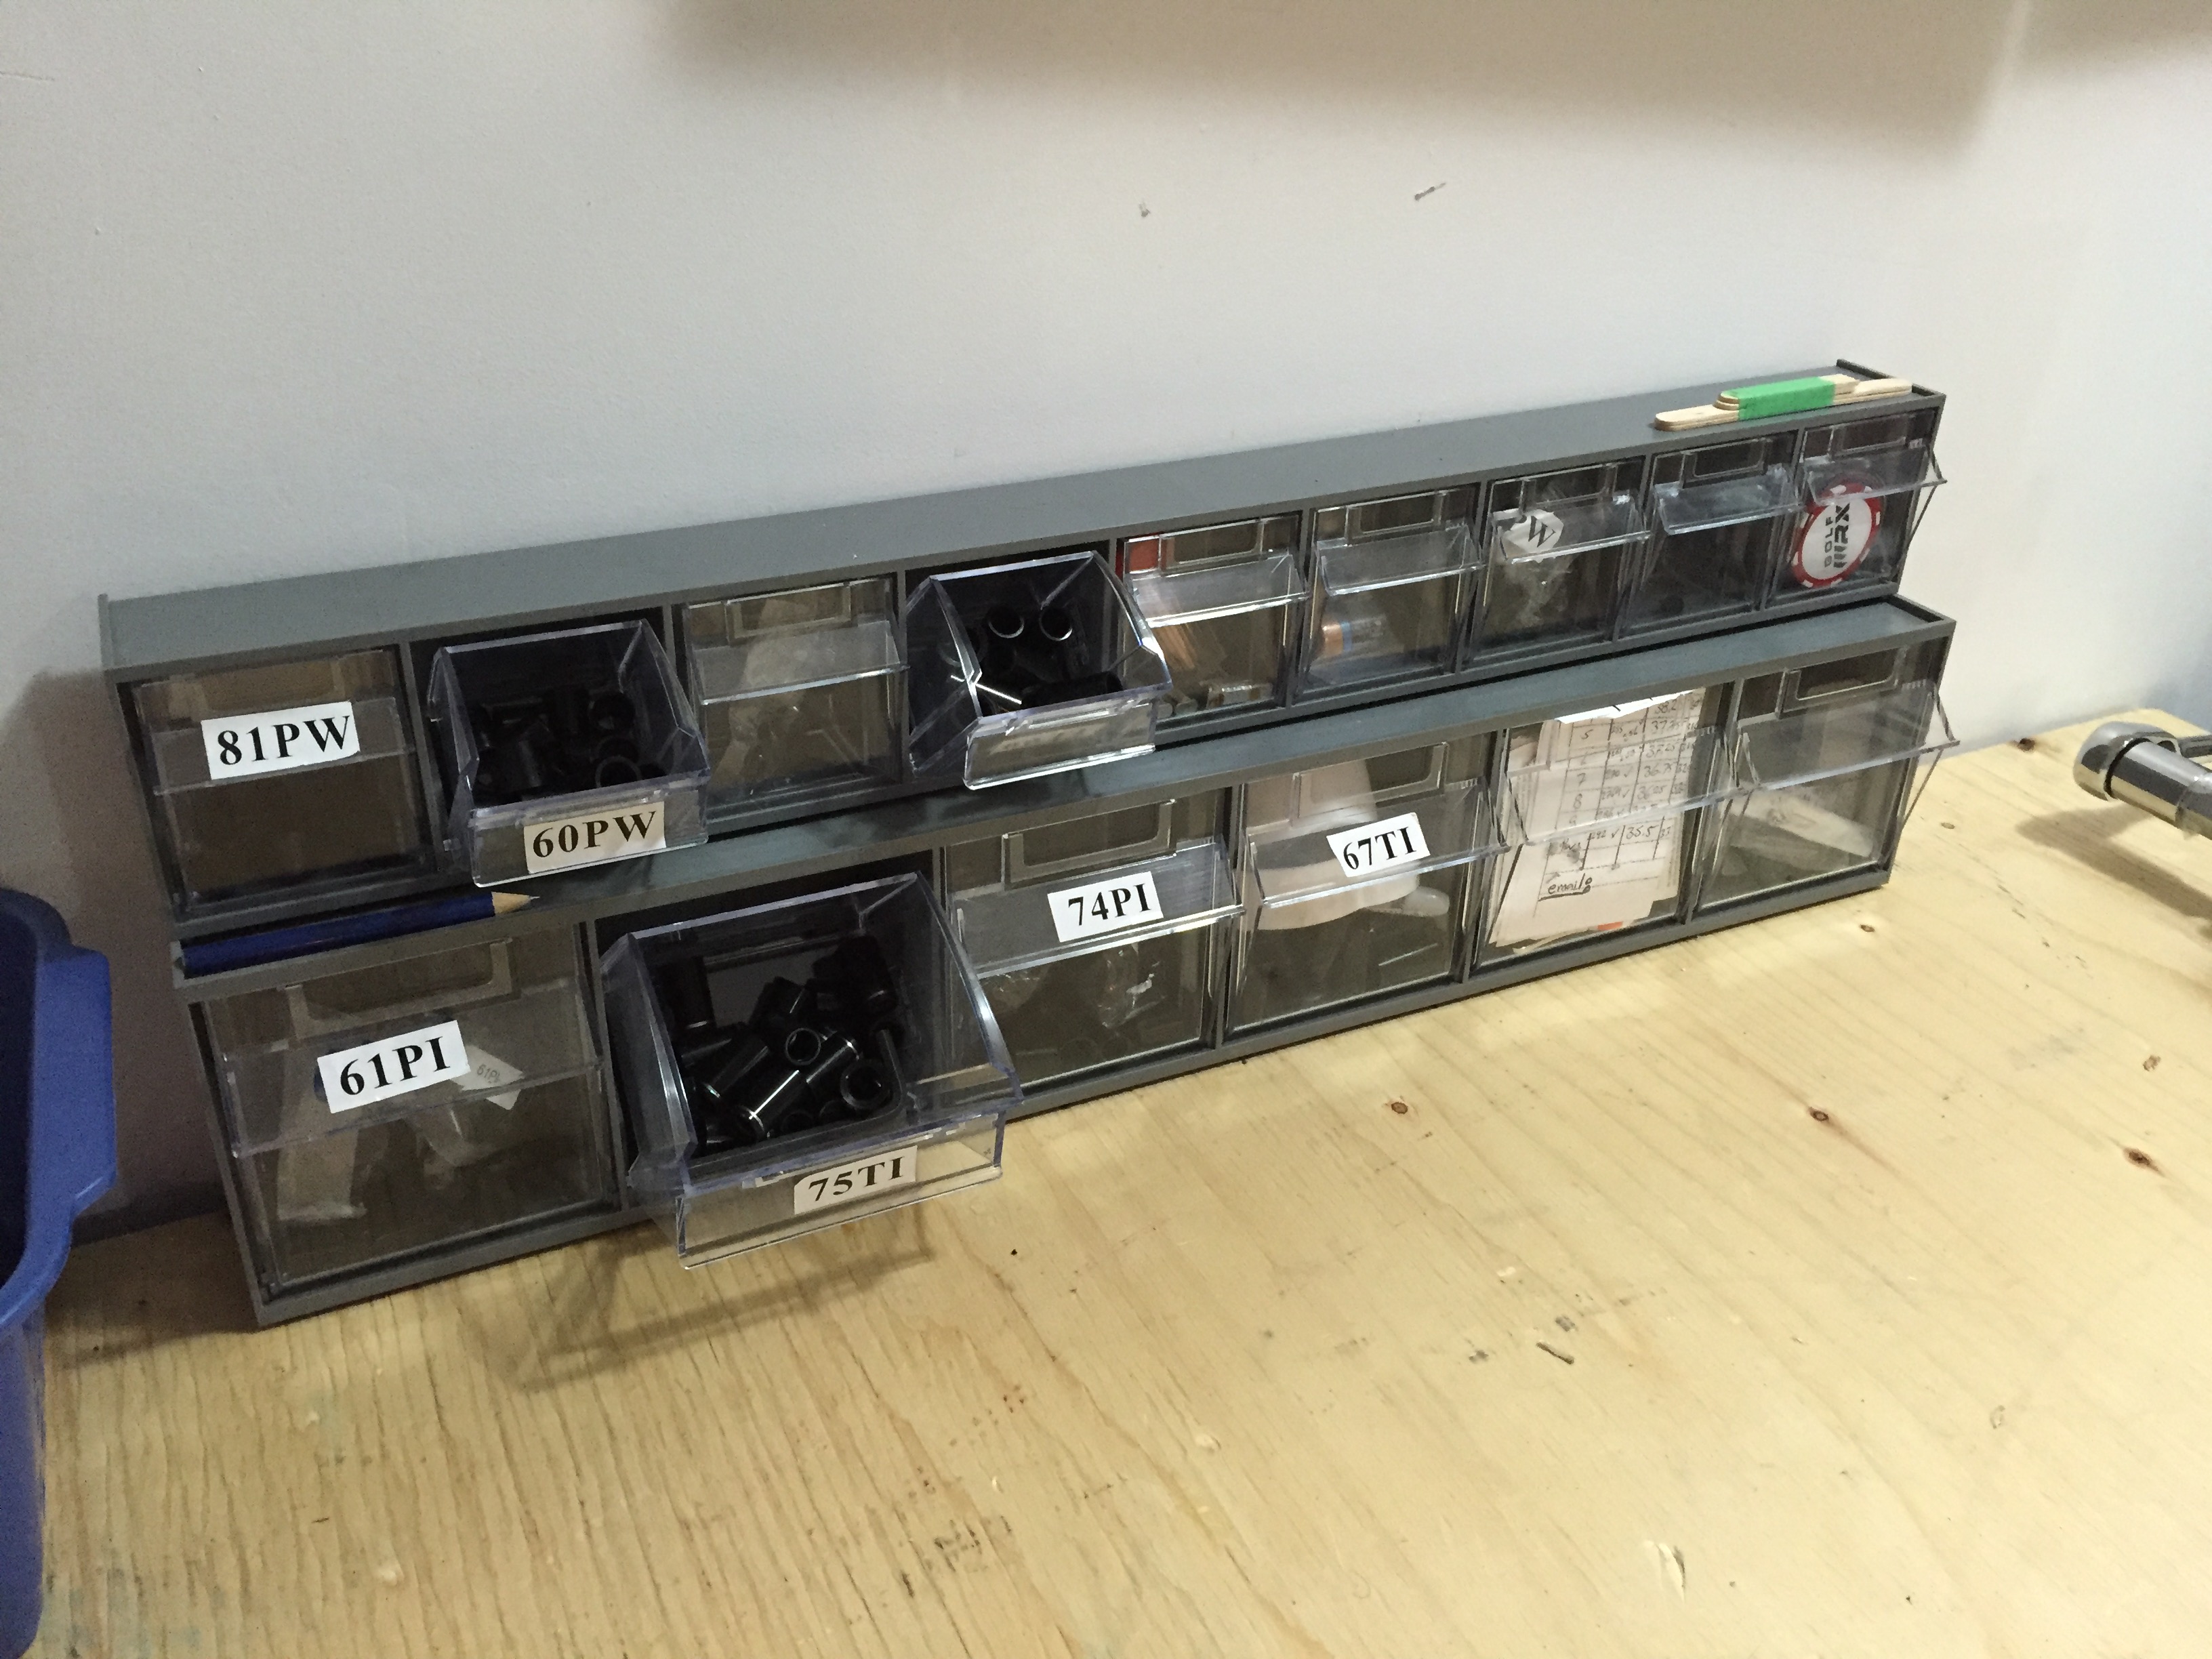
Drawers like this make great storage for small parts like ferrules.
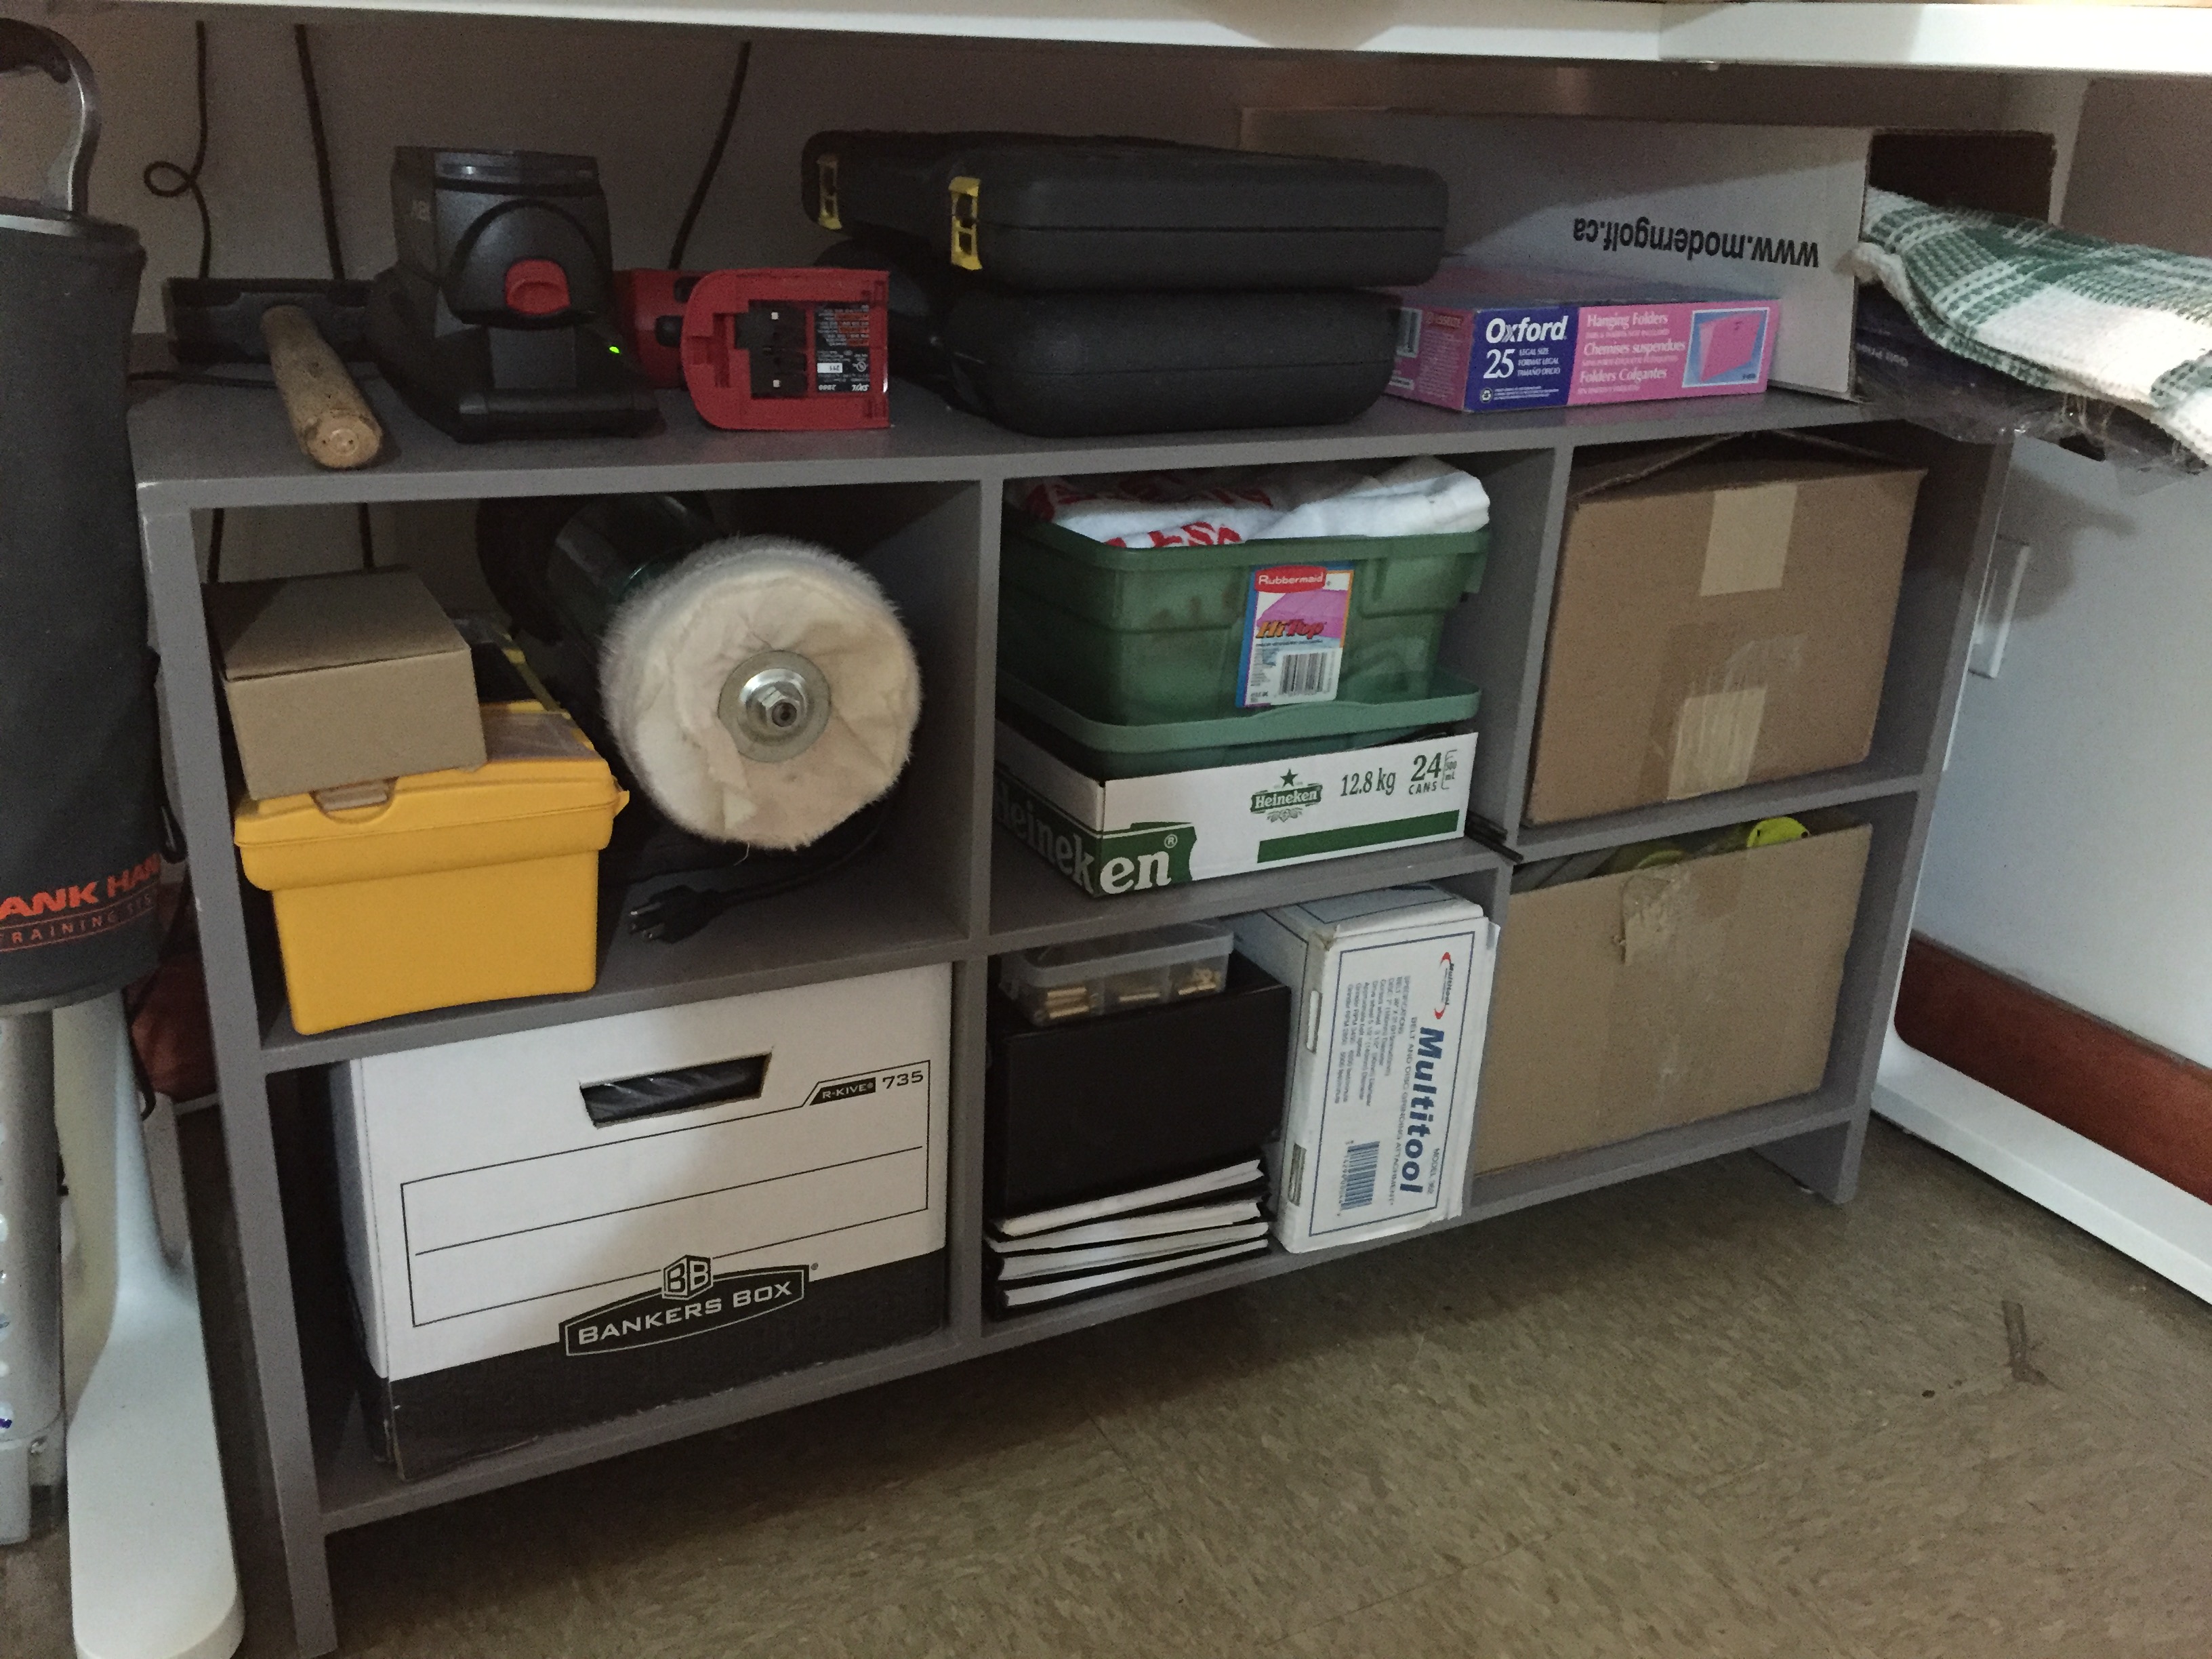
An under-bench storage unit holds a lots of tools and saves valuable space.
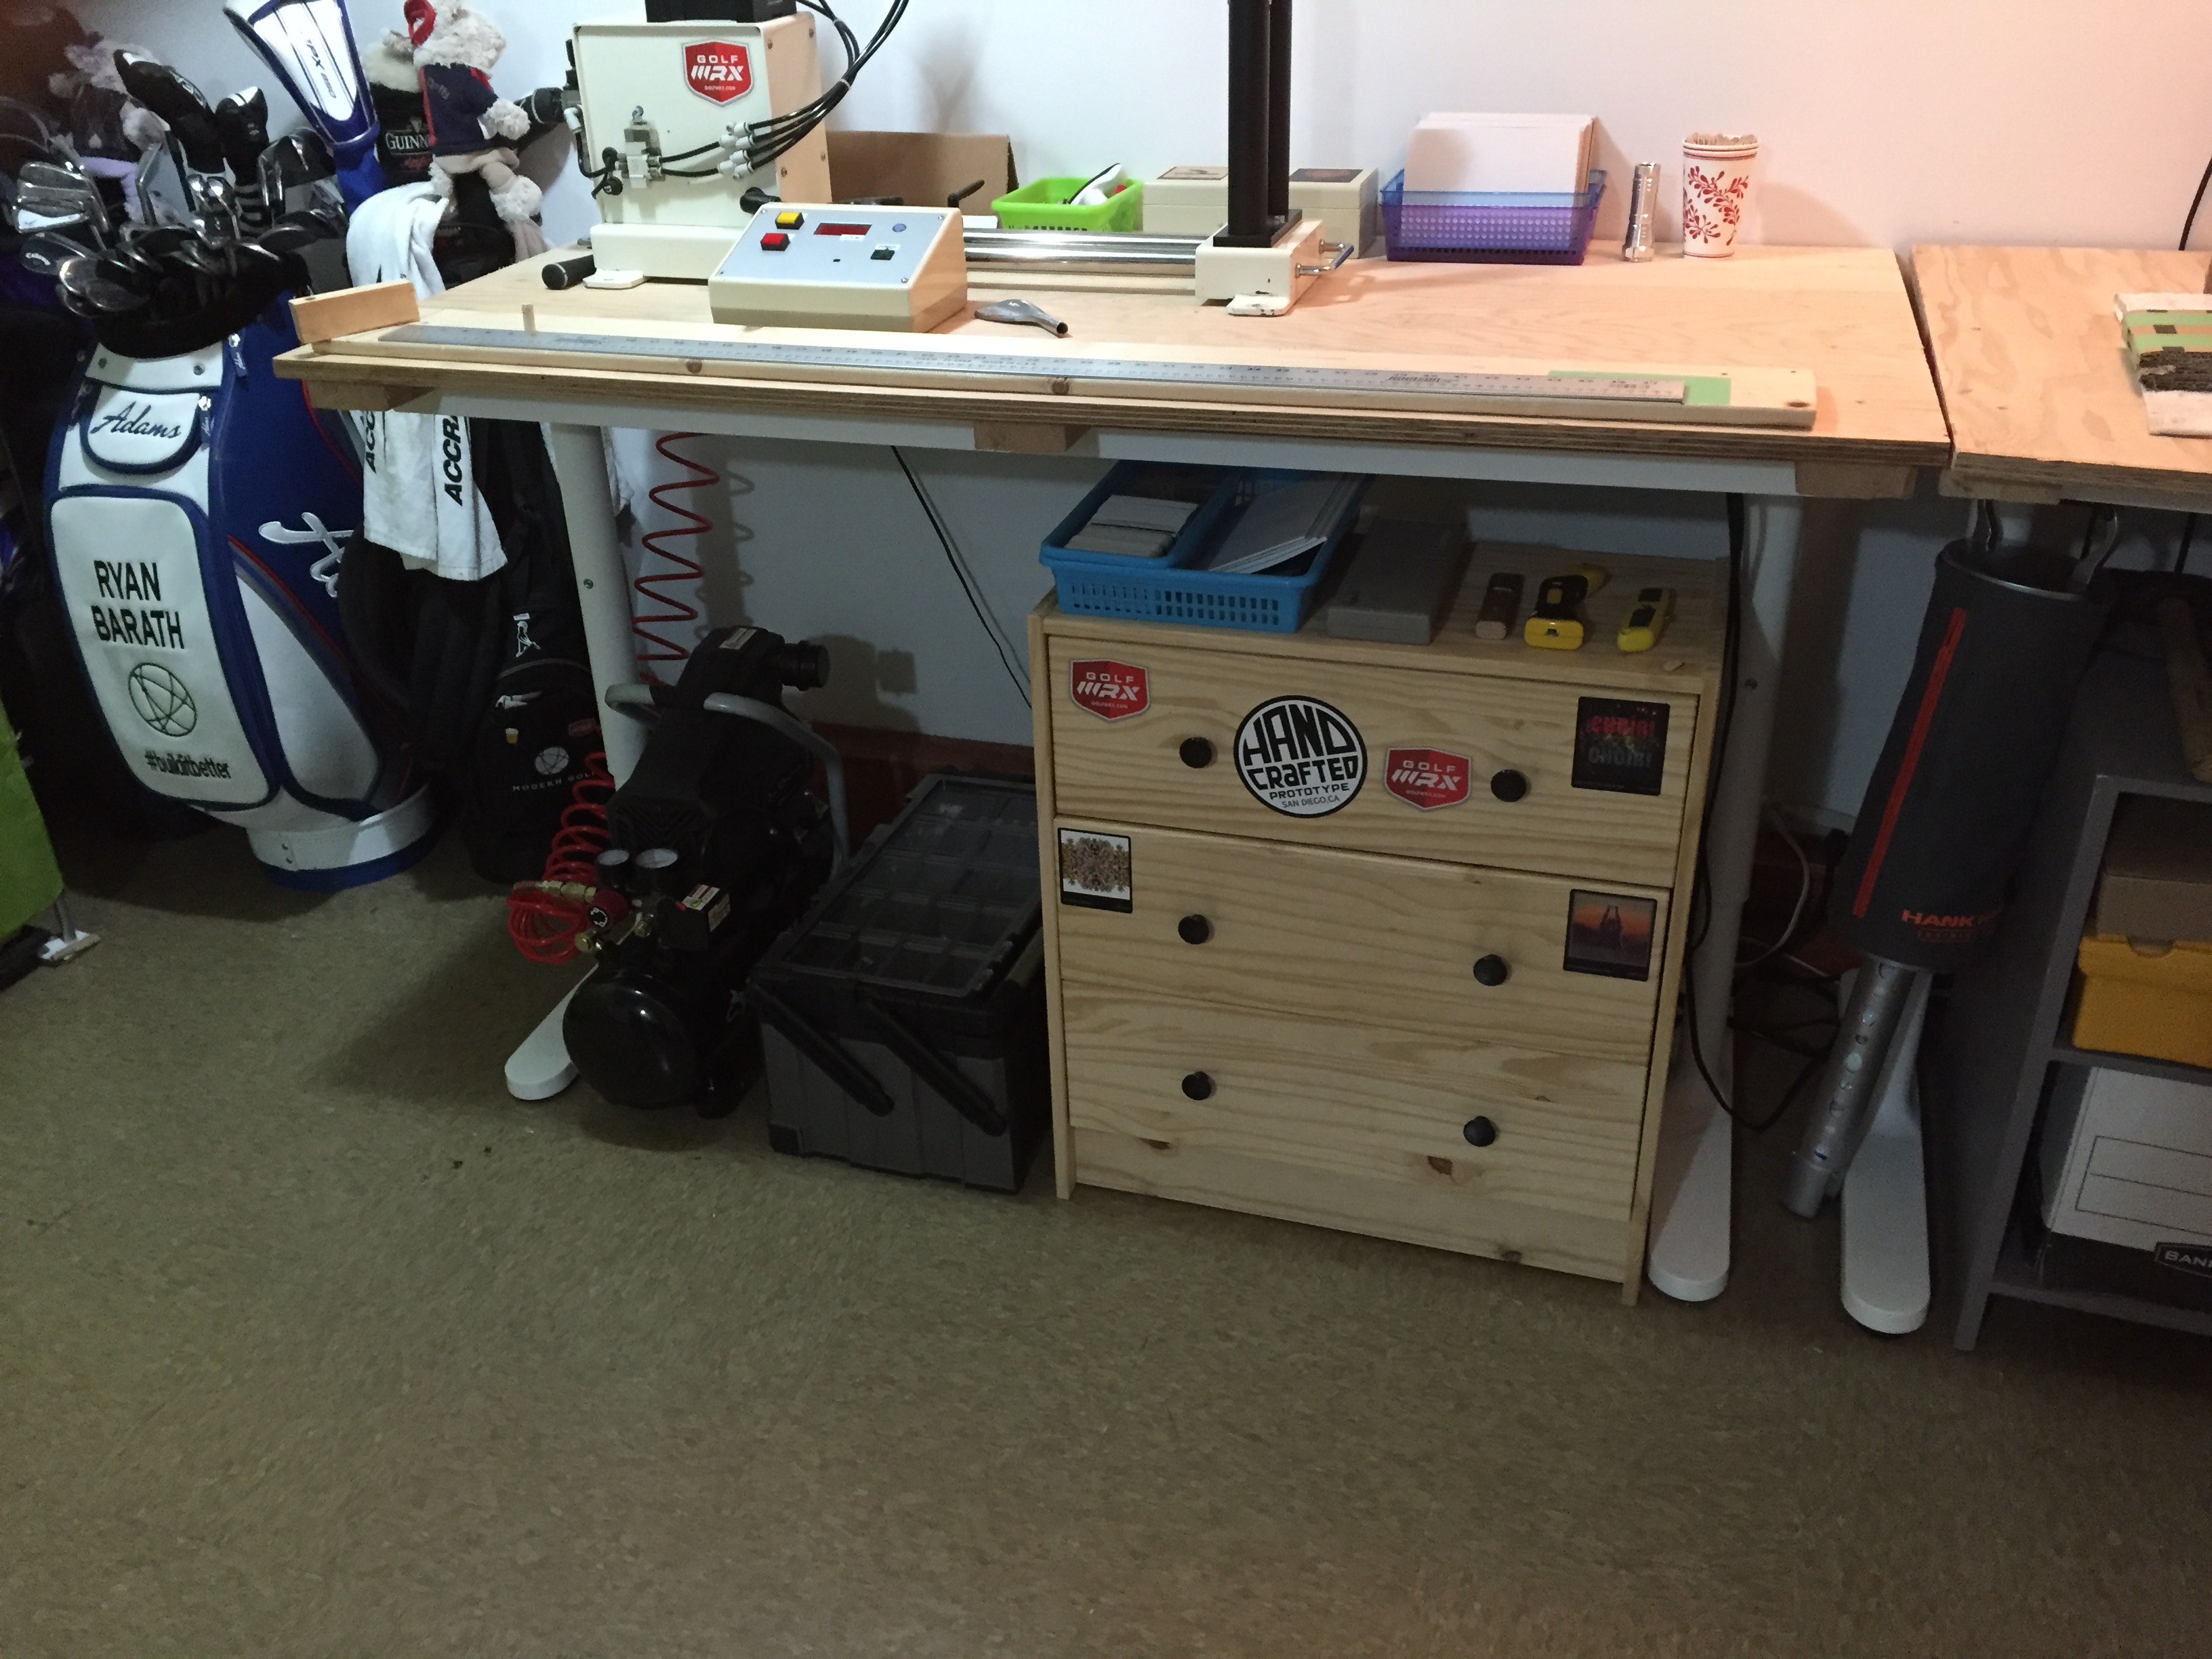
Maximizing the space under tables with storage solutions allow for less tabletop clutter.
The Tools
Unlike a golf bag where you are limited to 14 clubs, your build shop is only limited to the amount of space you have (and your budget). For me, every trip to the hardware store or to various tool supply shops has me finding another small tool or bit to help make things just a bit easier. Let’s put it this way; I have a lot of LED flashlights and finishing tools lying around.
What I’m trying to say is that what you should really focus on when building a shop from the ground up is quality over quantity. Having the proper tools will make building clubs and doing repairs a lot easier. There are very few things as frustrating as having a club not turn out the way you wanted because you weren’t prepared and didn’t have the right tools for the job.
Cordless Drill
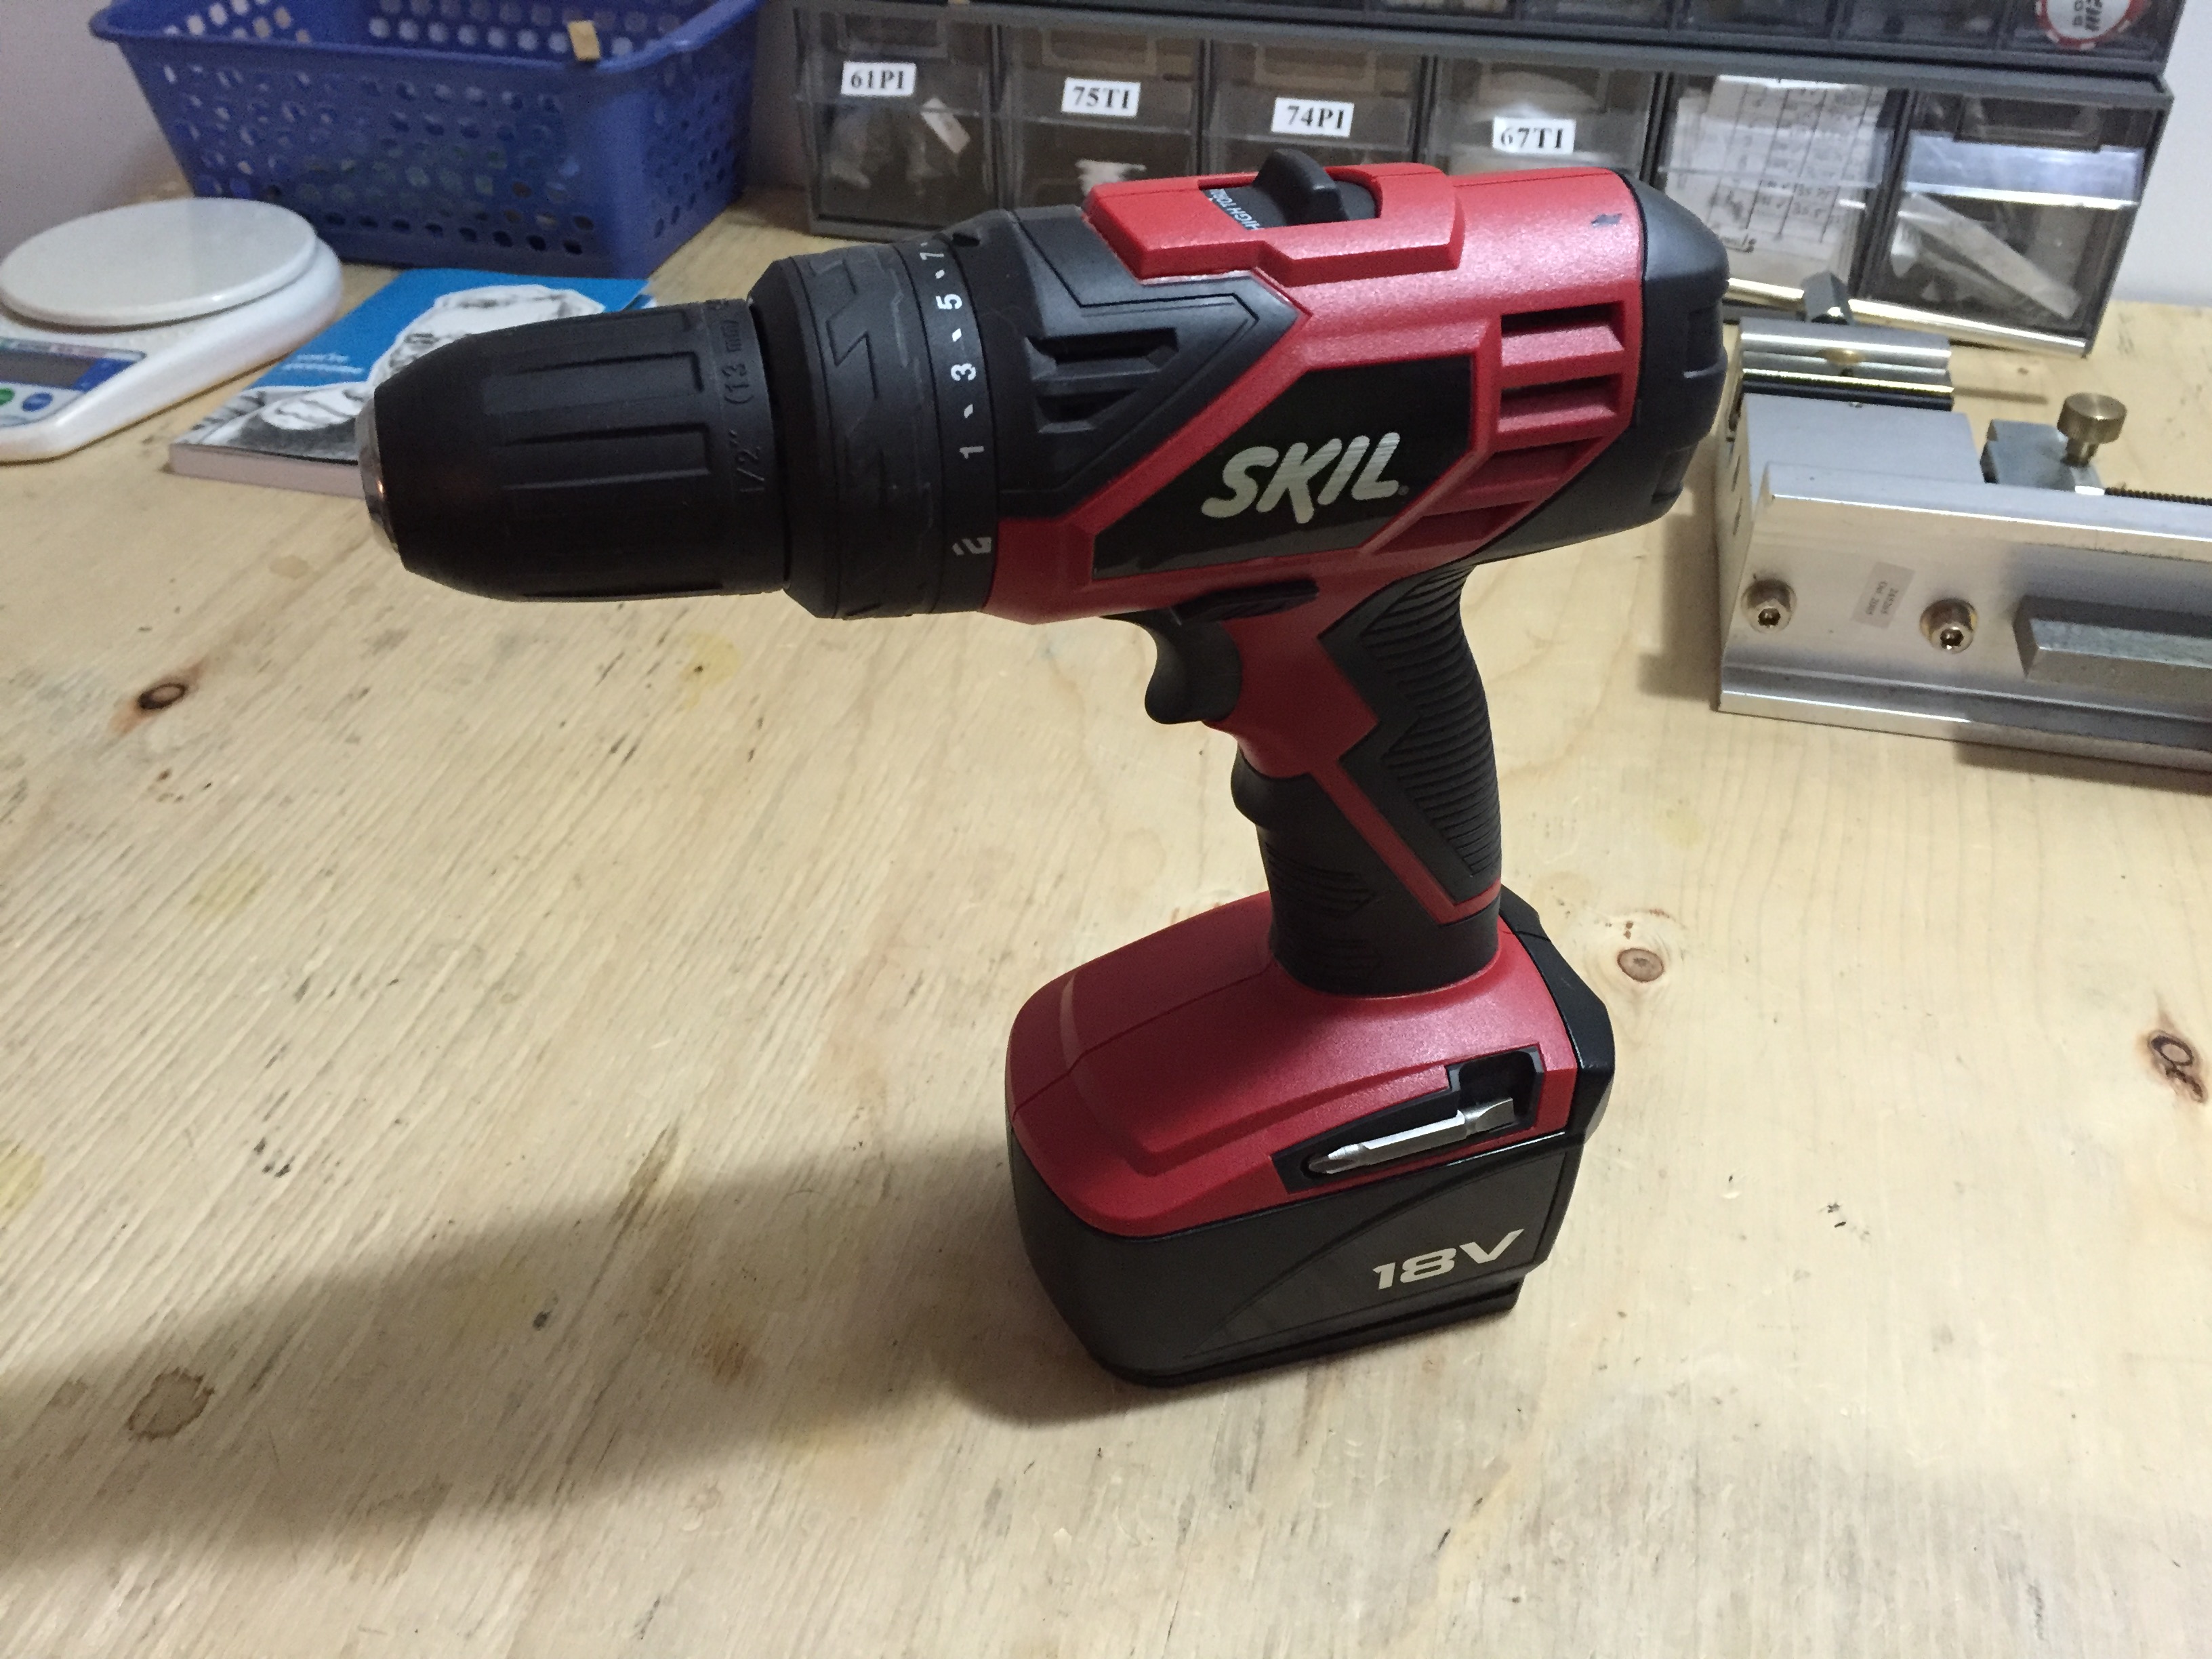
A cordless drill is great for small jobs and allows for quick moving around the shop.
A good cordless drill is a necessity, so make a quality purchase. I’m not an expert on drills, but any of the big name-brand drills that use an 18-20V battery have always done well for me. Make sure the drill has variable torque settings and, if possible, having one that has a built-in flashlight under the chuck makes it super easy to check hosels for debris while drilling. It’s also more ideal to find one in a kit that has two batteries with the charger — that way, if you’re drilling a lot for a single job, you will always have a fresh battery. You should expect to pay $119-$200.
I have seen many shops use a drill press, but personally I never found a real need for one on a day-to-day basis (plus they can take up a bunch of space). Drill presses can be useful for porting wedges, but that’s really not home-shop use.
Metal Drill Bits
Here’s where things get personal for me. I had an inexpensive drill bit break almost instantly and go right into the palm of my left hand (and off to the ER I went). I was not a happy camper, but I did learn a very valuable lesson; don’t buy cheap drill bits and never drill toward another body part. I still have a small scar to remind me of that mistake, and it also serves as a reminder to never take what you may consider a simple repair for granted. Bit sets can often be found on sale, but a small collection of proper bits will run you about $100.
Also, make sure to purchase proper metal drill bits. I’ve lost count of how many times I’ve seen people try and use either masonry or wood drill bits with little success.
Chop Saw
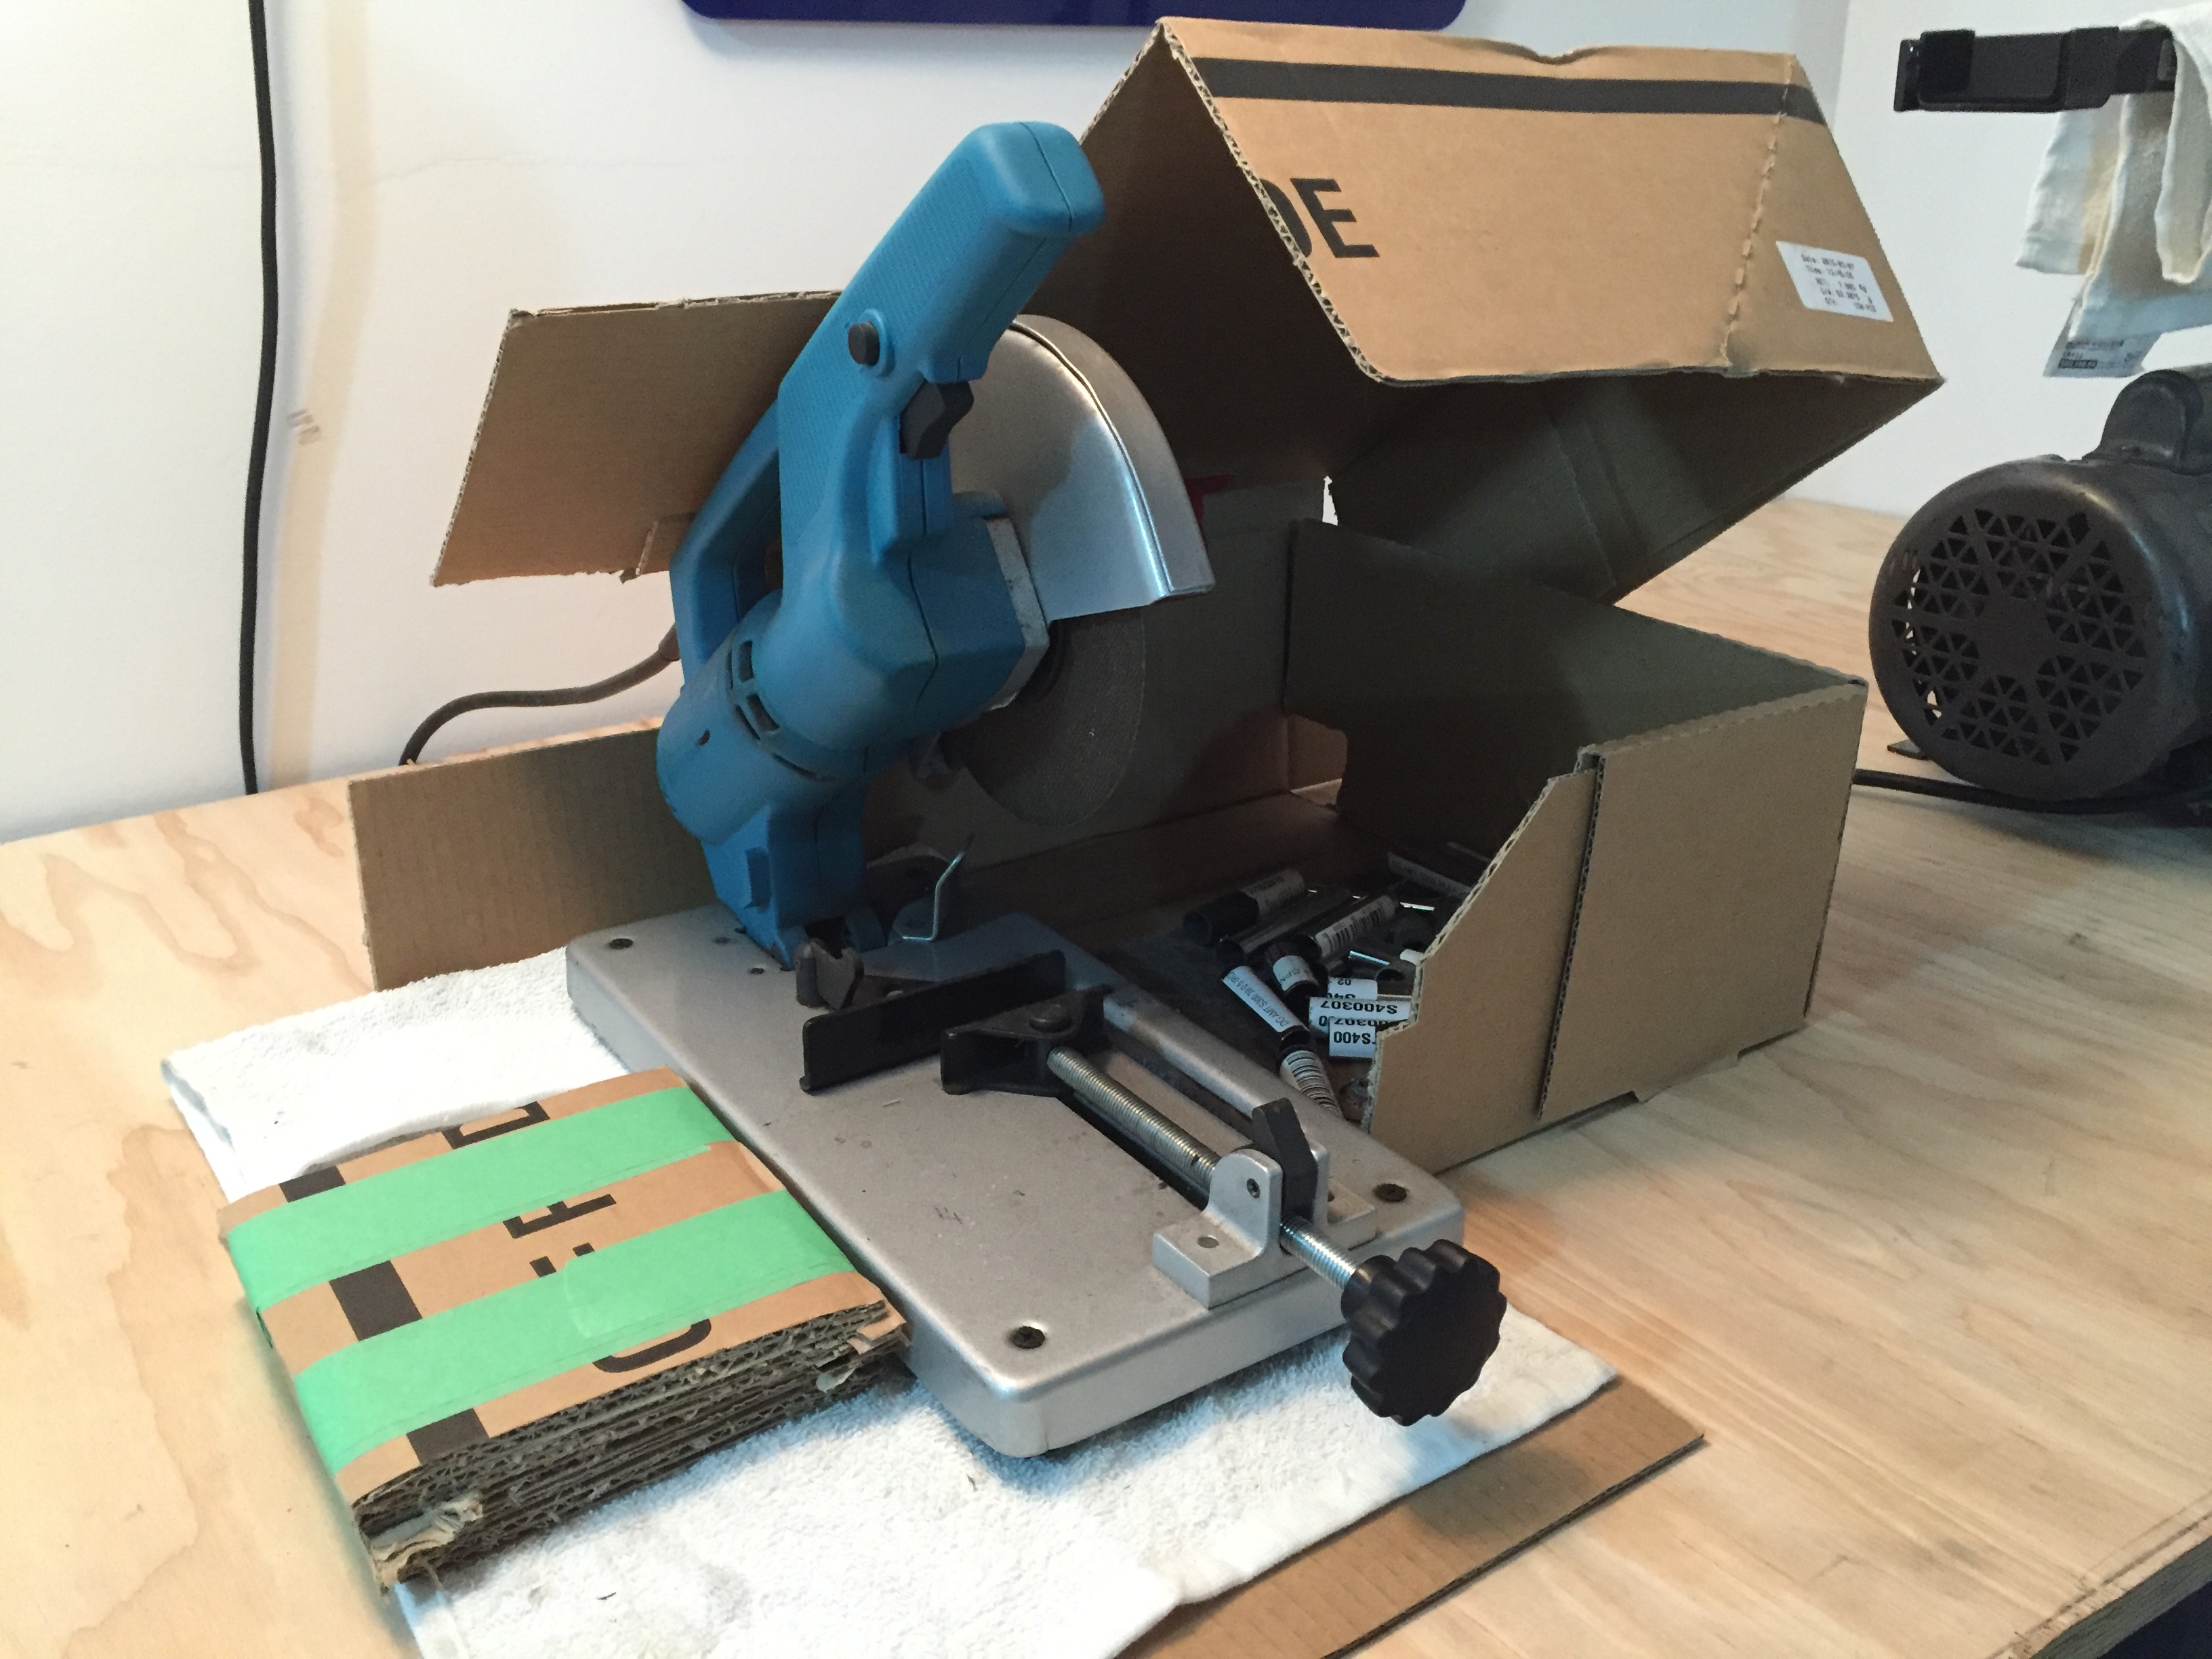
My saw setup has a simple negative air system and catch tray.
A good chop saw is worth every penny. There’s nothing worse than using a crappy saw and having it splinter the butt section of an expensive driver shaft. My personal favorite, and the favorite of many professionals, is the Gryphon Miter Saw. Almost any video in a tour van features one of these saws… and for good reason. They are compact, durable, use relatively inexpensive blades,and also make very precise cuts at high RPM. The better the blades and higher the RPM, the better the cut.
I don’t do that much volume in my basement, so I went with a more basic chop saw from GolfWorks that uses 6-inch blades. I did my research. It is still a good quality saw and worked with my budget, but compared to the Gryphon that I used in the past it is louder. The Gryphon is $260 direct from Gryphon, while mine was in the $80 range from GolfWorks. I’ve had my saw from almost eight years, and although is doesn’t see anything close to an industrial workload it performs great.
Side Note: Just like with drill bits, be sure to buy quality cutting wheels made for steel and other fibers. The thinner the better, because they will help keep dust down and reduce noise.
Belt Sander
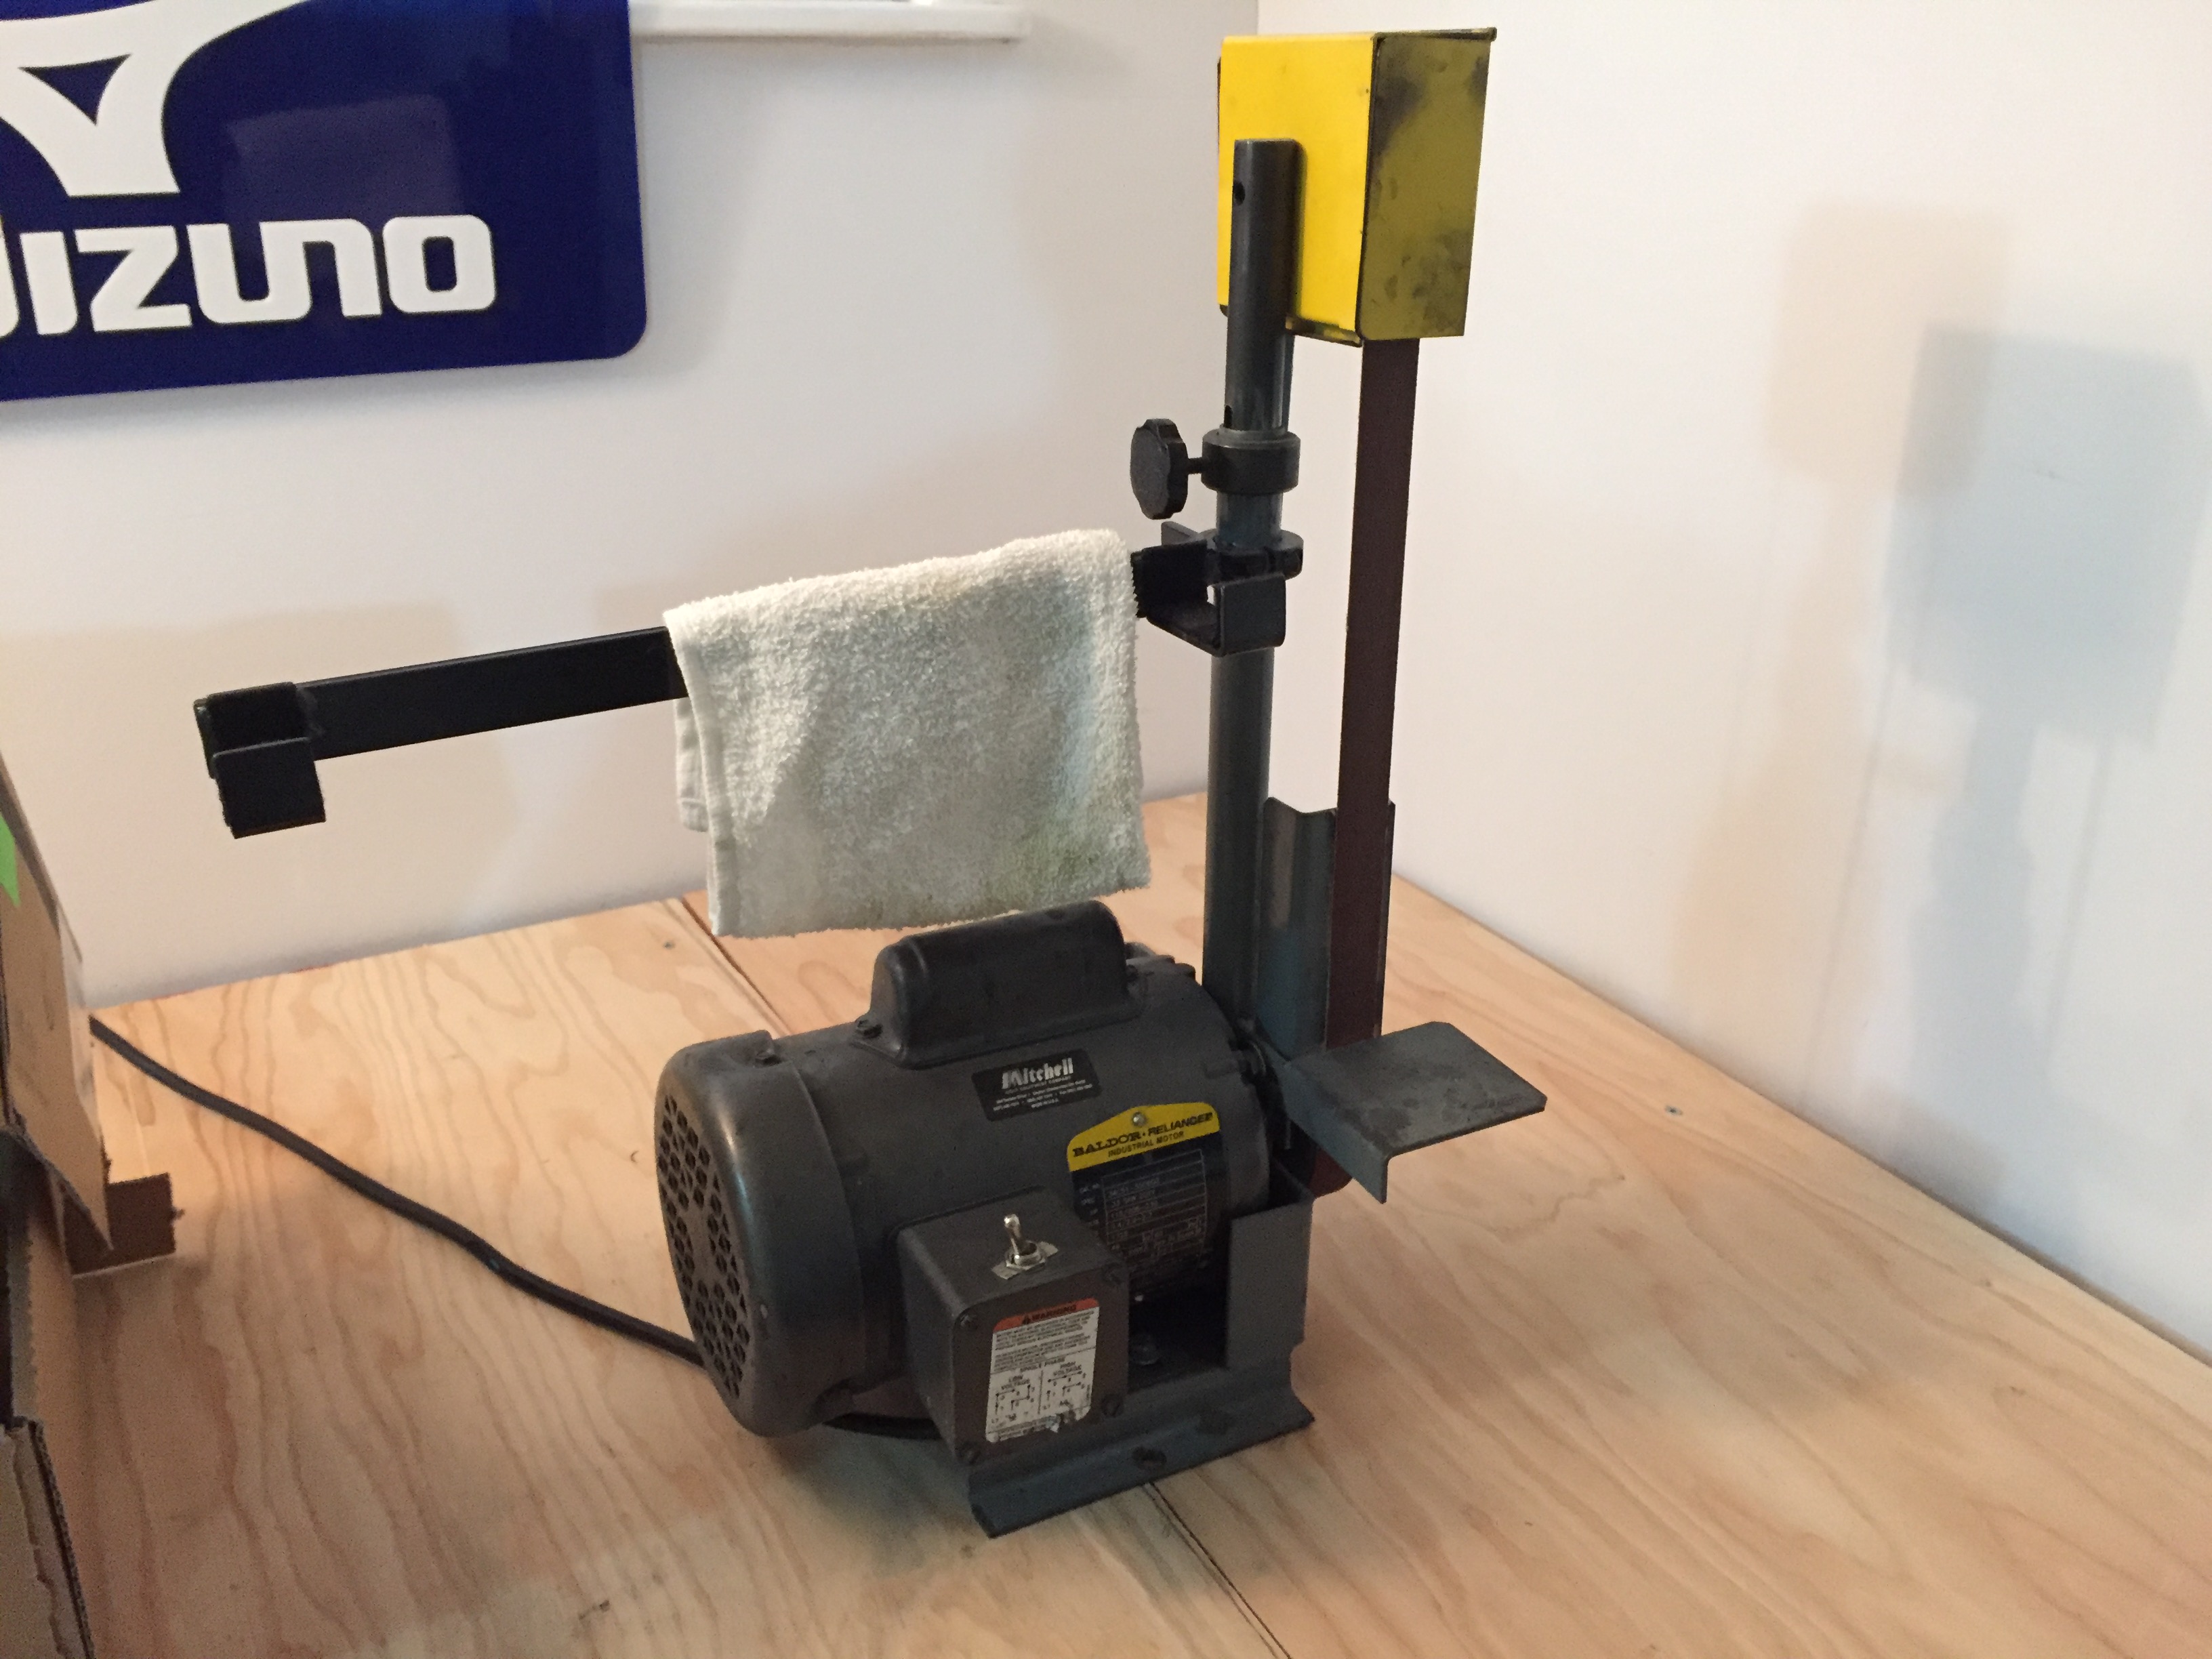
My Baldor motor with 42-inch belt attachment and ferrule turning arm.
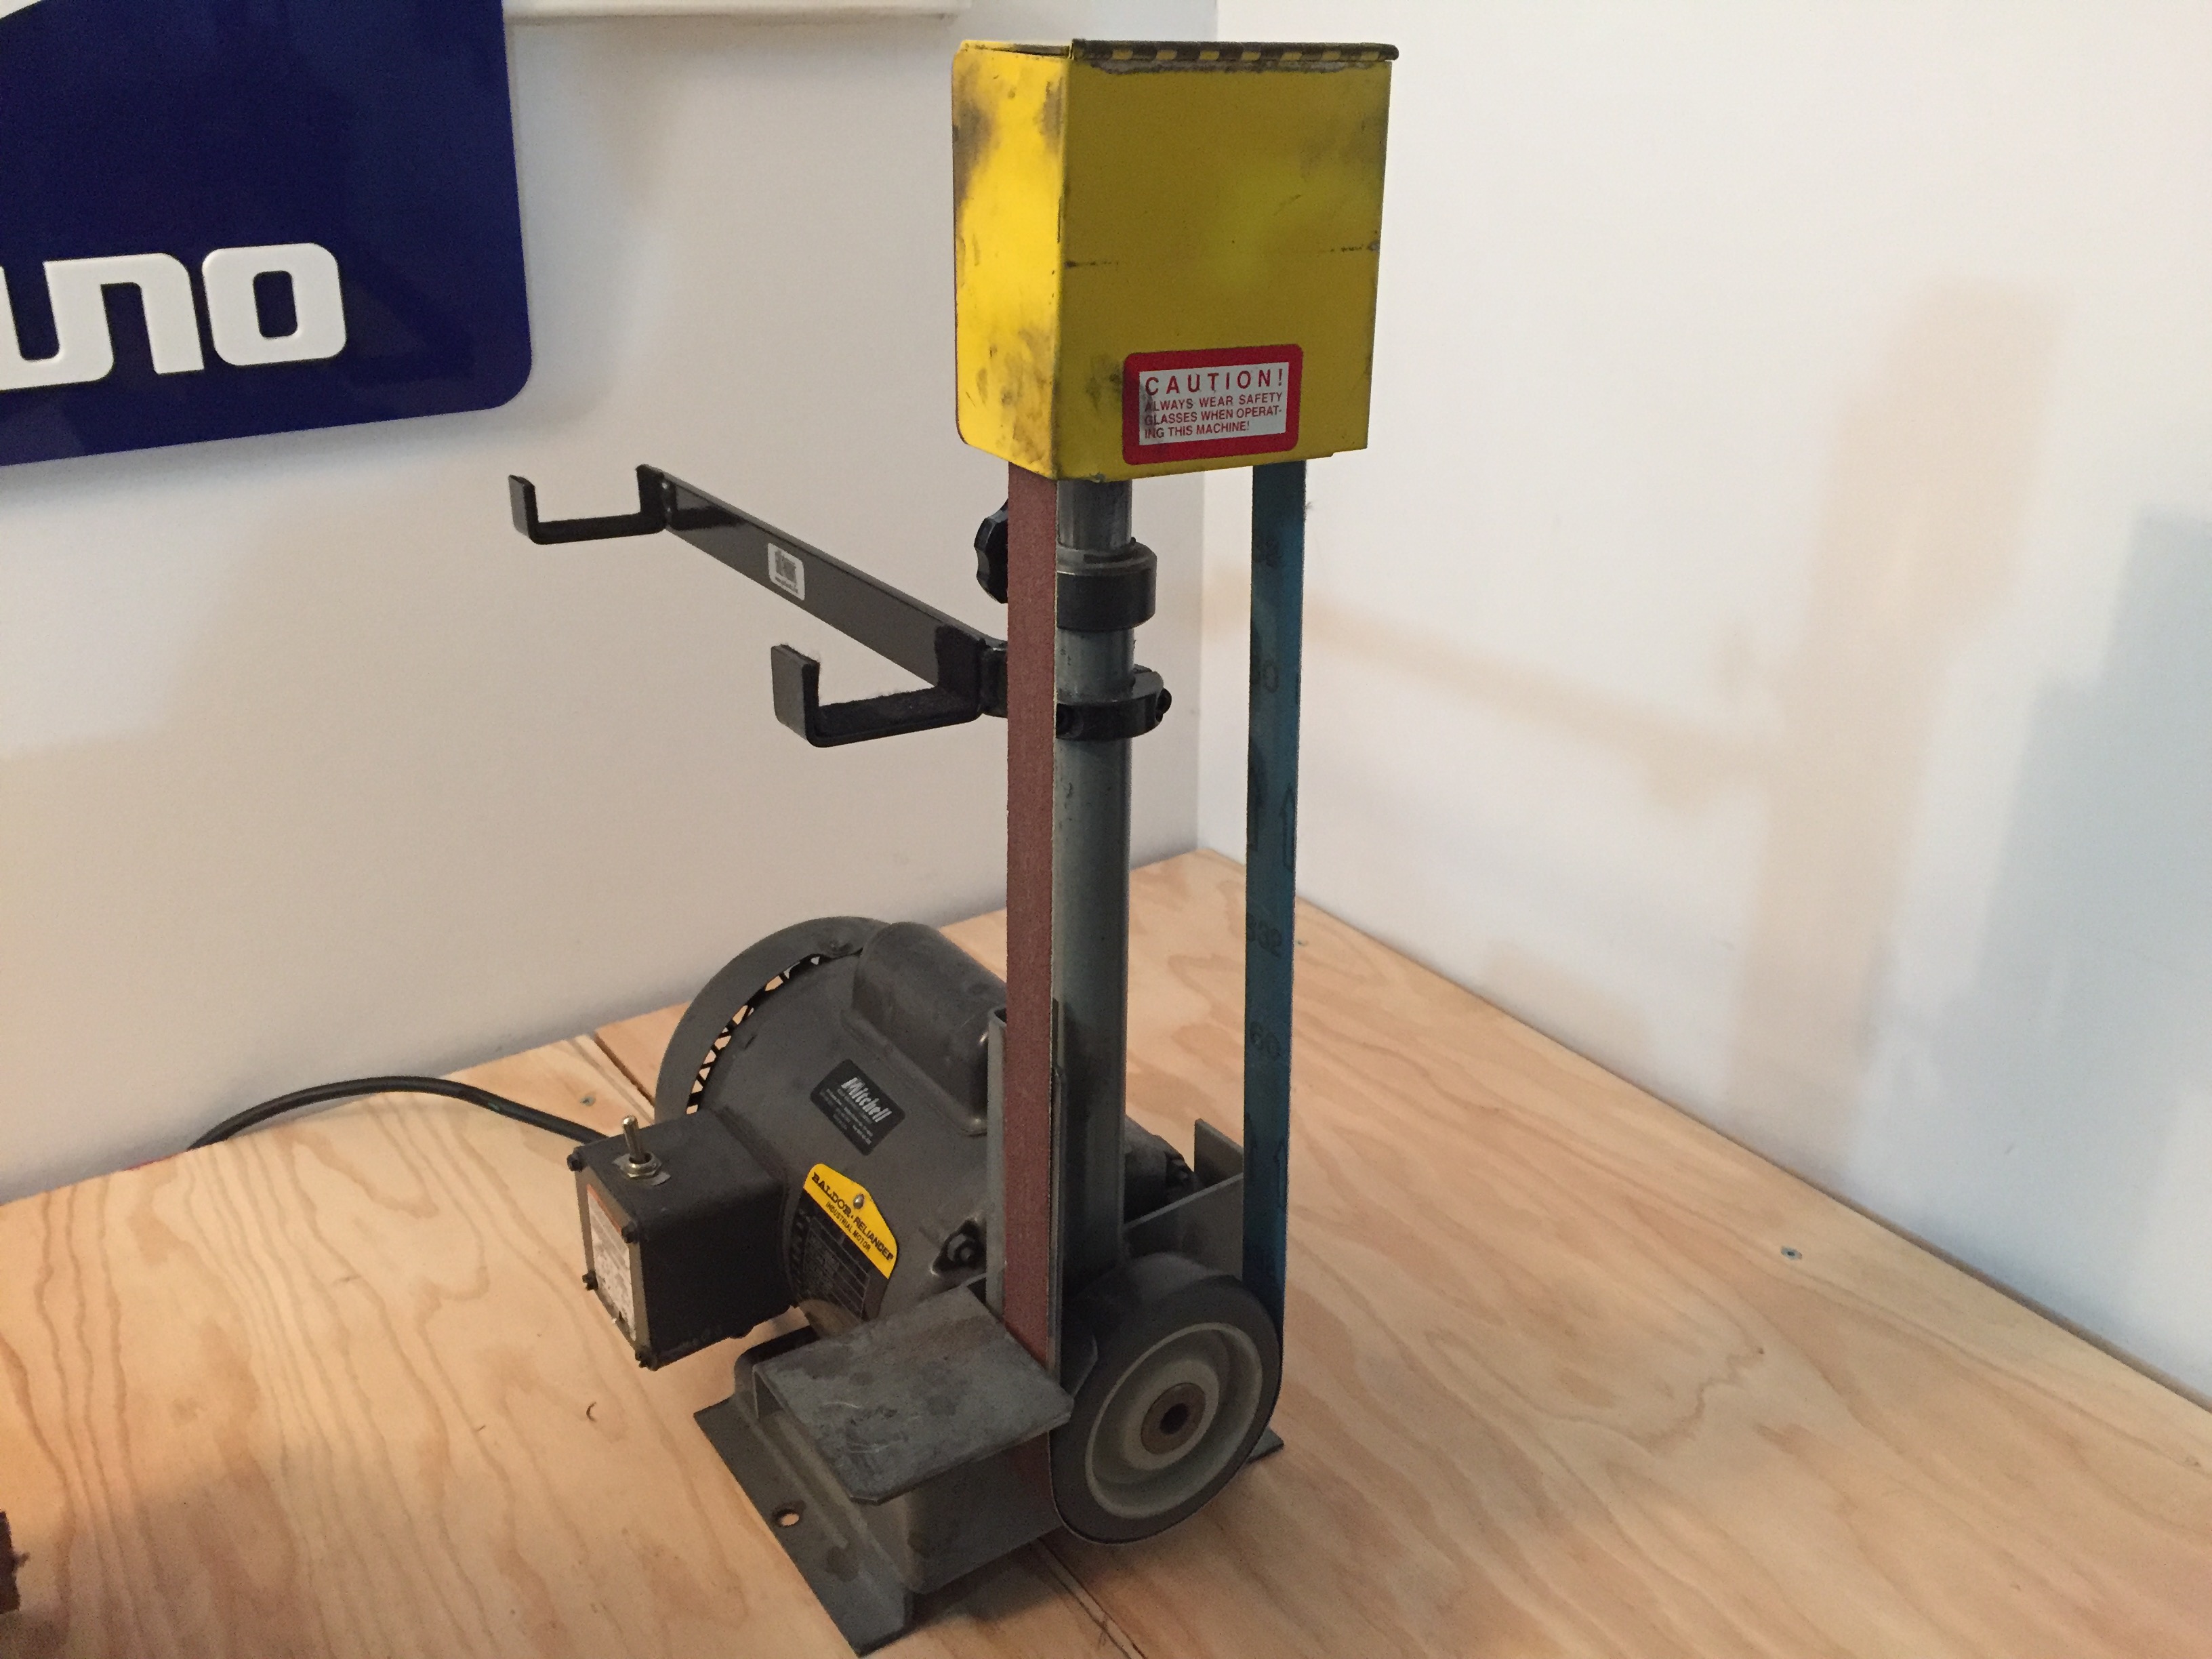
A side view of my belt sander/ferrule turning attachment.
Who doesn’t love the look of a properly turned-down ferrule that has just been shined with acetone? To me, this is one of the most important aspects of finishing a club. It seems simple, but it took me a long time to get really good at it.
To properly turn down a ferrule you need a belt sander, and don’t skimp on a cheap one. The best ones use 42-inch belts, and I prefer the DuraBrite Felt belts since they don’t take too much material off the ferrule at once. This makes them more forgiving, especially for beginners, and I find them much cleaner, which makes final finishing easier. You can use a belt sander with a inexpensive motor for around or under $100, but you can’t go cheap on the attachments. The attachment shown here is the most widely used and reliable one that I’ve found and costs around $200 from most suppliers. Some of the most reliable tools found in shops have Baldor Motors that alone start around $350. Since grinders are very common tools, you can often get a good deal on a used one if you stay patient.
Dust Collector
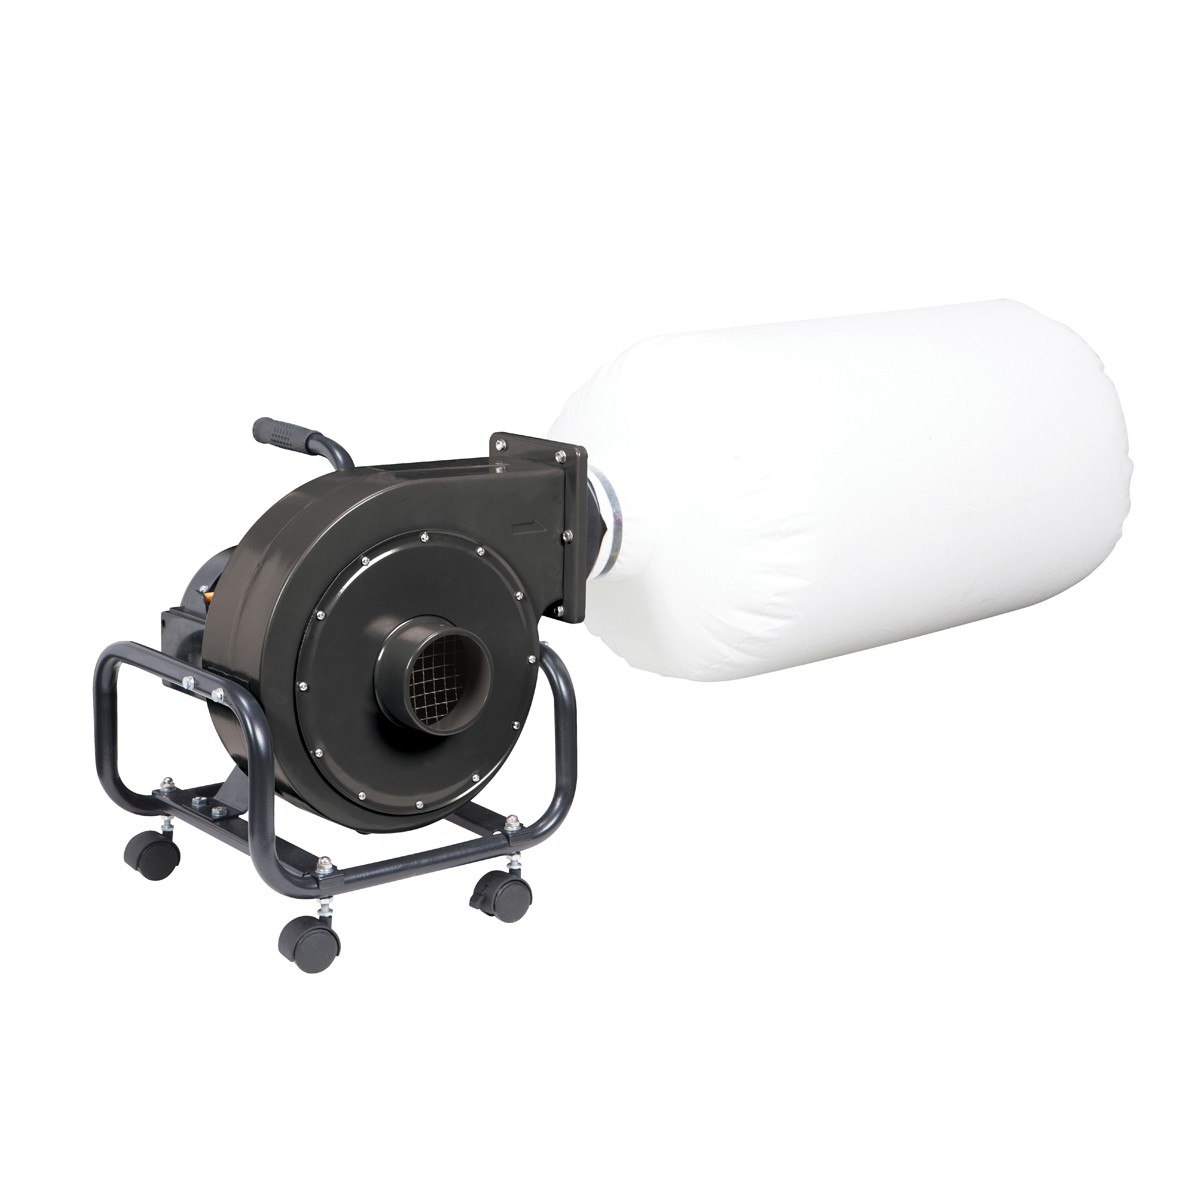
Harbour Freight dust collector
You can’t cut or sand at any volume without creating dust. I don’t know what the long-term effects of breathing in graphite and steel dust are, but I’m not ready to be a test subject either. You may have noticed the ugly looking box around my chop saw. It’s not only a catch basin for shaft ends, but is also used in conjunction with a shop vac to keep airborne dust to a minimum in my basement. I designed it to act as a mini-negative air system.
Most tool shops like Harbour Freight (or Princess Auto/Busy Bee Tools in Canada) have some type of inexpensive dust collector, and even a shop vac can do the trick. When purchasing a dust collection system, look out for CFM, or cubic feet per minute, which explains how much air/dust the system can collect as once. The more air that the system can pull through the filter the more dust it can pull out of the air. A simple cyclone system is about $100, but you can find mini 1HP systems (lots of power for a saw or small sander) for about $175 on sale or between $200-$250 full price.
Gripping Station
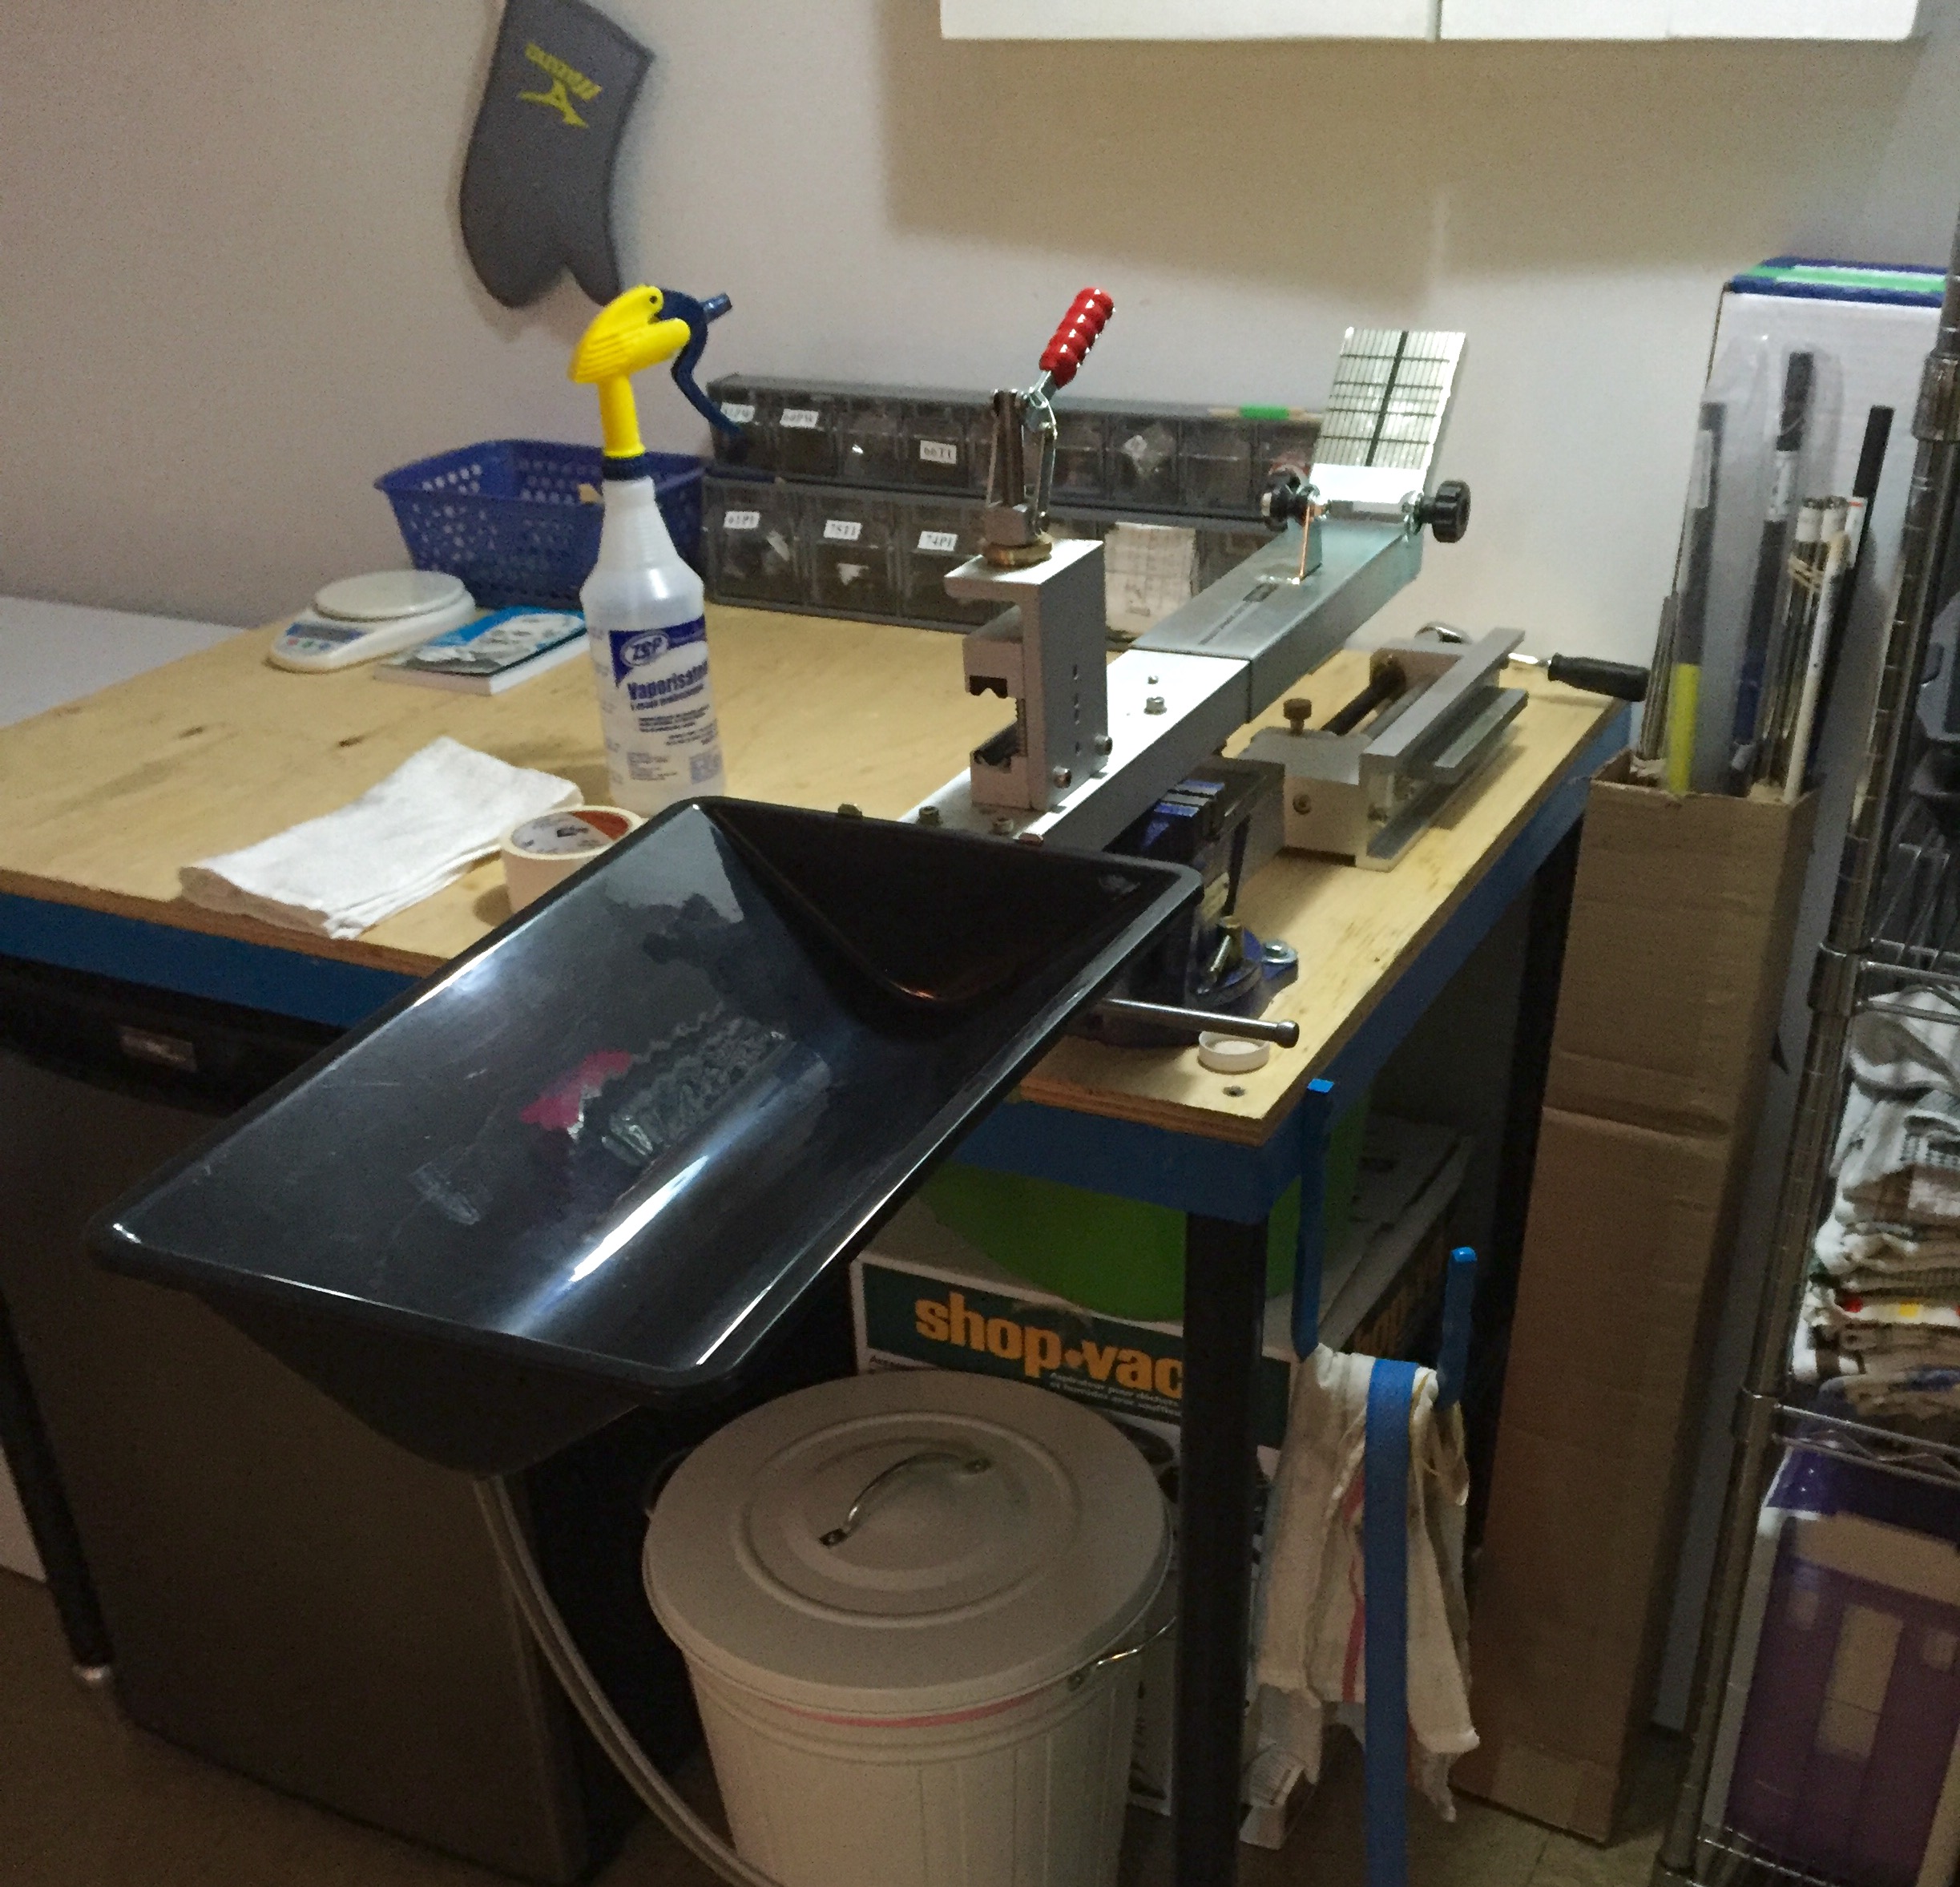
My GolfMechanix gripping station with catch basin in vice.
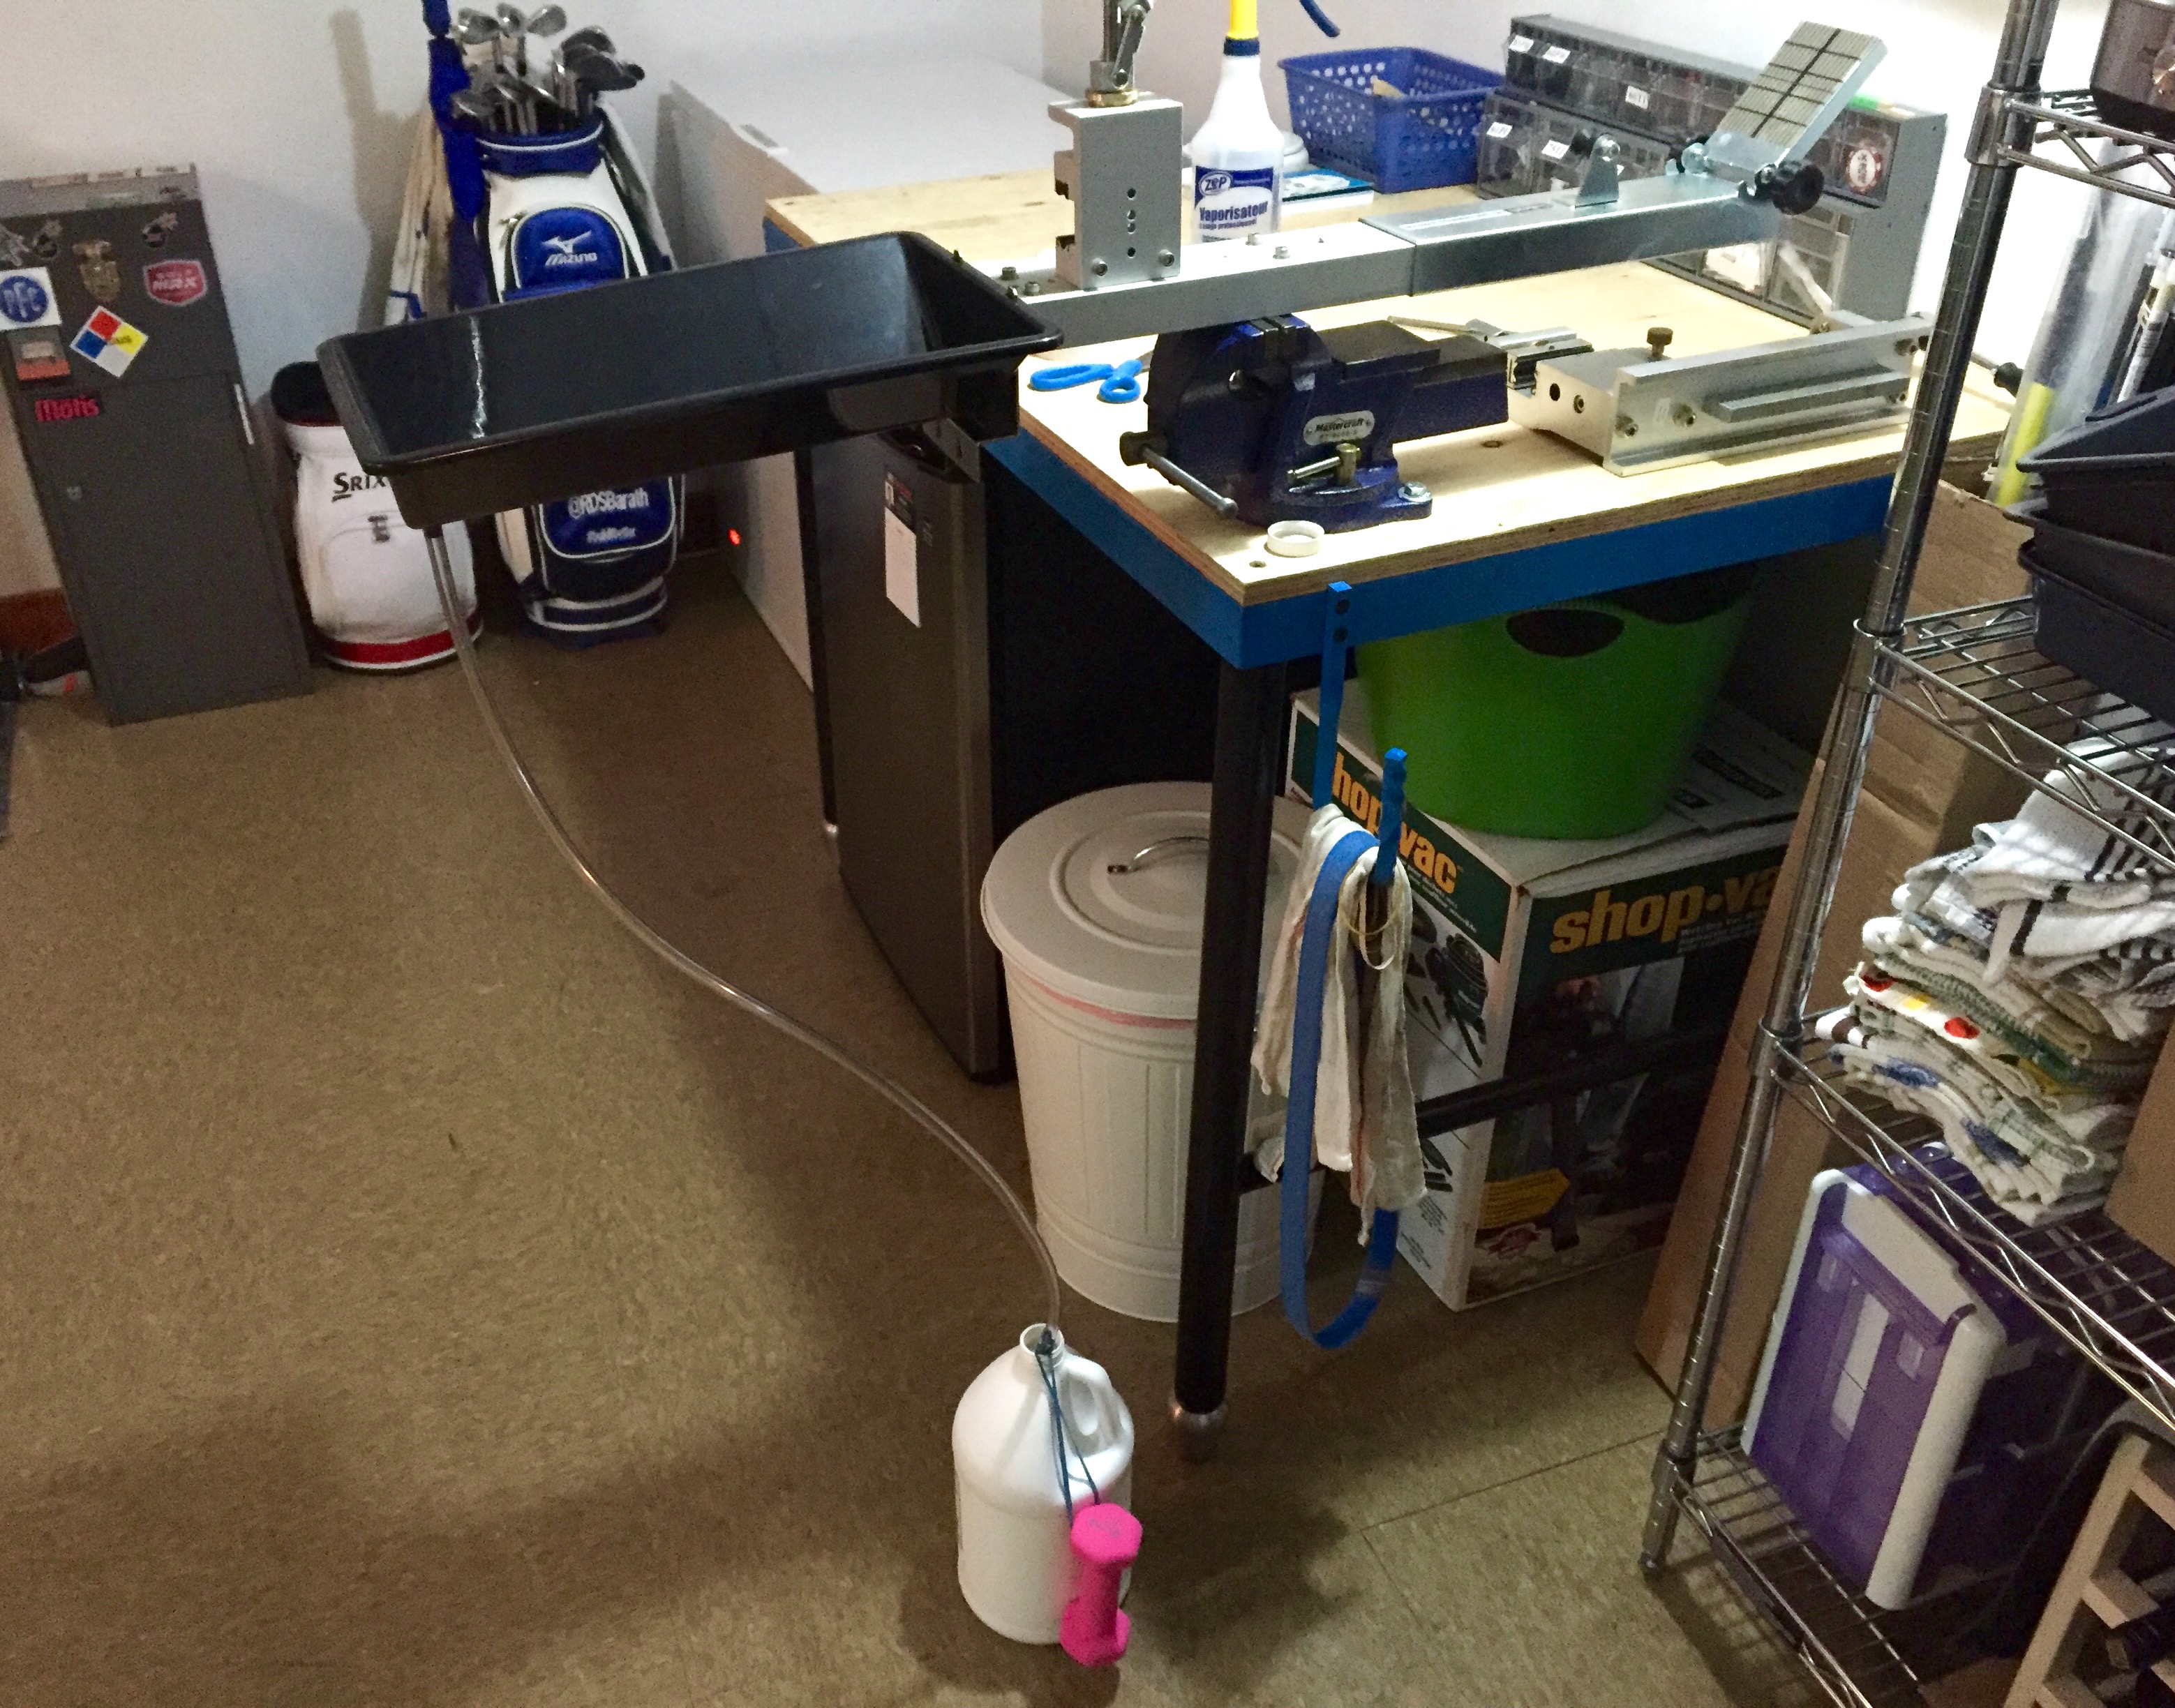
Having loose solvent is a hazard. Proper drainage and storage is key.
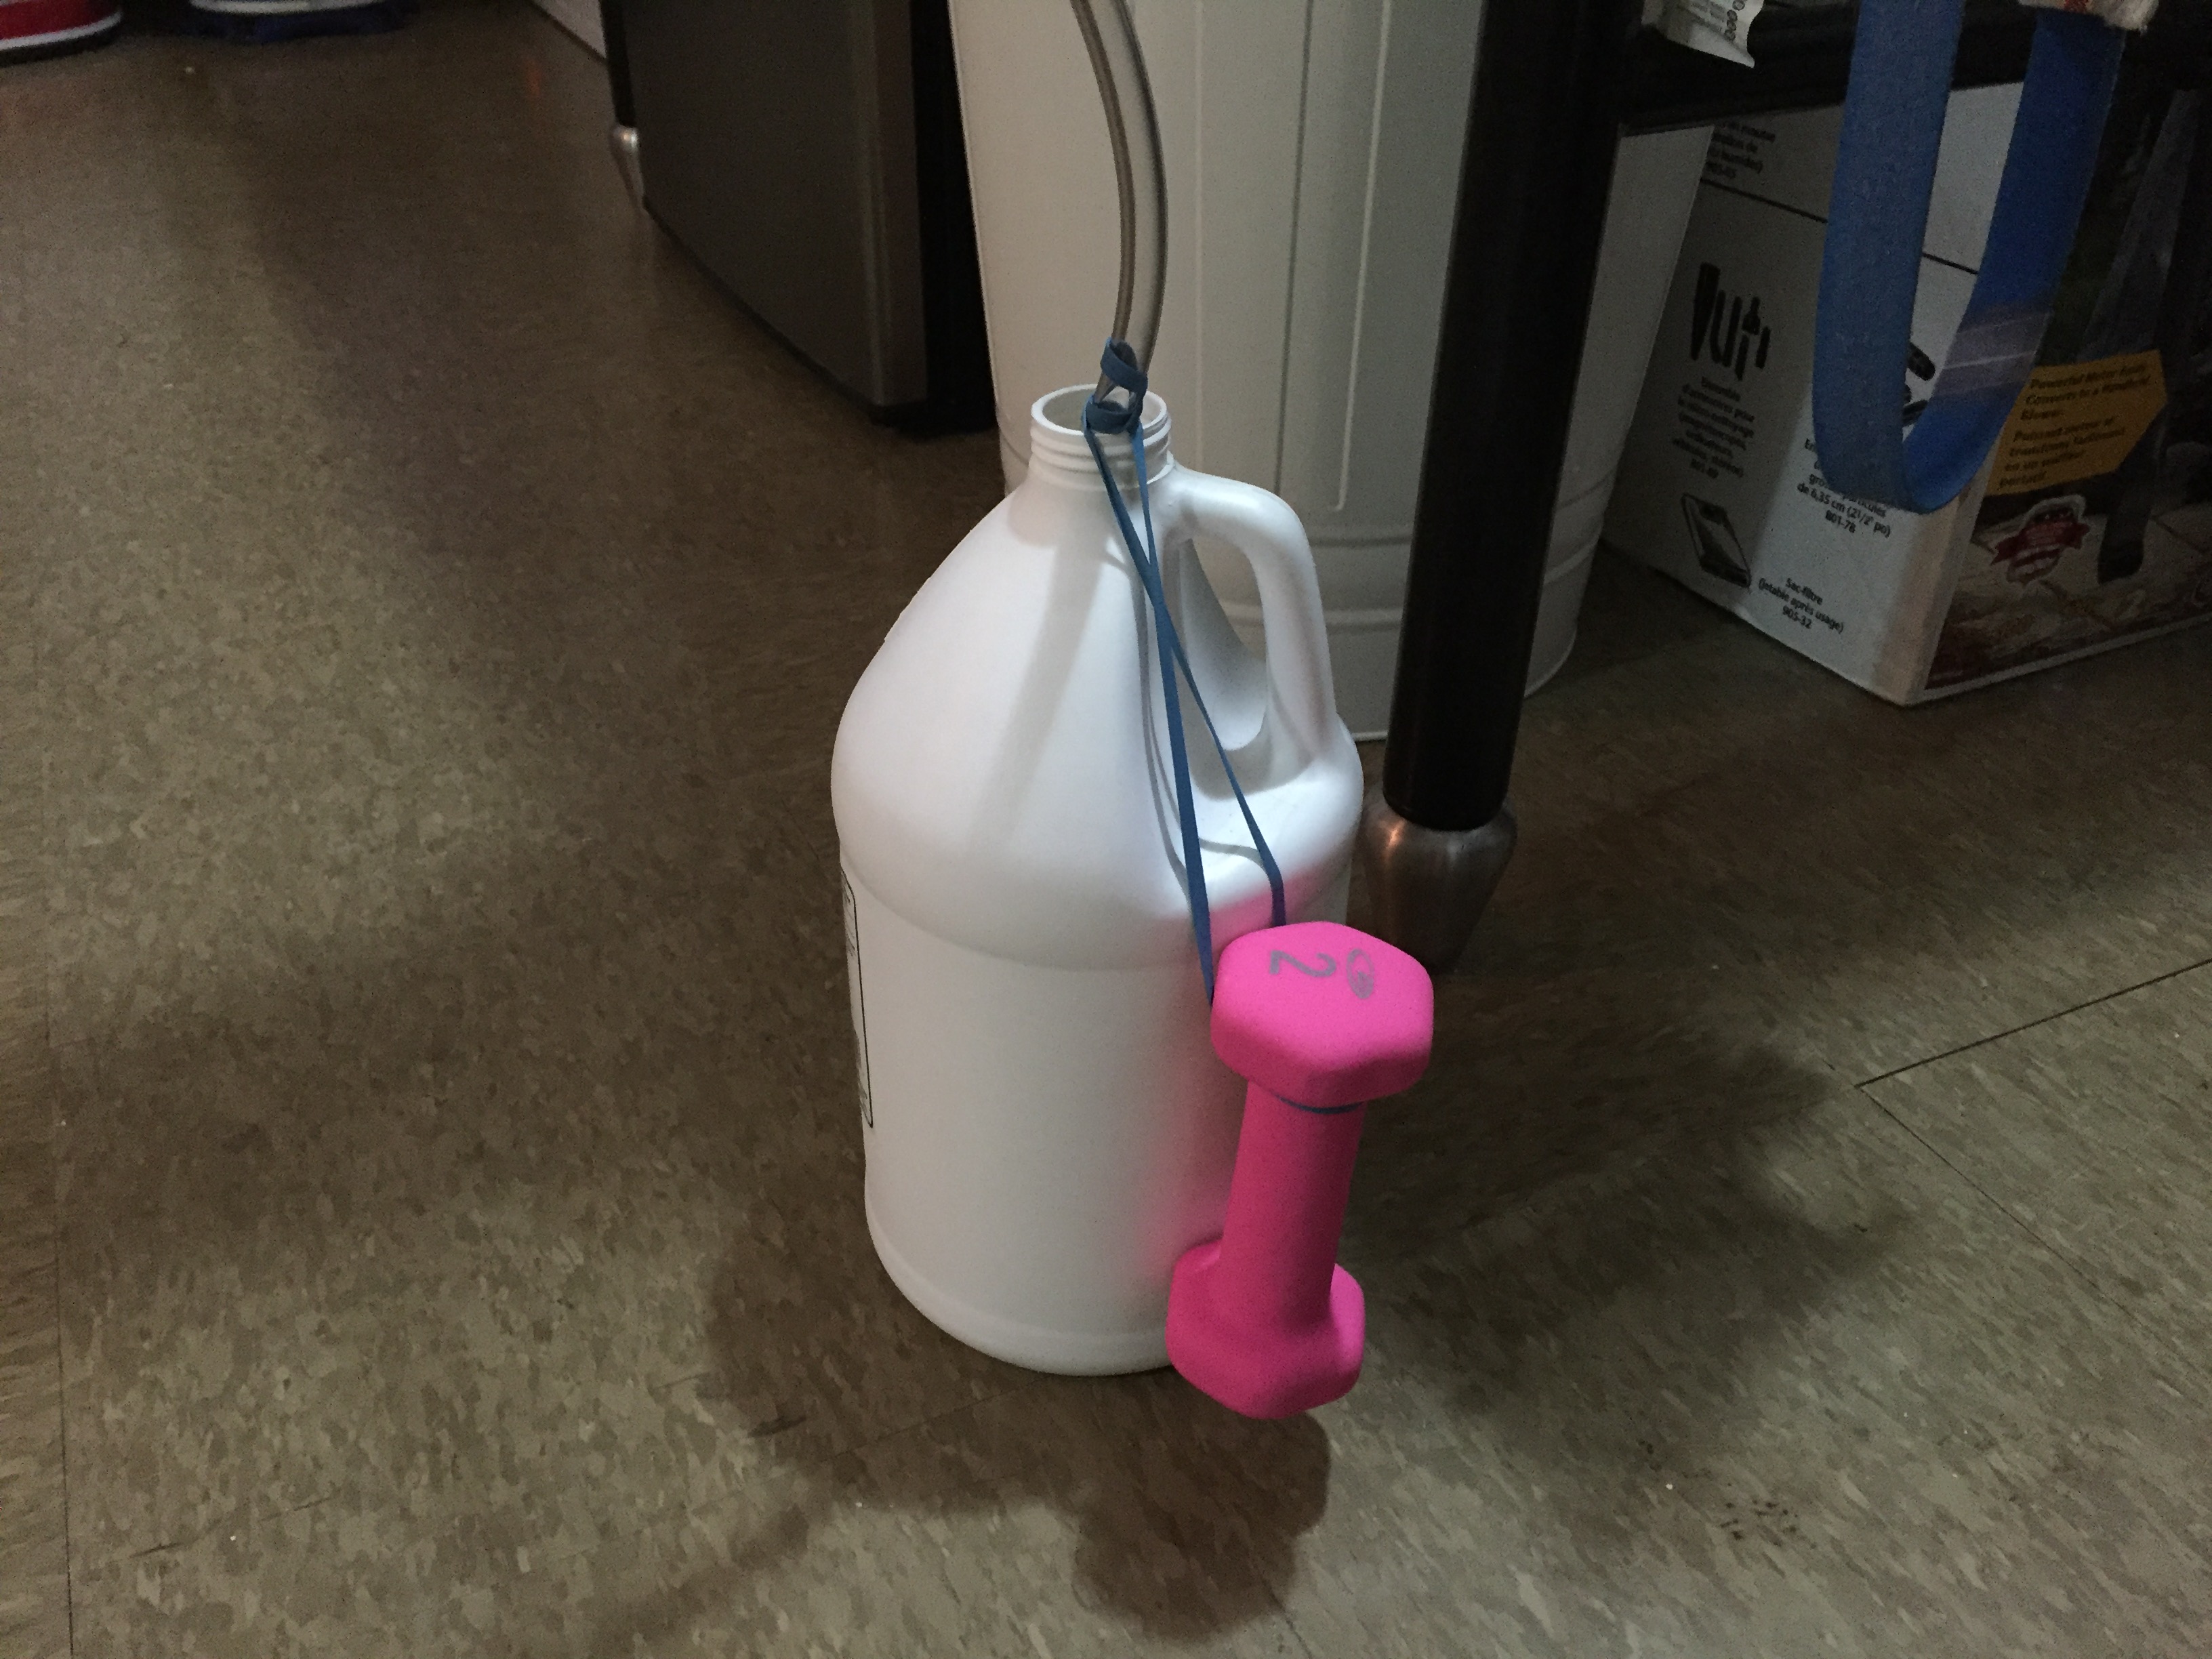
This simple setup makes sure the tube stays in the catch bottle.
When it comes to gripping clubs, the best solution is a proper gripping station that will collect and recycle grip solvent and safely hold a club “square.” The nicest shop I ever worked in had foot-activated pneumatic clamps that automatically adjusted pressure, just like a tour van. Starting with solvent, it’s never good to run that stuff into a drain or have it sitting in an open container, especially with children or pets kicking around. My setup, although not perfect, is very effective at not wasting solvent and allowing me to get grips on in a timely fashion. The picture shows exactly how I recycle my solvent. Like I said, it’s not fancy, but it is very effective. This exact system from GolfMechanix is $185 before the cost of solvent or tape.
Graphite Shaft Puller
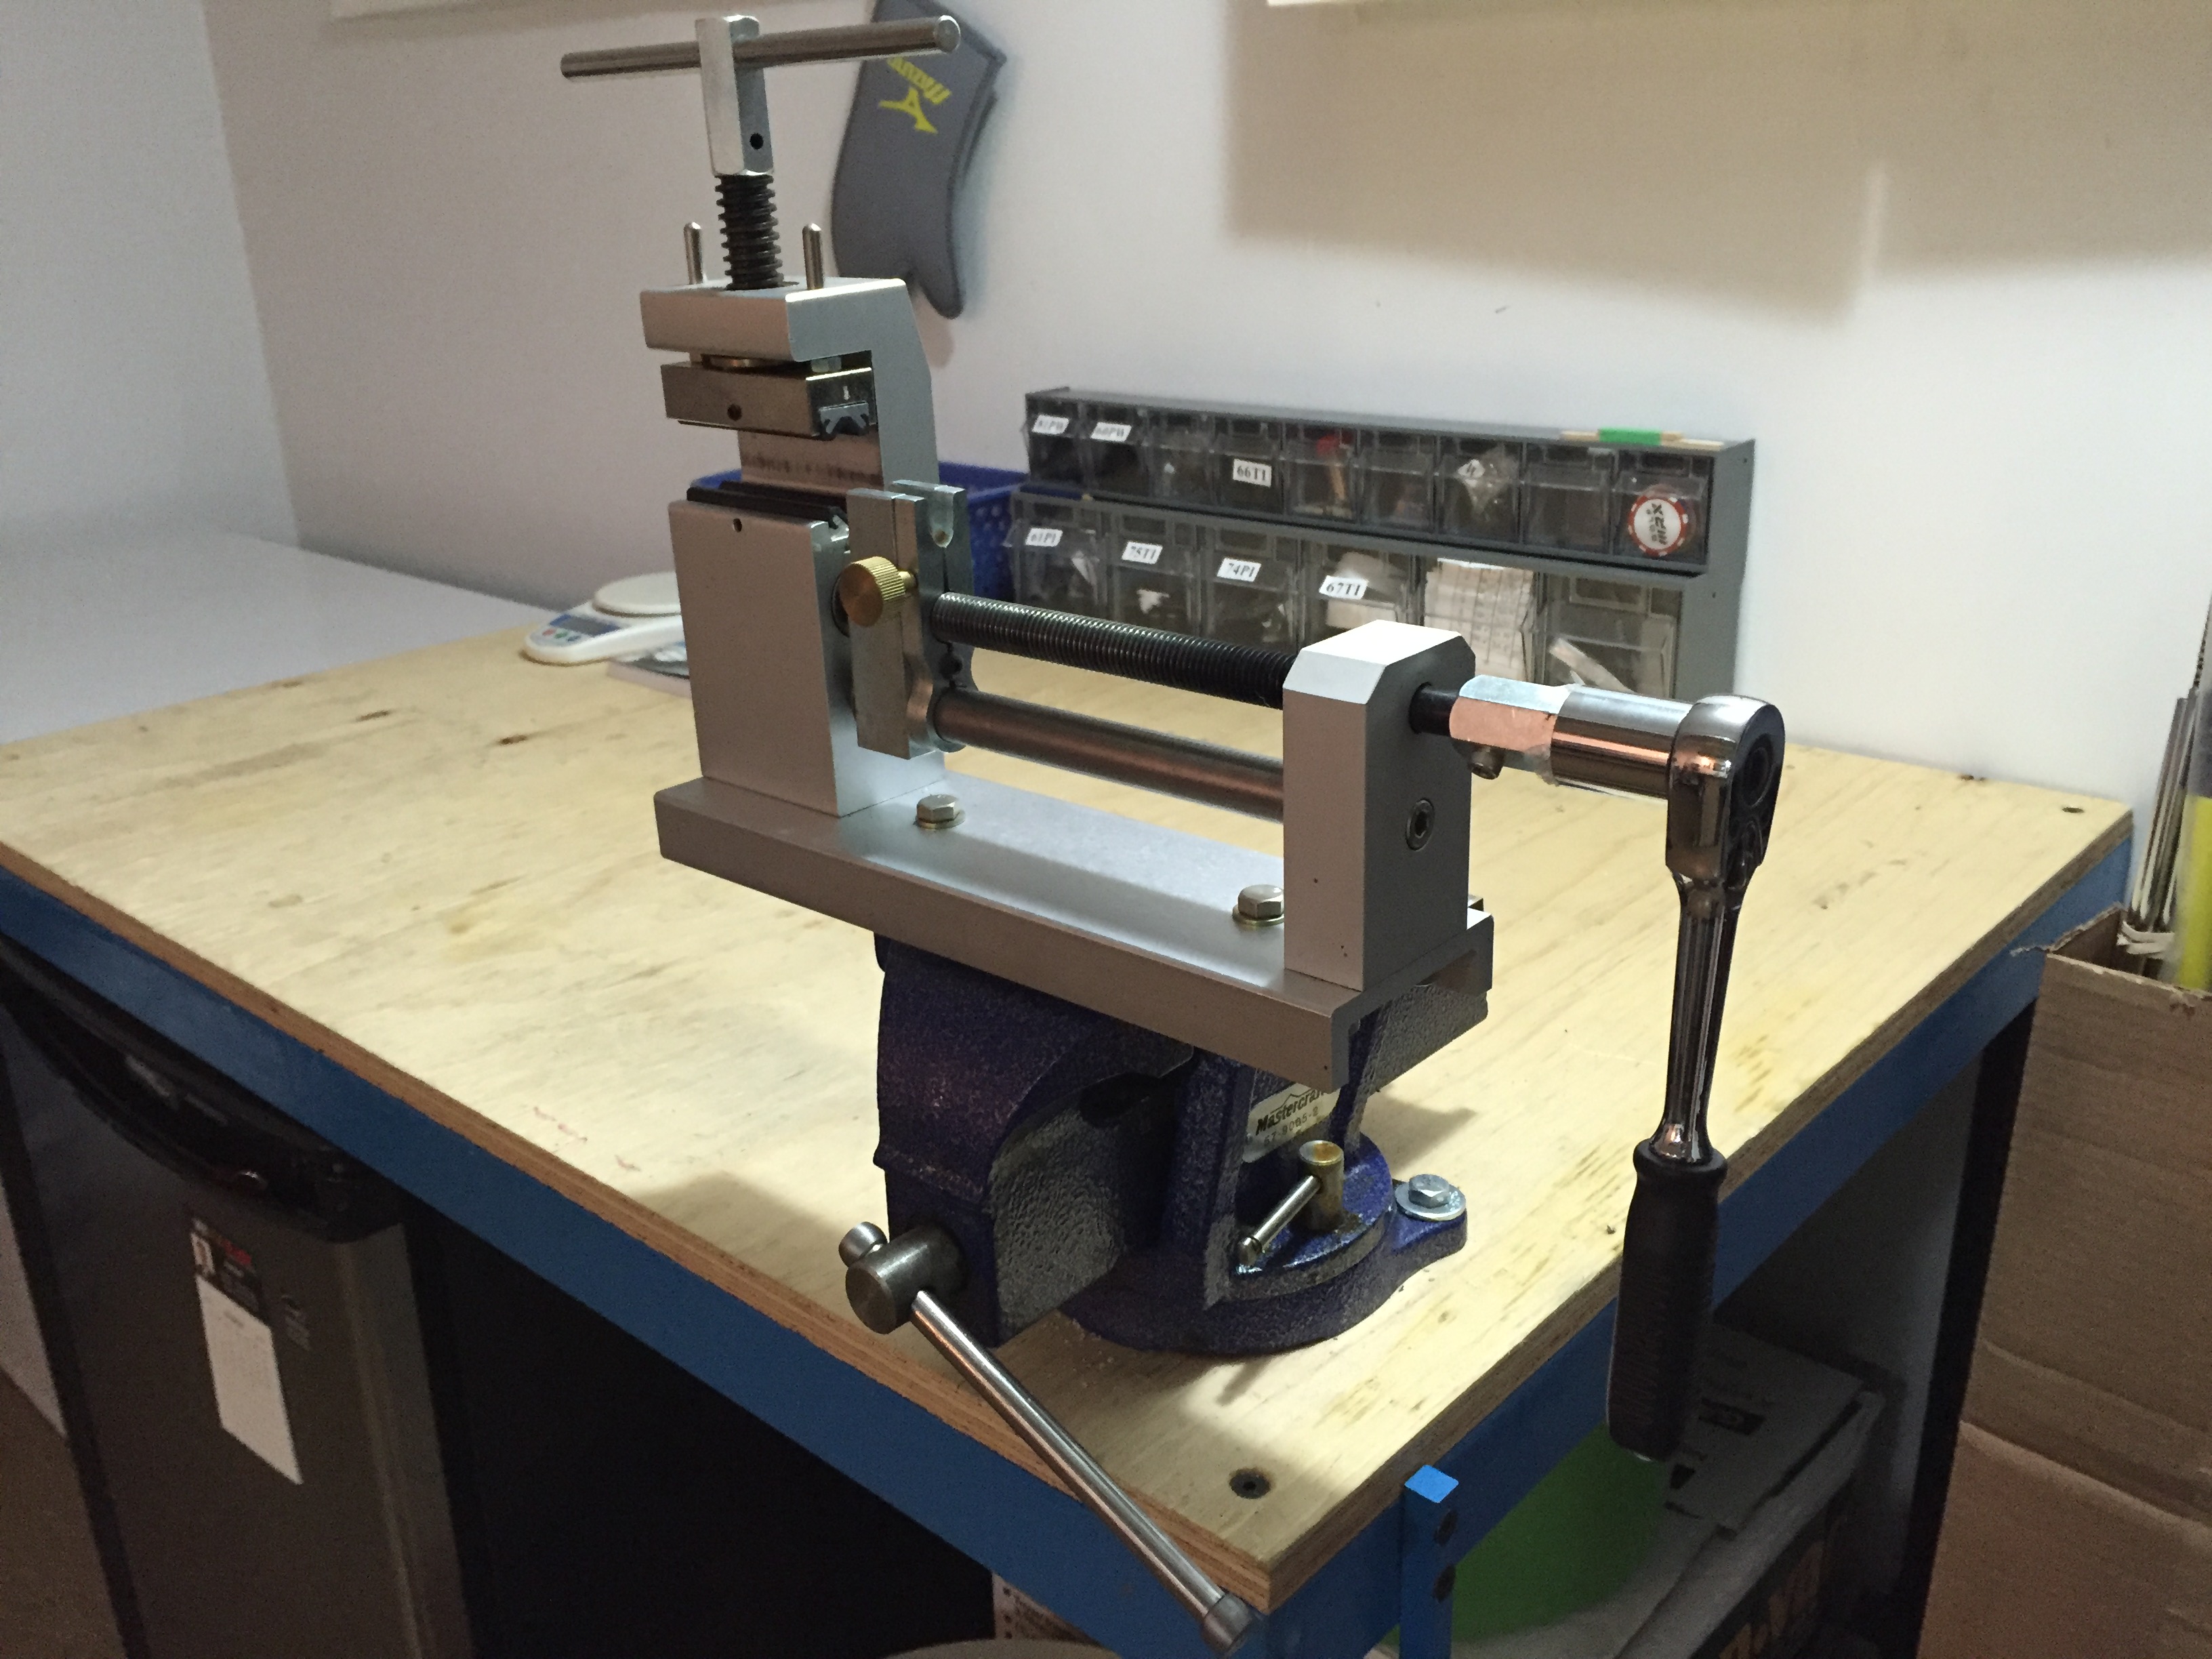
My spring-loaded GolfMechanix shaft puller.
So you want to pull a graphite shaft? Like I mentioned in my last article, Avoid These 5 Club Building Disasters, there is a right way and a wrong a way to do it. Using a proper shaft extractor is necessary for graphite because of the fibers and the way the graphite sheets are wrapped. If you plan on doing a bit more than just the occasional shaft pull, I ALWAYS recommend using one with either a spring or hydraulic mechanism. Maltby makes a few really nice ones, as does GolfMechanix. I’ve had my Golf Mechanix shaft puller for more than 10 years now with no problems and hundreds of shafts pulled. The model in the photo retails for $350.
Loft-Lie Machine
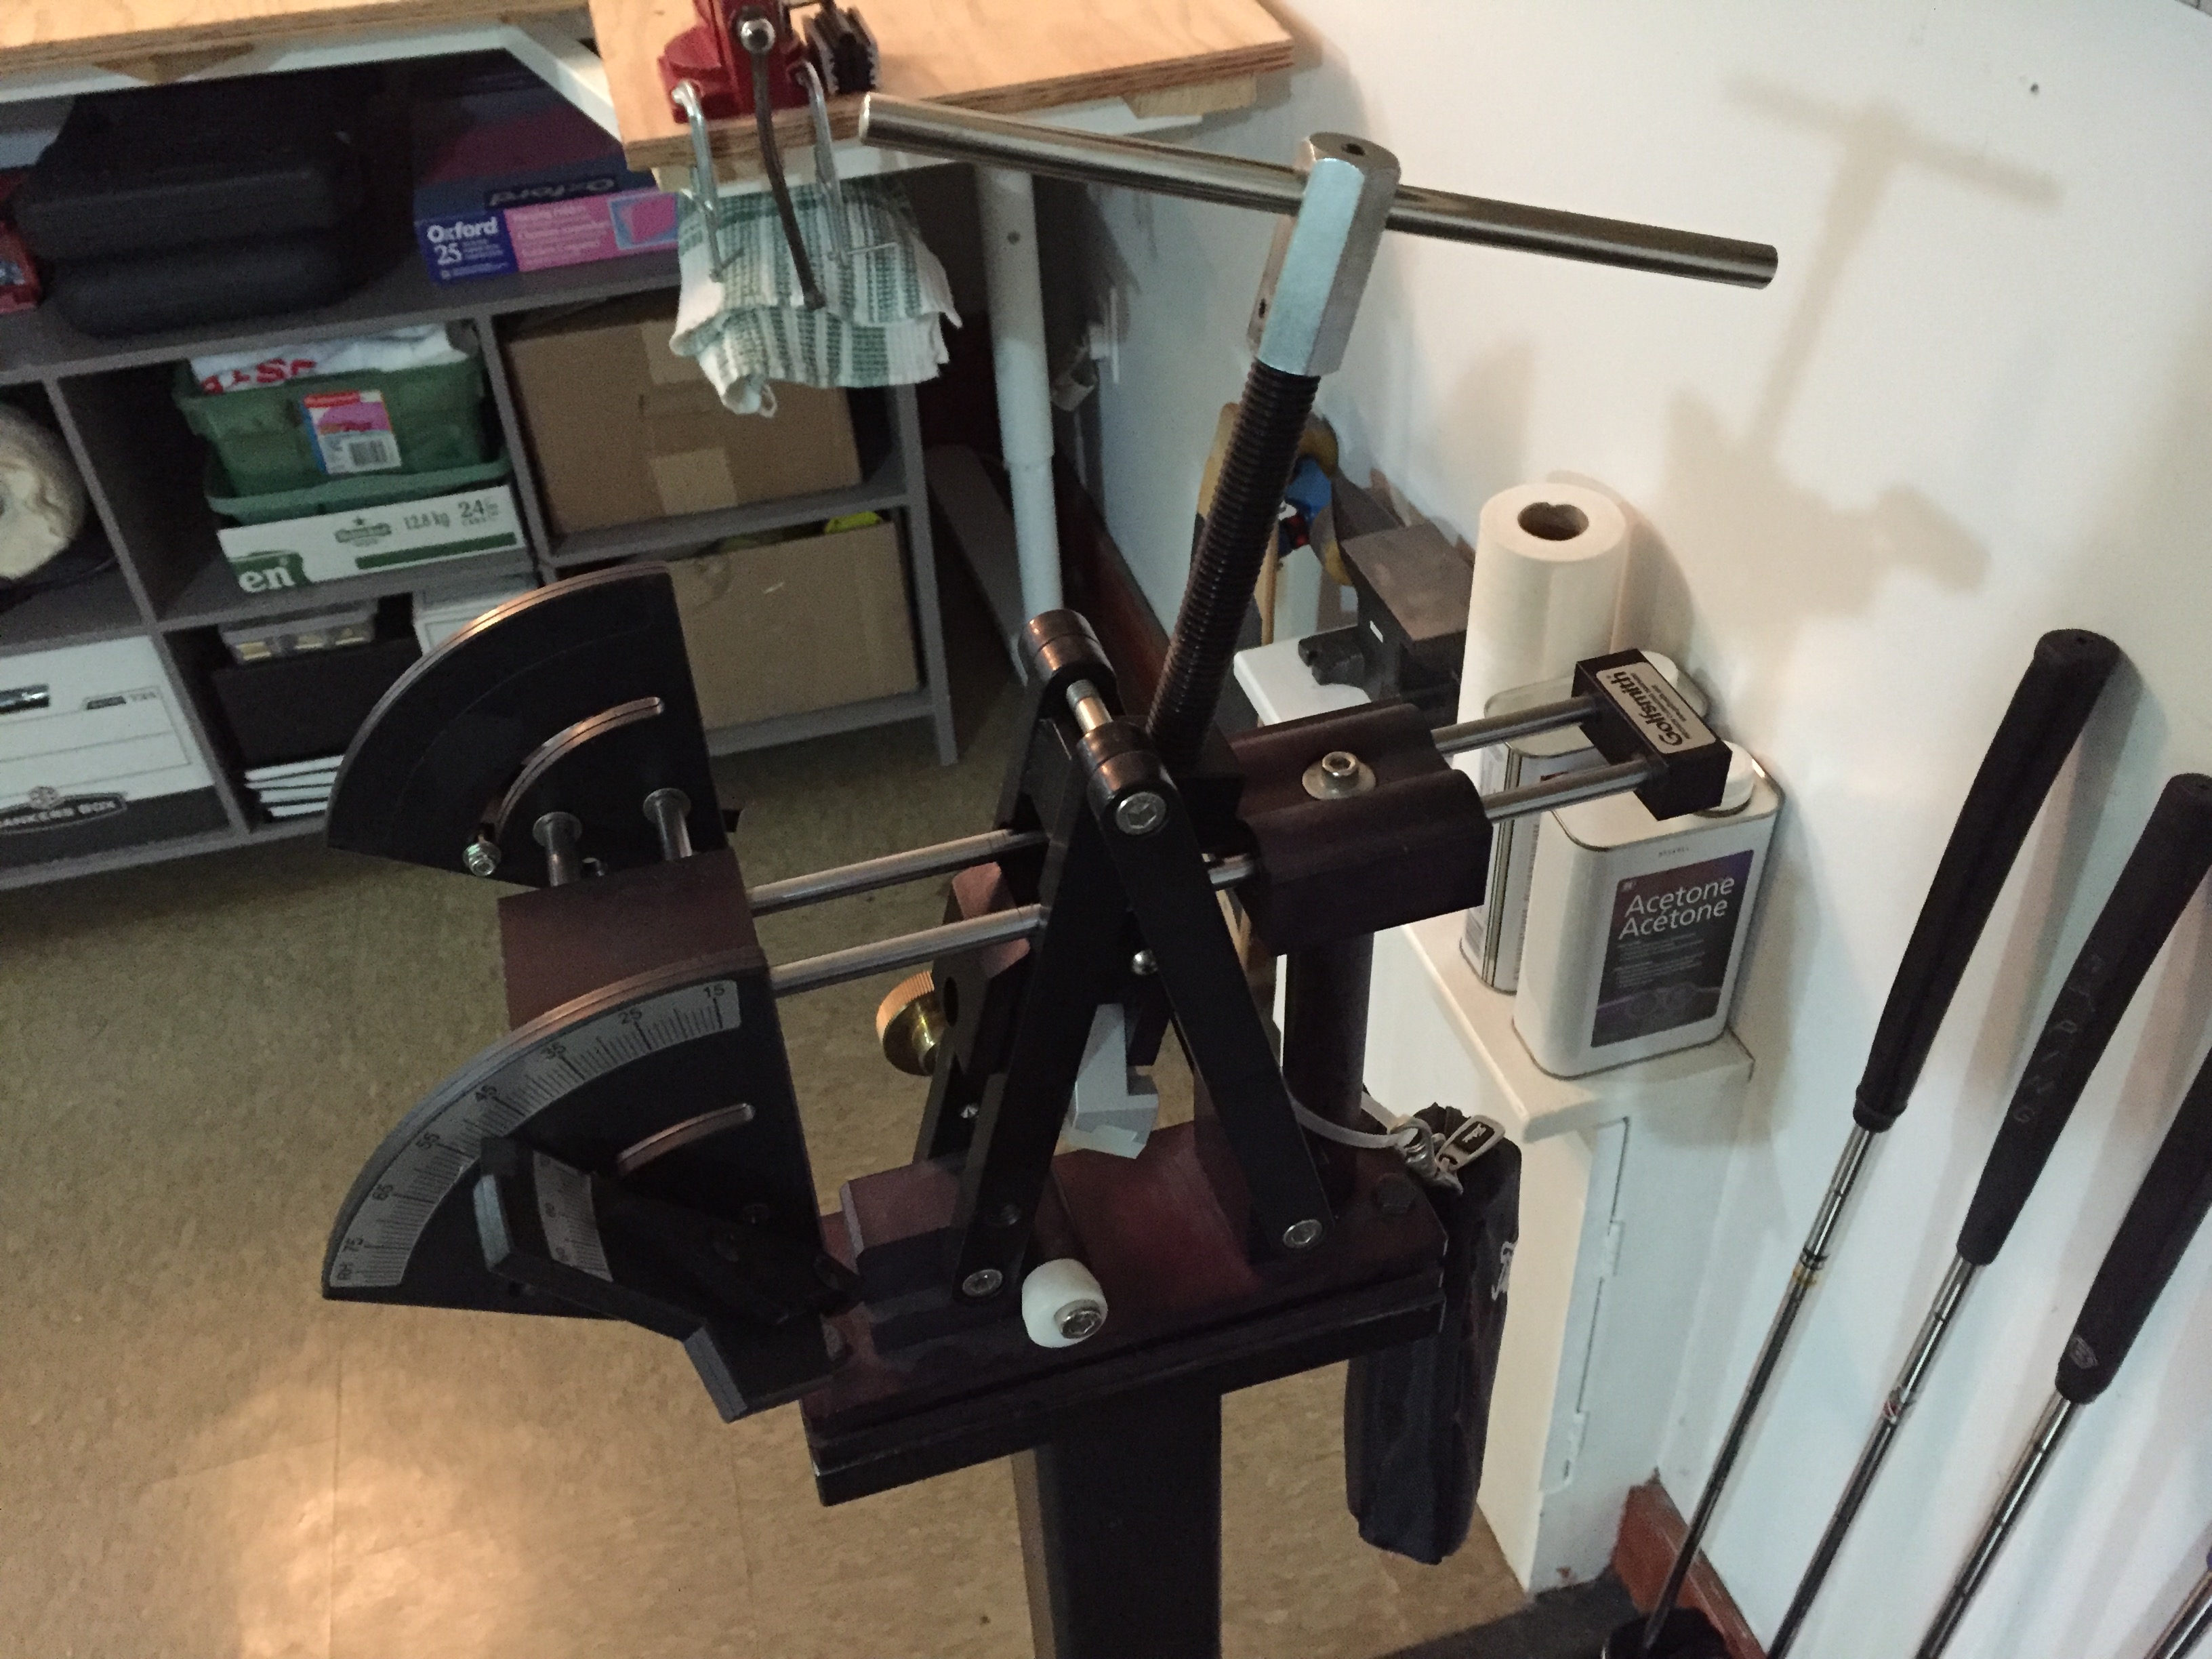
My simple analog lie/loft machine on custom base.
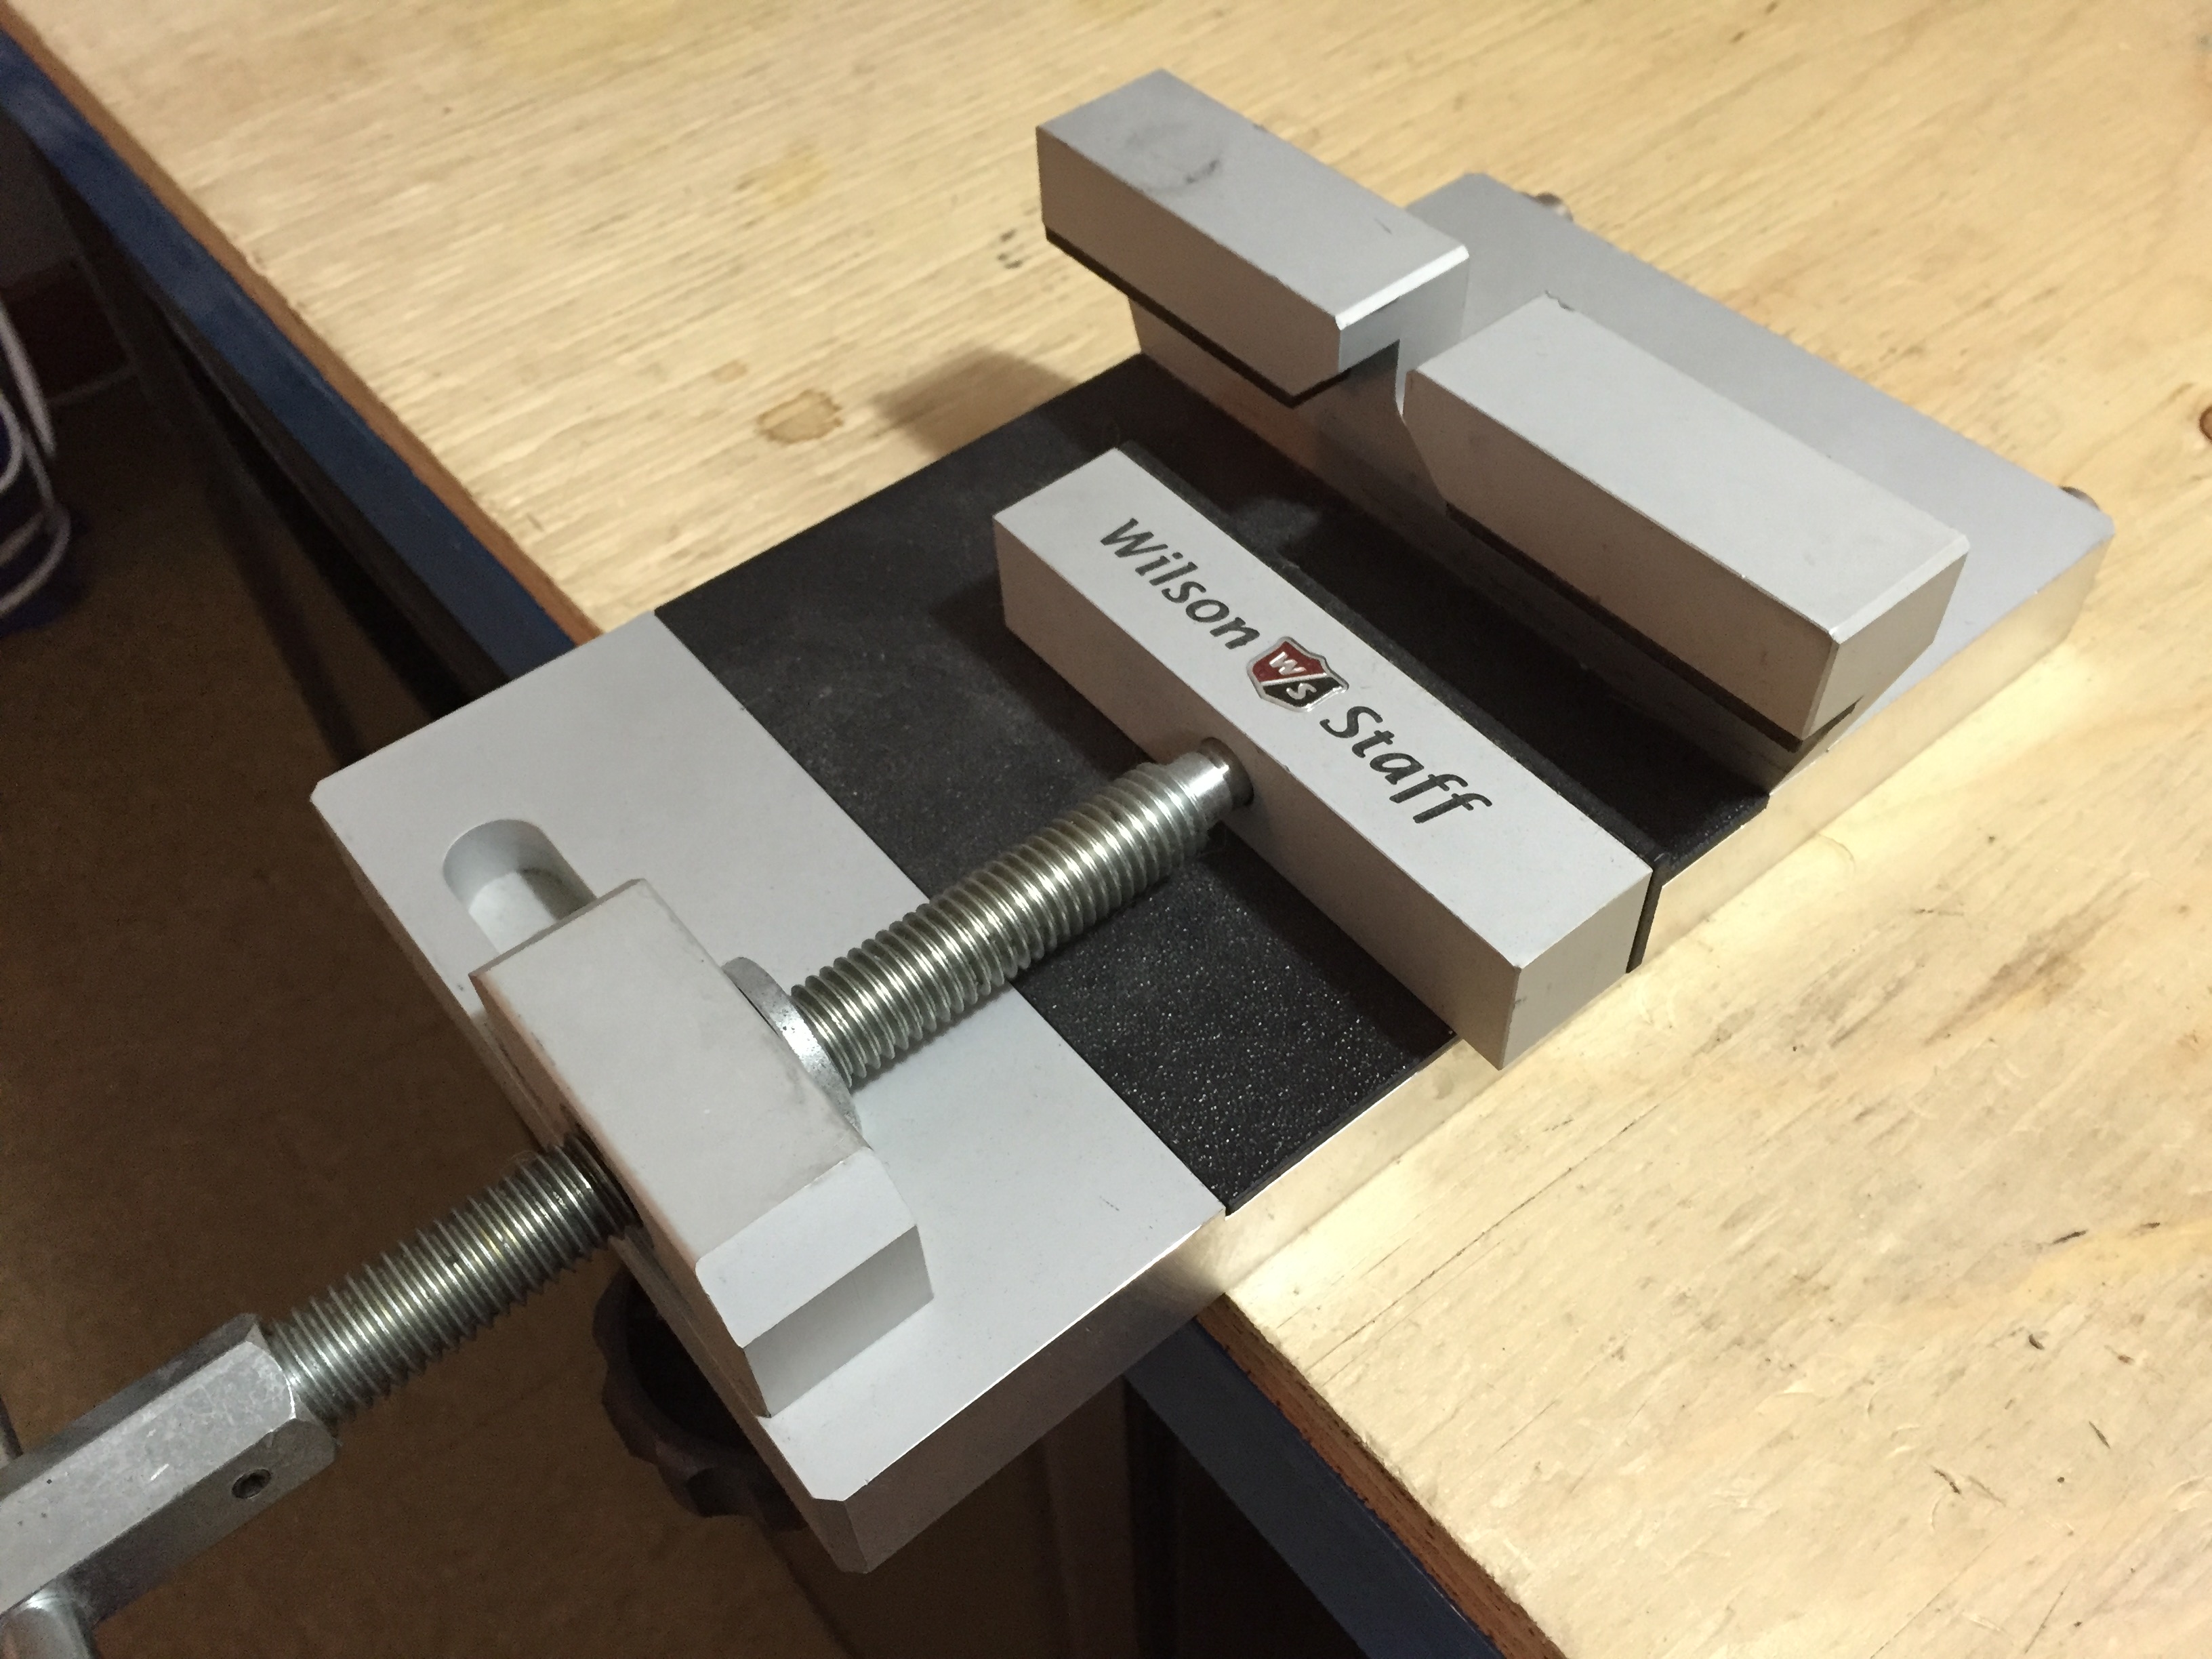
My putter lie/loft bending tool. Lie and loft have to be measured separate.
Loft-lie machines are pricey, but just like a belt sander a good one is very much worth it. If you’re entrepreneurial, loft-lie machines can be a good little money maker, too, since the golf shops that have them can be few and far between, depending on where you live. Do good work on a few clubs for friends and word will spread. Believe me.
The cream of the crop loft-lie machines are digital. I wish I had one, but know that a well-machined loft-lie machine can be just as effective. Just like with the shaft puller, a great one can be had from Maltby and Golf Mechanix. On top of a loft-lie machine for irons, a separate loft-lie machine for putters is a really nice thing to have. Mine is from an older Wilson Staff unit dating back to when Kirk Currie was still making putters. It’s most effective with blade style putters, but can be used with most styles. Again, you don’t need to completely break the bank to have an effective shop with the right tools.
Don’t forget to make sure to get a good, non-maring bending bar tool, too. Bending marks are almost unavoidable for certain iron heads, but to make as few marks as possible a good bending bar is key.
A professional-quality loft/lie machine starts at around $550, but prices can get into the thousands. On top of that, a proper base usually add about $100-$200 to the cost. Putter machines are about $300 to start, but remember, bend a few putters for friends with great results and you will start getting phone calls.
Frequency Machine
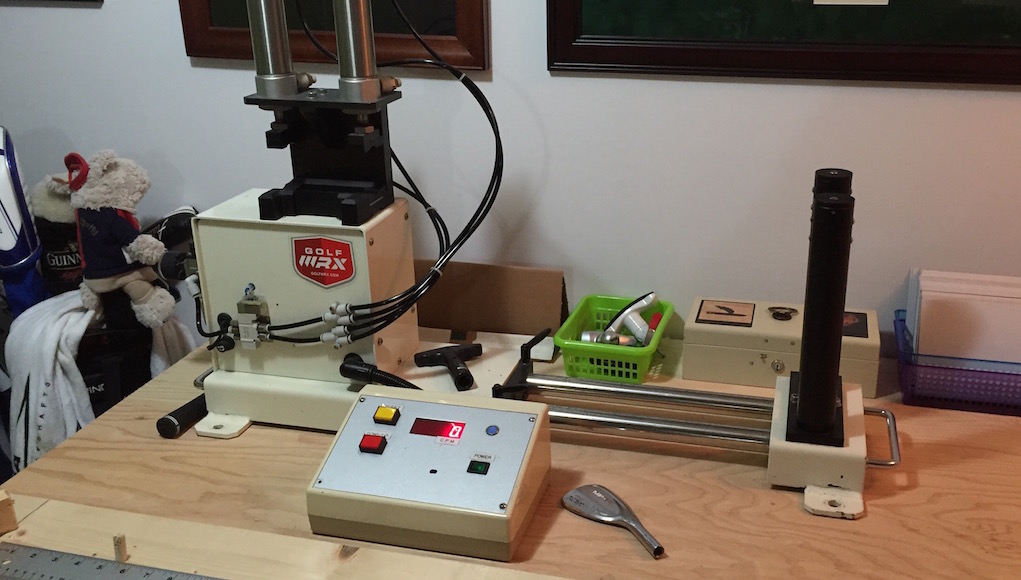
My frequency machine with 5-inch pneumatic clamp.
This is a tool that certainly falls under the category of a luxury build shop item. My personal machine is a older model that was built and designed by Fujikura, which has a pneumatic pressure controlled clamping system to ensure consistent results. The age or model of the frequency machine has little impact on the reading that are put out (as long as it’s a quality, properly calibrated machine). The other specification to pay attention to is clamp length. You will get vastly different readings depending on the clamp length used, and if you’re using a computer-based formula your entire set could be off because of the clamp length.
Some newer machines have clamps that can be adjusted from 3-5 inches. I wouldn’t build a set of irons without it, but then again, club building was my livelihood and I’ve gotten used to the luxury. A frequency machine is by no means a necessary tool when it comes to doing home builds and repairs, as they start at about $550. A nice one from Maltby goes for $650, and a top-of-the-line model from GolfMechanix will set you back $750.
Air Compressor
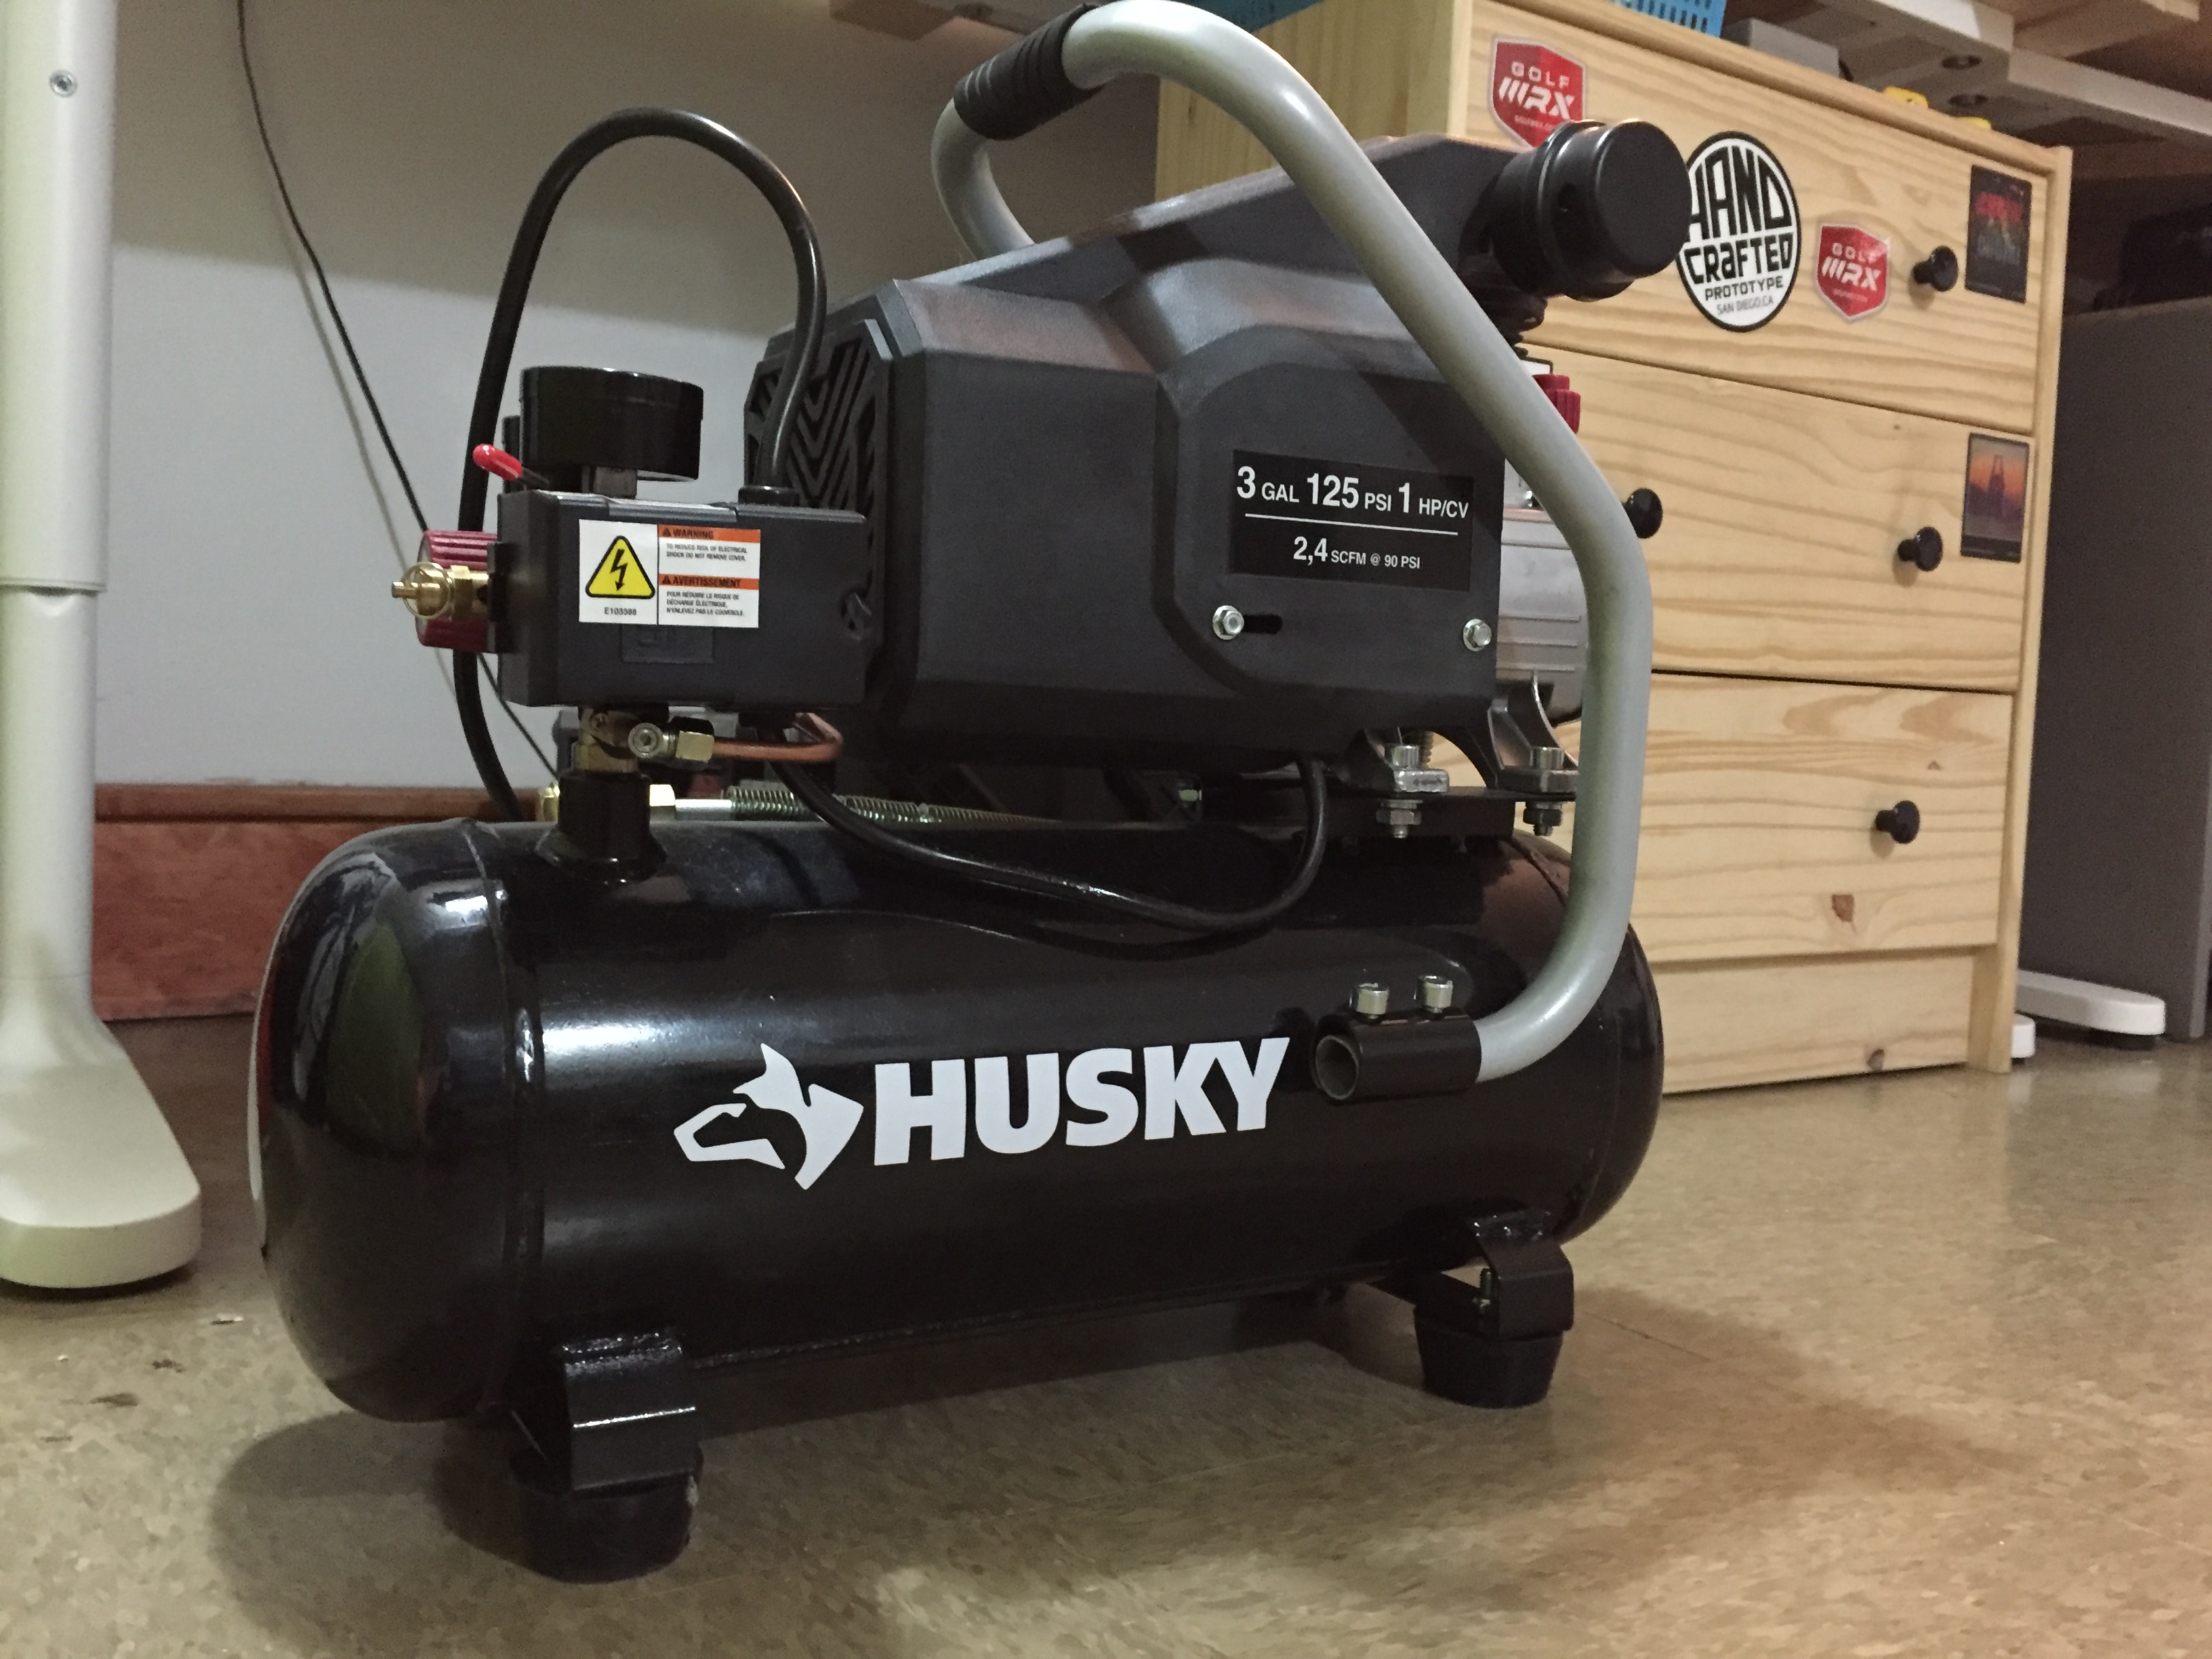
A Husky air compressor from Home Depot is perfect for small jobs.
An air compressor is a tool that falls under the category of “not just useful for a custom shop.” An air compressor has an abundance of uses including blowing on grips, cleaning out hosels and powering a plethora of pneumatic tools. I always charge mine up when building iron sets for use with my frequency machine, as well as making sure clubhead hosels are clean and ready to go for gluing. I selected mine based on three things:
- Size. This was important, because it needed to fit in my smaller shop.
- Volume. It needed have a tank big enough that it didn’t have to charge every time I used a tool. Also, pay attention to CFM (cubic feet per minute), which is how efficient the compressor is at filling the tanking and keeping up with demand.
- Noise. Most small compressors have a decibel rating. Try and find one that’s not too loud. Some are even advertised as being more quiet. It’s not always a big deal, especially if you’re working in a larger space, but can be key in a smaller shop.
A nice, simple compressor will go for around $150.
So what am I missing?
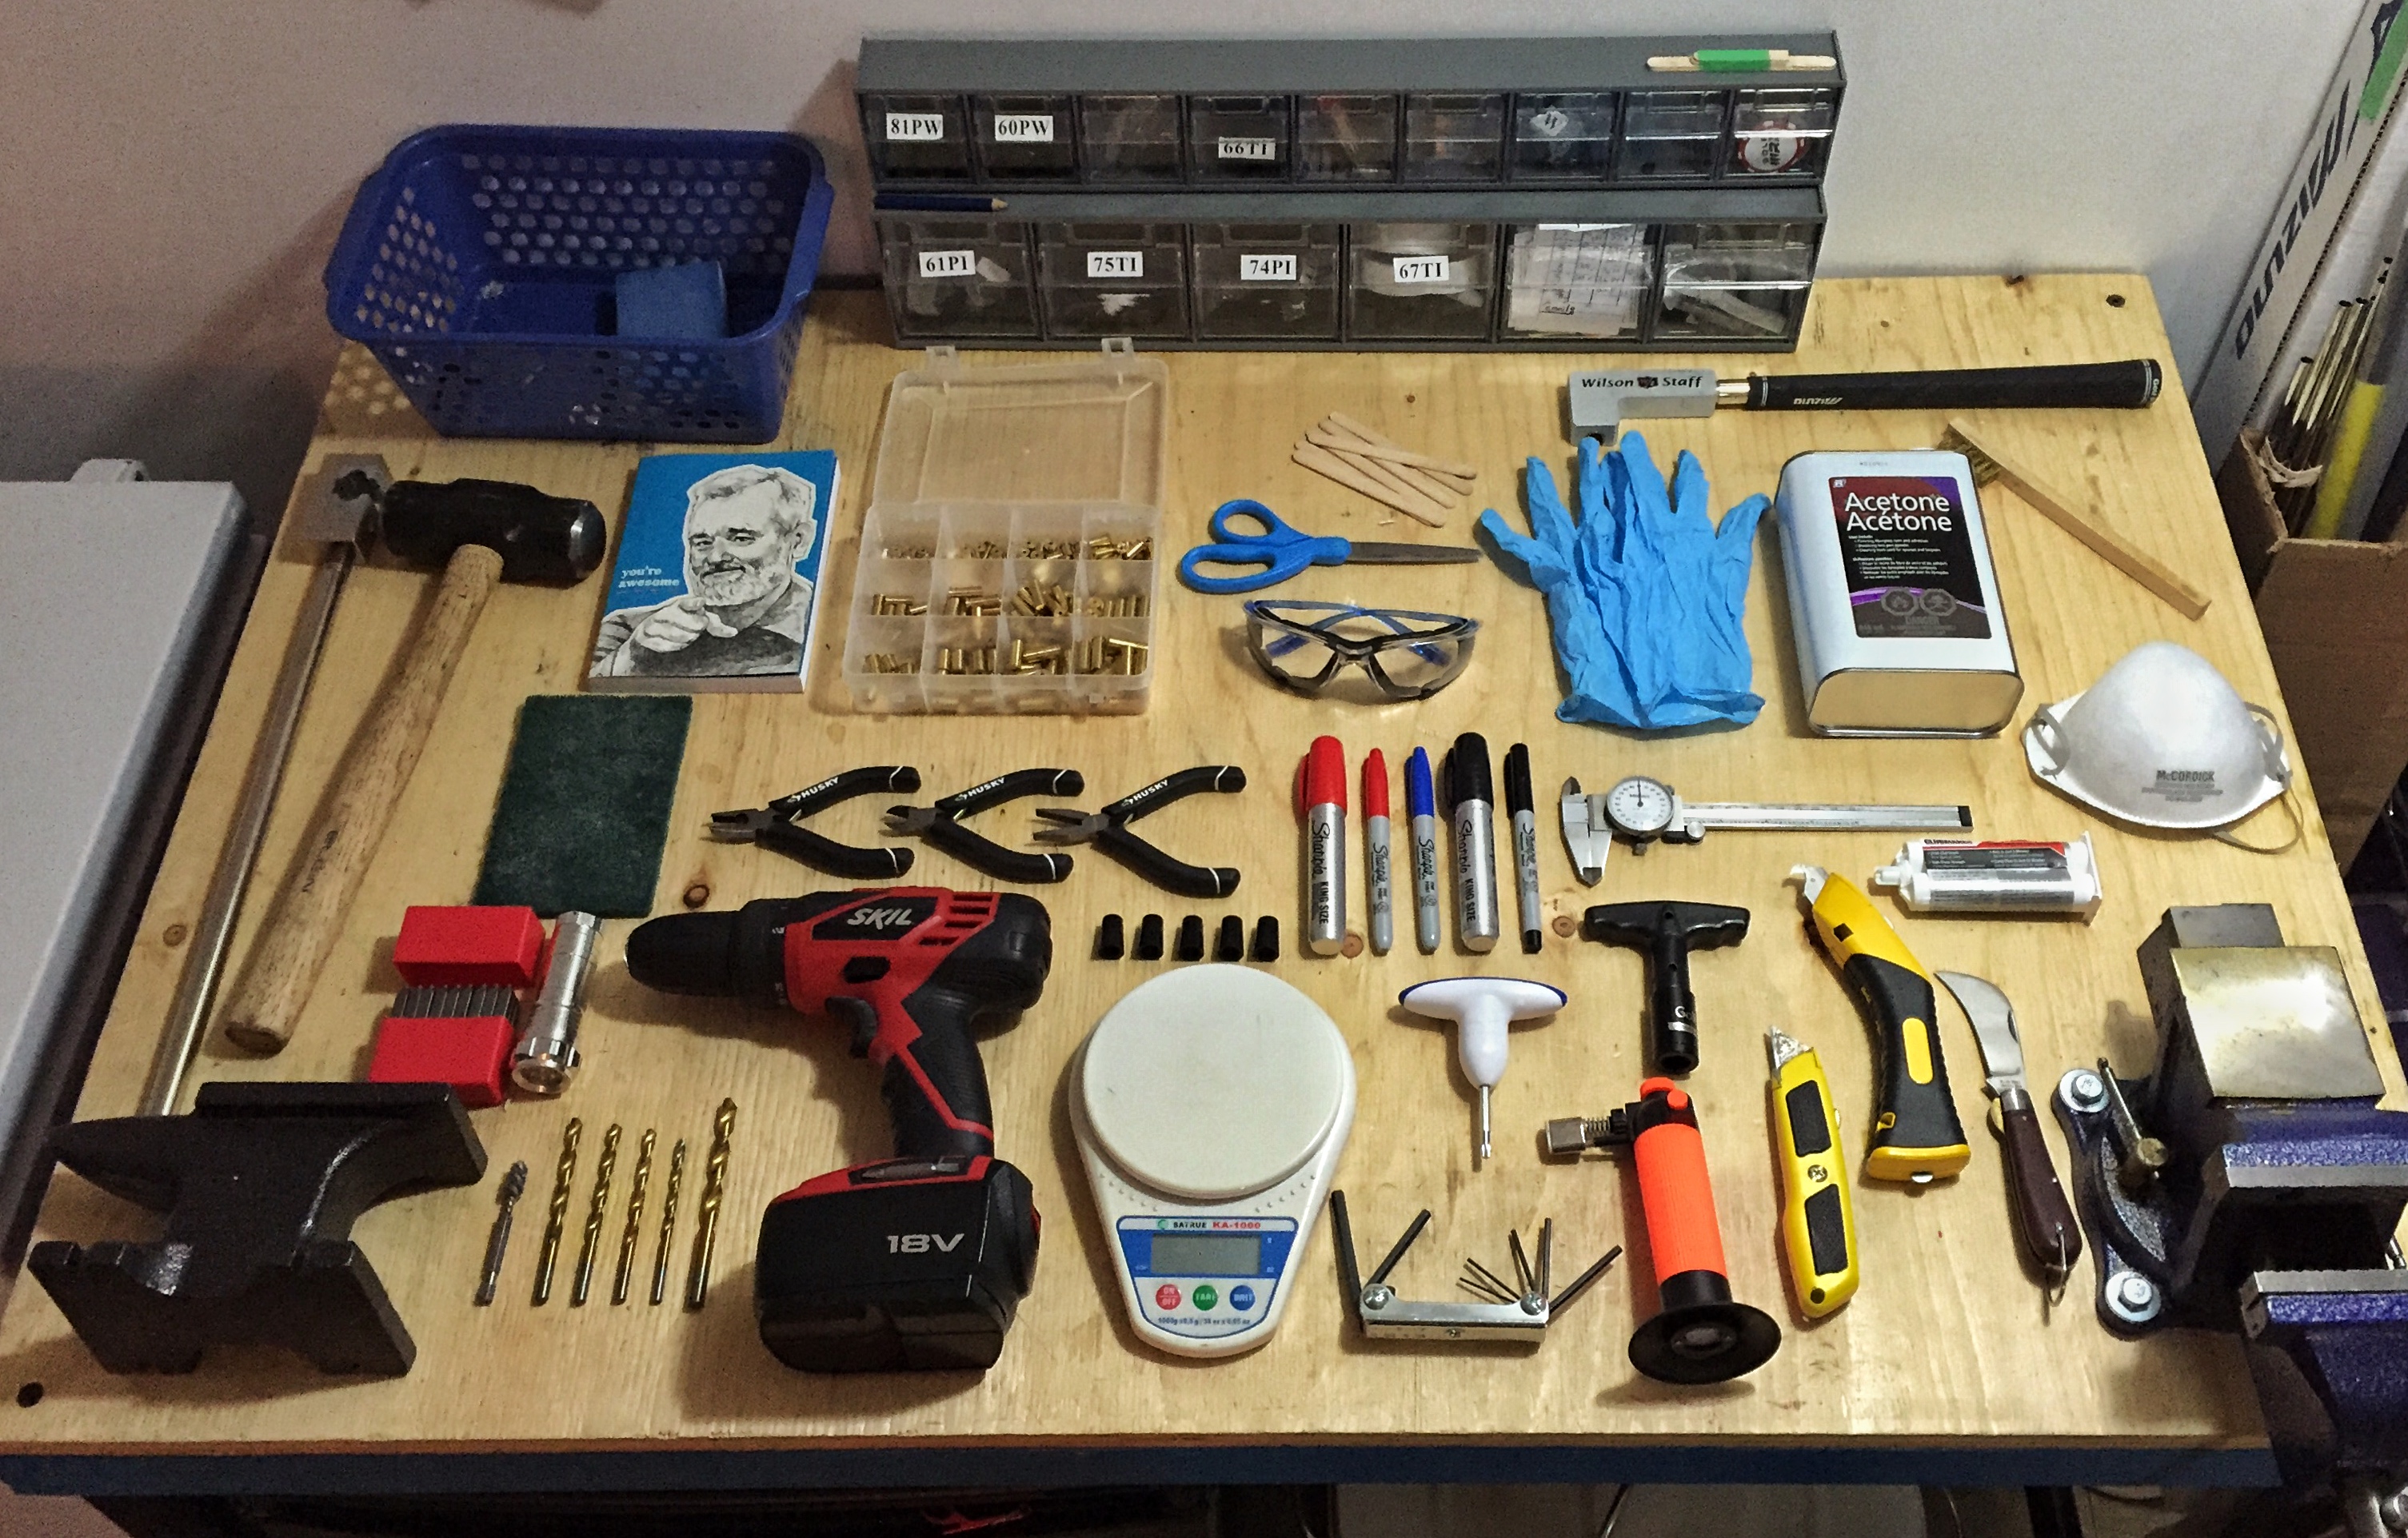
Almost everything you need to do shop work.
I realize that I haven’t even begun to cover cover all the small tools that can be very important when building clubs. In attempt to offer a complete list, I have compiled the items below.
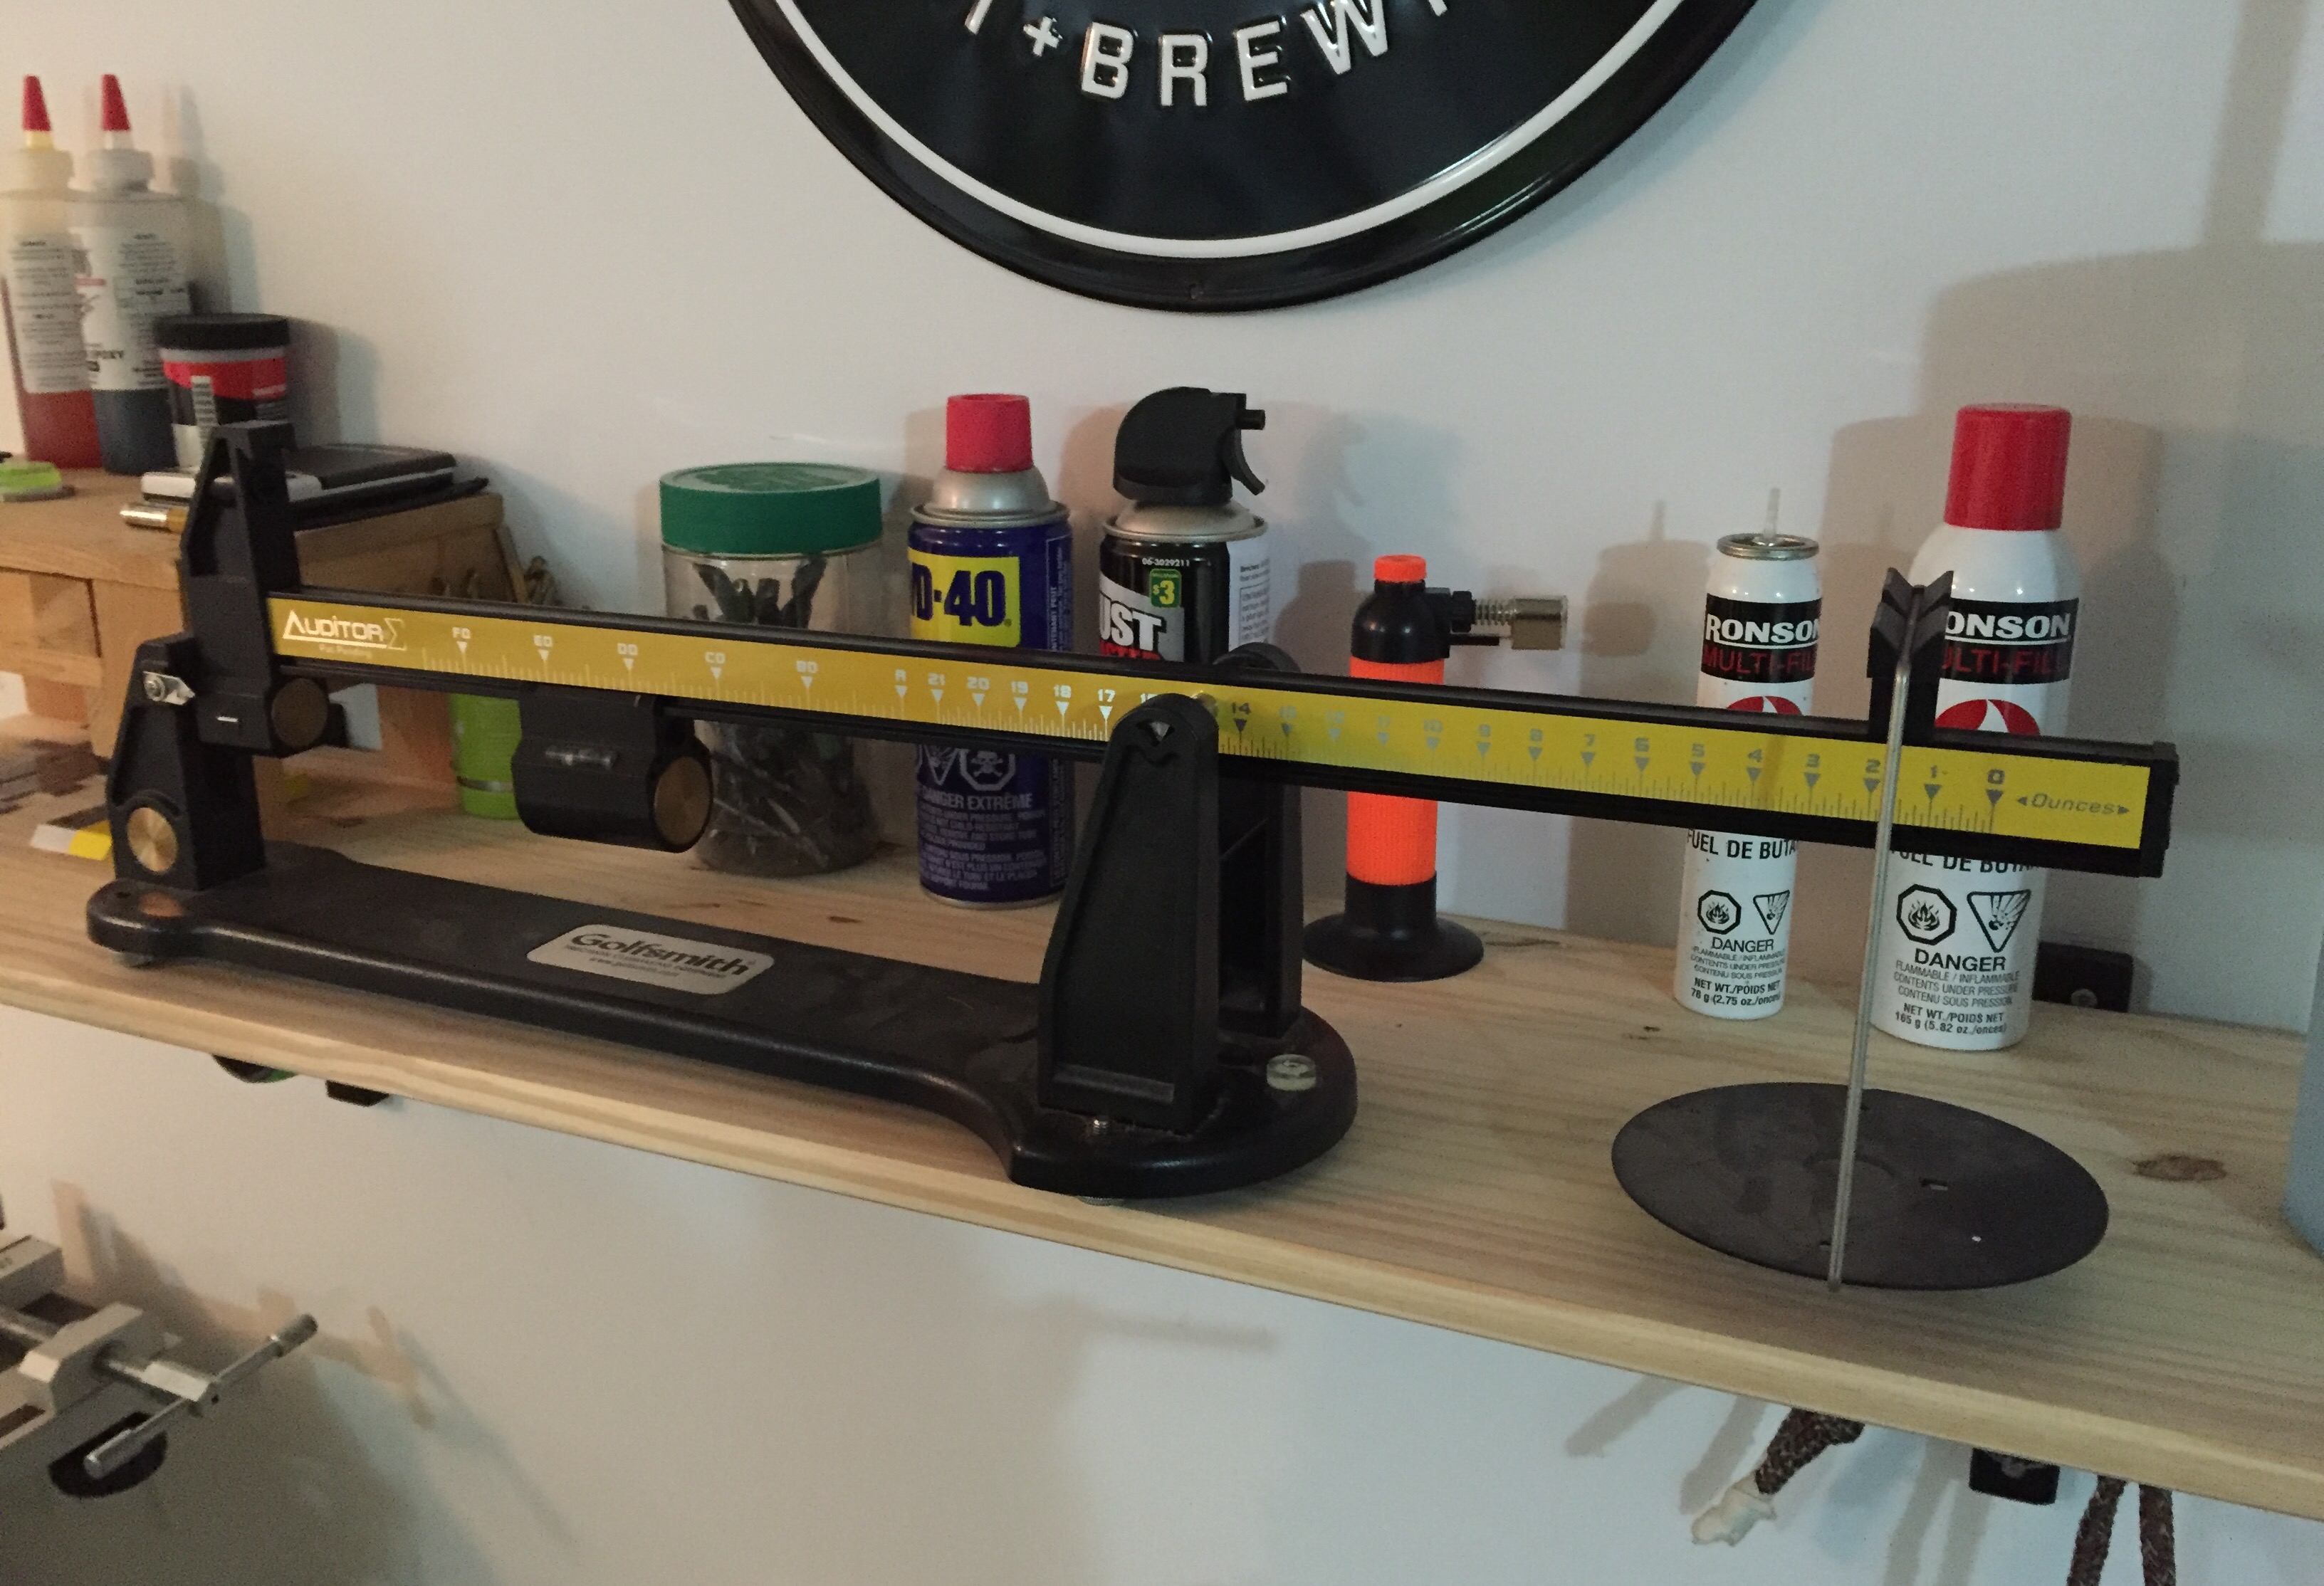
Swing weight scales haven’t changed much in 100 years.
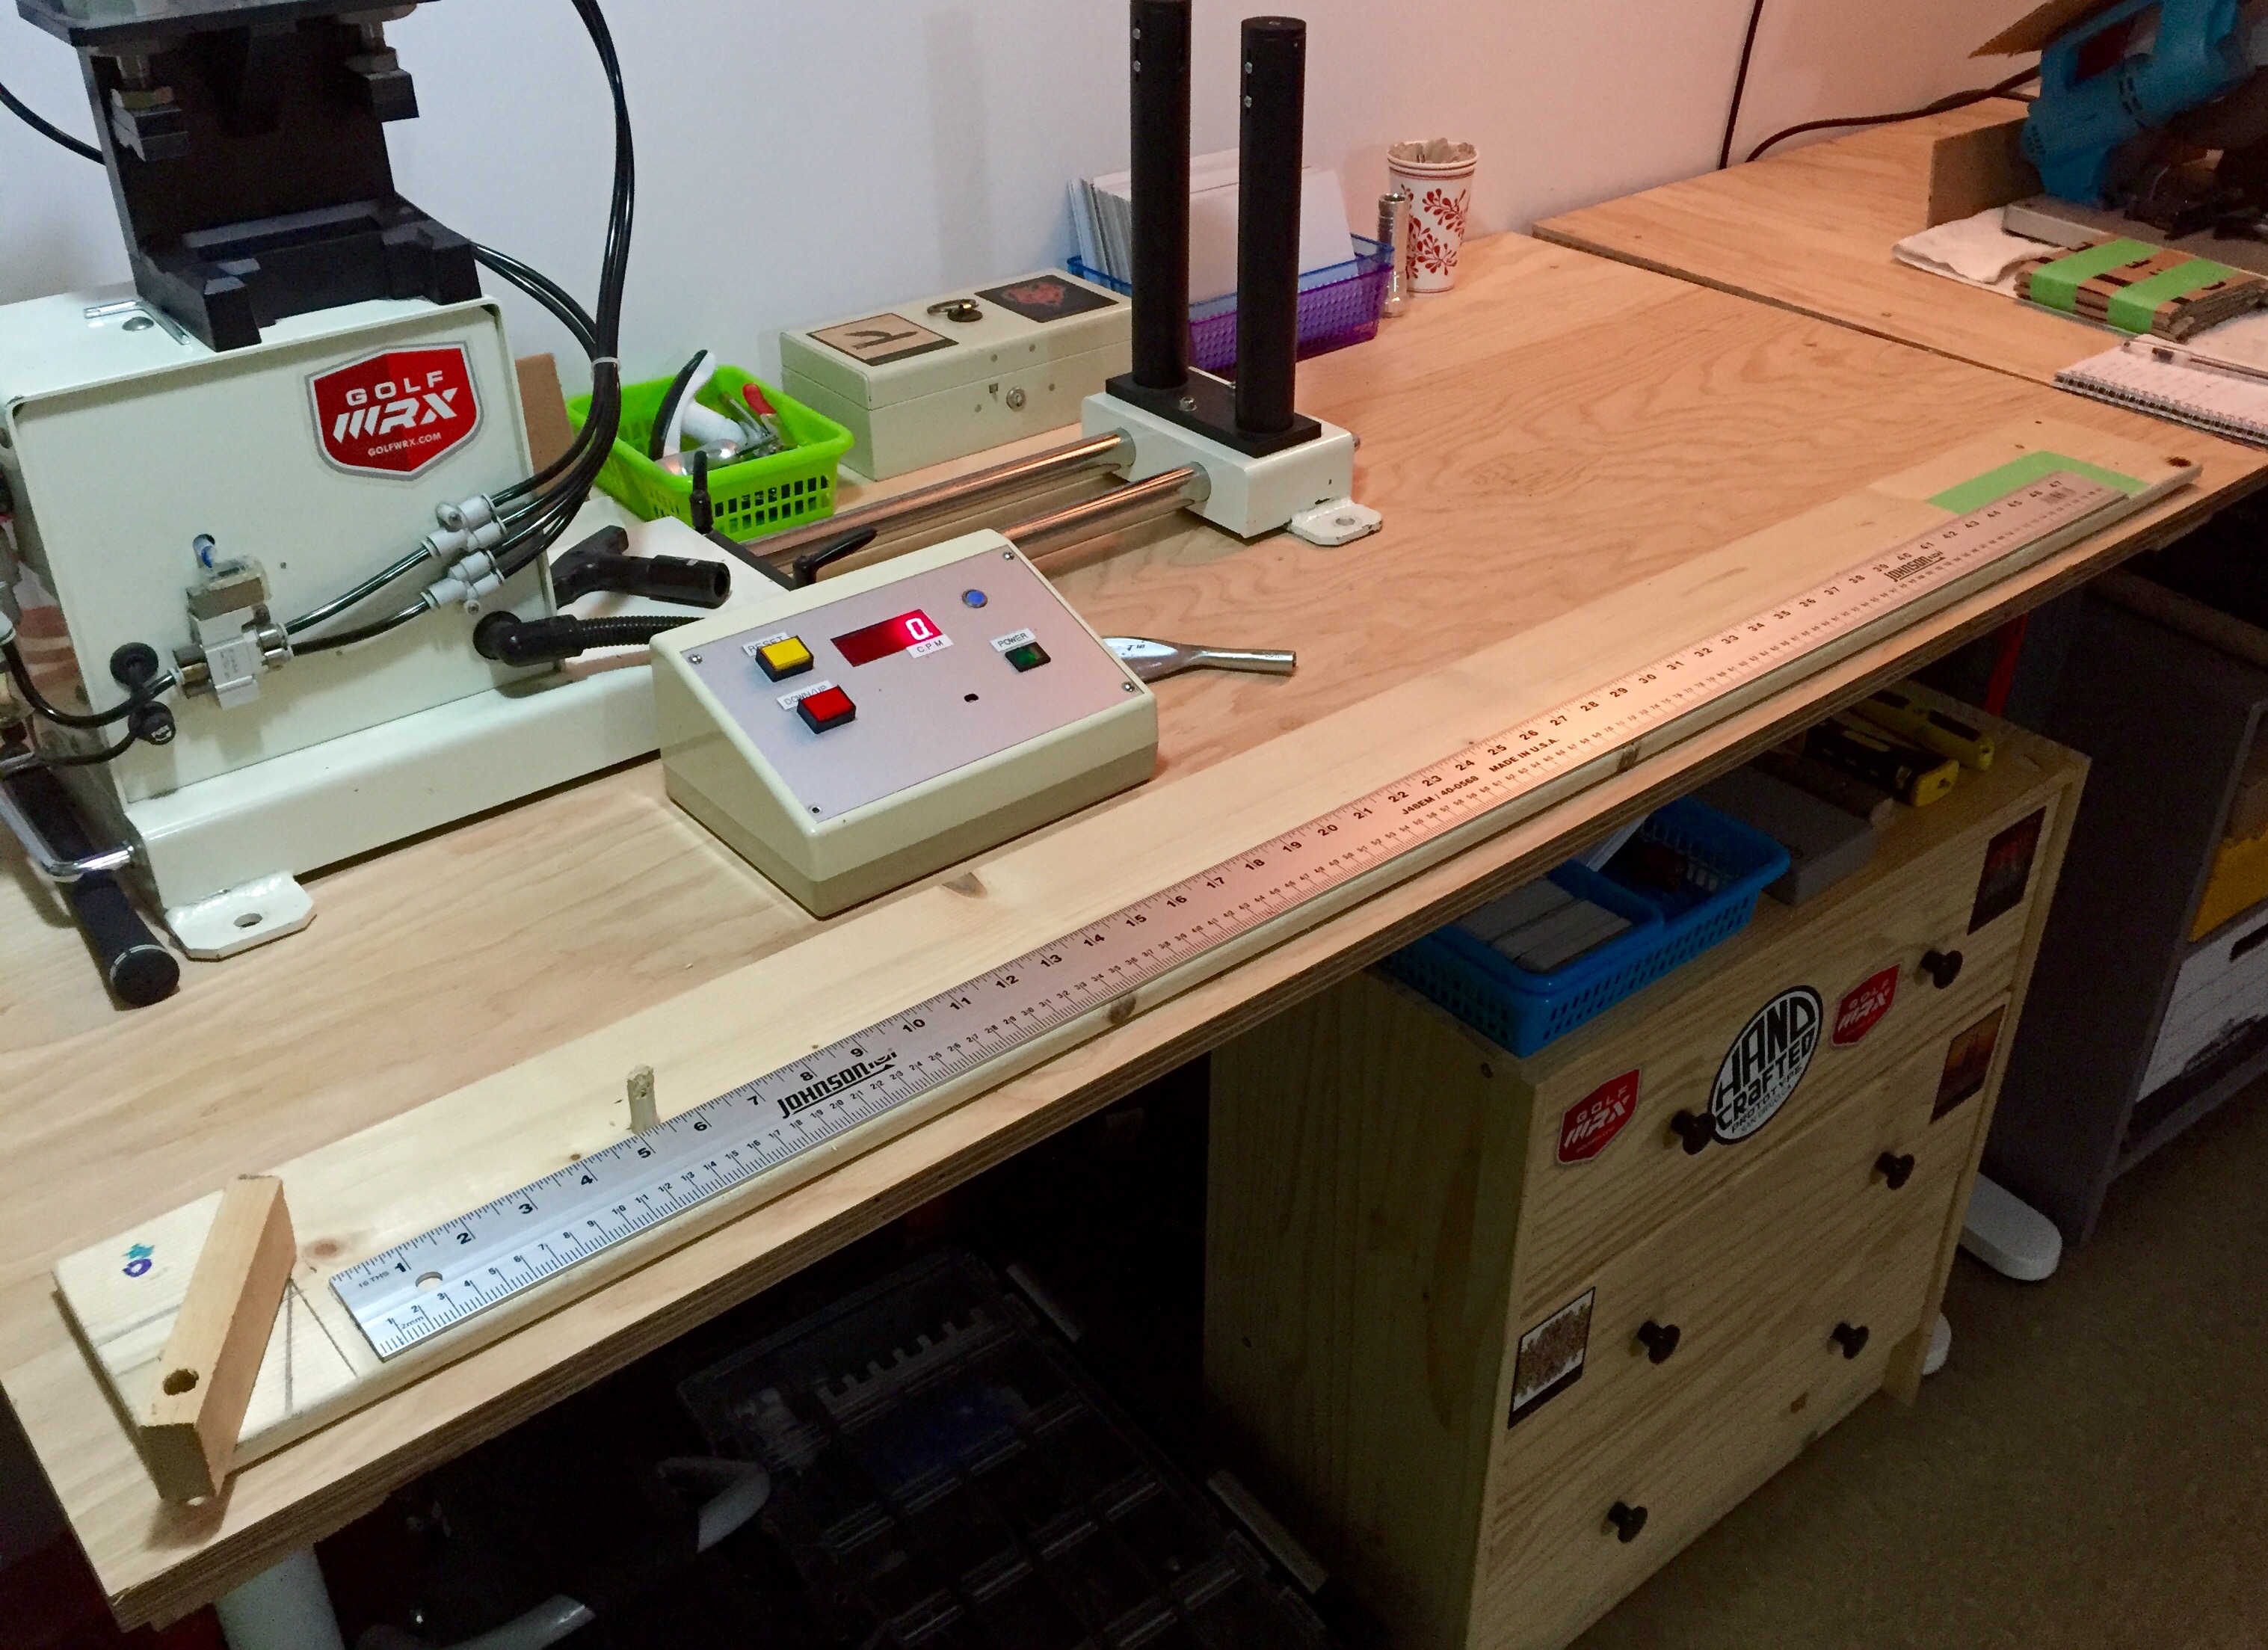
A bench ruler I built to measure clubs at actual lie angles.
- Bench ruler designed to measure golf clubs.
- Swing weight scale. Digital is best, but conventional is still very good.
- Digital scale that reads to +/-0.1 grams.
- Wire brushes for cleaning out hosels.
- Ram rod for removing old stuck tip weights and epoxy.
- Ferrules of all sizes, shims and tip weights.
- Sanding belts for prepping shafts (80 or 120 grit works well).
- SHARPIES! You can never have enough.
- Small pliers and clips.
- Acetone.
- Sand paper of varying grits.
- Gloves for using acetone. It can be nasty on the skin.
- Safety glasses. I can’t stress this enough.
- Calipers (digital are best, but analog can do the trick).
- Grip tape.
- Sharp hook knife and straight blade.
- Butane torch with extra fuel.
- Flash lights.
- Scissors
- Metal trash bin
Questions, concerns or comments? Let me know in the comments section below. I’ll do my best to answer all I can.



Aronimink is not a storied club, but when Donald Ross himself proclaimed it to be as good as he can design and build, one had to take notice. Jay Sigel was the pre-eminent male amateur golfer from the mid-1970s to the mid-1990s. He might have called any number of Philadelphia clubs home, but he chose Aronimink. It served him well. Gary Player won a PGA Championship here in 1962, and was followed by the 1993 winner … nobody. Aronimink gave that event away to Inverness, for reasons of which it is certainly not proud. So be it. We had to wait sixty-four years for the PGA to return to Newtown Square, but here we are. Aronimink has been neo-restored by Gil Hanse and team, to return Ross features with an eye toward defense against the dark arts, errrr, high-tech equipment.
Day one saw Rory McIlroy and Bryson DeChambeau dig big holes, to the tune of plus-four and plus-six, respectively. Since the first-round lead will be minus-three at worst, many shots will need to be made up for the power couple to reach contention. By nightfall, seven golfers held the day-one lead at three-under par 67. Shots and sticks caught our attention, and we are proud to present Five Things We Learned on Tech Thursday at the 2026 PGA Championship. Thanks to InsideTourGolfer, Today’s Golfer, and GolfWRX for initial equipment research.
First, meet Min Woo Lee
Min Woo Lee, aka Dr. Chipinski, has once again thrust himself into the conversation of Can he, will he, when will he? Lee has so much talent, wins not nearly as often as we believe that he should, and has no major near-misses (much less titles) on his wiki. The young Aussie is getting older and wiser, but is he able to avoid the scarring that holds the older and wiser back from breaking through? Philadelphia offers another opportunity. Min Woo signed for five birdies and two bogeys on day one, and grabbed a share of the opening-day lead at Aronimink. Winners transcend history and the moment, and Lee will need that sort of ascent to lift the Wannamaker on Sunday.
Second, meet Aldrich Potgeiter
The young South African golfer can rip driver with the best of them. Aronimink tips out at nearly 7400 yards, but beyond the fairway bunkers that ensnare only the mortals, Potgeiter can take his chances with wedge from the rough. On Thursday, he spent plenty of time in the spinach. Like Popeye, he used his muscles to gouge and thrash and dig his way out. Six birdies against three bogeys on the card brought AP in a three deep.
Third, meet Martin Kaymer
Not a major event takes place without a where’s he been throwback moment. We know that Martin Kaymer left the PGA and DP World tours for LIV golf, but the two-time (US Open and PGA) major winner has a lifetime exemption into at least one major event, and he seizes the opportunity each May. Kaymer joined the six-seven brigade with four birdies and a solitary bogey on day one. Kaymer was never a long hitter, and the years are kind to no golfer. The German champion will need to uncork every bottle of guile and strategy in his cabinet to remain in contention. For today, though, he occupies a rung on the ladder of Tour Tech.
Fourth, meet Scottie Scheffler
Let’s see, he’s the defending champion at the PGA, and he found his way back to the top tier with five birdies against two bogeys. To be a favorite and then play up to that stature and expectation is quite difficult. Just ask Rory, Bryson, and some of the other pre-tournament heartthrobs. Scheffler’s game is complete, and to knock him off the OWGR #1 pedestal, one needs to defeat him at the majors. Aronimink is the sort of course that fits Scheffler’s game. Better yet, it unfits the game of many of his challengers. Don’t expect Scheffler to go away anytime soon. Come Sunday, he’ll be around.
Fifth, meet Stephan Jaeger
Clocking in for the unheralded players shift are Ryo Hisatsune and Stephan Jaeger. Hisatsune logged seven birdies on day one, but gave most of them back with four bogeys. Still, he’s tied at the top for a time. Jaeger pitched five birdies against two bogeys, including a run of three consecutive, from holes four through six. Odds are that one of the two will hang around through 36 holes. Odds also suggest that both will be gone by Saturday evening. Still, the PGA Championship has historically been the major most likely to be won by an under-known. Both Hisatsune and Jaeger feature on that list, so good luck, lads!


On this episode of the Club Junkie Podcast, I head to the Titleist Performance Institute for a full driver fitting with the new Titleist GTS lineup. We dive into the fitting process, talk about what made the biggest difference in performance, and break down how the different GTS heads and shaft combinations compare on the launch monitor. If you are thinking about a new driver setup for this season, there is a lot to take away from this one.
I also get into Brooks Koepka and the gear setup he brought to the PGA Championship, including the putters that caught my eye during the week. There are some interesting equipment trends showing up at the highest level right now and we break down what stands out.
To wrap things up, I talk about reshafting a few wedges, what I learned during the process, and swapping an adaptor onto a new shaft for another build project in the shop. A gear packed episode from start to finish for anyone who loves golf equipment and club building.
Follow Club Junkie everywhere:
Instagram: https://www.instagram.com/clubjunkiepod/
X: https://x.com/ClubJunkiePod
TikTok: https://www.tiktok.com/@clubjunkiepod
Threads: https://www.threads.com/@clubjunkiepod

Excited for this week’s WITB as we get to add the new Titleist GTS woods to the bag! I was fit at Titleist’s TPI facility in Oceanside California a few weeks ago and my new clubs just showed up. I am also adding a cool set of irons that I built last year some wild custom wedges into a new golf bag. Speaking of the bag I have a new Ghost Anyday Black Ops stand bag that I will be using on my Motocaddy Remote M7 electric cart.
Driver: Titleist GTS3 (11 degrees @ 10.25)
Shaft: Fujikura Ventus Red 6s
3-wood: Titleist GT1 3Tour (14.5 degrees)
Shaft: Graphite Design Tour AD CQ-7s
5-wood: Titleist GTS (18 degrees)
Shaft: Fujikura Ventus Red 7s
9-wood: Titleist GT1 (24 degress)
Shaft: Fujikura Ventus Red 7s
Irons: Bettinardi CB24 (5-PW)
Shafts: KBS C-Taper Lite 110 stiff
Wedge: TaylorMade MG5 (50-09 SB)
Shaft: Mitsubishi MMT 125 Stiff
Wedge: TaylorMade MG5 (56-12 SB)
Shaft: Mitsubishi MMT 125 Stiff
Wedge: TaylorMade MG5 (60-08 LB)
Shaft: Mitsubishi MMT 125 Stiff
Putter: Dan Carraher ZT Proto
Ball: Callaway Chrome Tour
Bag: Ghost Anyday Black Ops Stand Bag

Justin Rose WITB 2026 (April): Full WITB breakdown with new McLaren irons

RBC Heritage Tour Report: More minis, course-specific setups, Spider & GTS launches

What’s the story behind Webb Simpson’s custom-stamped irons?

Cadillac Championship Tour Report: Spieth’s sizable changes, McLaren Golf launches, and more

Kristoffer Reitan’s winning WITB: 2026 Truist Championship

Cameron Young’s winning WITB: 2026 Cadillac Championship

Aaron Rai’s winning WITB: 2026 PGA Championship

Nelly Korda WITB 2026 (April)

Justin Rose on the switch to McLaren Golf, learnings from previous equipment moves

Photos from the 2026 PGA Championship


Patrick Reed WITB 2026 (May)
Driver: Titleist GT3 (9 degrees) Buy here. Shaft: Aldila Rogue Silver 130 M.S.I. 70 TX 3-wood: TaylorMade Qi35 (15 degrees)...

Aaron Rai’s winning WITB: 2026 PGA Championship
Driver: TaylorMade M6 (9 degrees) Shaft: Aldilda Synergy Blue 70 TX 3-wood: TaylorMade Qi10 (15 degrees) Shaft: Fujikura Ventus Blue...


Michael Block WITB 2026 (May)
Driver: TaylorMade Qi4D (9 degrees) Shaft: Fujikura Ventus Black VeloCore+ 5 X 3-wood: TaylorMade Qi4D (15 degrees @14.25) Shaft: Mitsubishi...


Bryson DeChambeau WITB 2026 (May)
Driver: Krank Formula Fire Pro (6 degrees) Shaft: Project X Prototype 3-wood: Krank Formula Fire (10 degrees) Shaft: LA Golf BAD...
-
 Whats in the Bag3 weeks ago
Kristoffer Reitan’s winning WITB: 2026 Truist Championship
-
Whats in the Bag2 weeks ago
Aaron Rai’s winning WITB: 2026 PGA Championship
-
 Tour Photo Galleries3 weeks ago
Photos from the 2026 PGA Championship
-
 Equipment2 weeks ago
GolfWRX Launch Report: 2026 Titleist GTS drivers
-

 Equipment2 weeks ago
PGA Championship Tour Report: Fitzpatrick, Koepka among big-name putter switches for Aronimink
-

 News2 weeks ago
WITB Time Machine: Phil Mickelson’s winning WITB, 2021 PGA Championship
-

 Equipment2 weeks ago
Which of Tiger’s major winning irons are your favorite? – GolfWRXers discuss
-

 Equipment2 weeks ago
Lead Tape Report: Adjusting the swingweight of the Wanamaker Trophy


KENS CUSTOM CLUBS. PXG DEALER
Apr 30, 2019 at 6:04 pm
Chop saw is a no no, to much dust a good wet saw with proper blade and also a complete bench collection system, throw in a good launch monitor and 25 years experience also club fitting schools and club building schools and you might be getting close also a moment of inertia machine to ho beyond swingweight and make every iron feel the same could go on with more list never ends if you want to keep up with technology.
geohogan
Mar 4, 2019 at 1:19 pm
Please, where is the fire extinguisher?
Grinding sparks ignited on the bench after I finished grinding.
I almost lost my home to a fire on my work bench.
There is wood and flammable chemicals. Have to have a working fire extinguisher and know how to use it. cheers
Tom D
Oct 17, 2016 at 3:22 pm
Heck, I’d love to get a loft/lie machine and I’m closer to 60 that to 16!
Andrew Nielsen
Oct 9, 2016 at 10:30 pm
Great article and appreciate the tip on the Gryphon Mitre Saw. Been looking for a small chop saw just for shafts and the Gryphon is perfect. Any recommendations on Bench top drill presses?
Skip VanB
Oct 7, 2016 at 3:19 pm
Ryan,
Great fun article! That’s a nice shop you have. Where did the base for your work bench, the one with your vice come from?
Ryan Barath
Oct 7, 2016 at 9:48 pm
Hi Skip,
I’m gonna be straight up, I am a very lucky guy to not only be married to a great lady, but to also have a very talented brother-in-law. He’s is not only a welder, but also a great designer of all things metal. This base was completely custom built to the space that I had and specs that I gave him ( although I installed the vice on my own after the bench was built )
But for most, there are a bunch of bench kit system that very easily allow you to build to your spec at a very reasonable cost. You just need to buy the metal or plastic fibre brackets and then have the base pieces cut to length.
Really hope this helps.
Ryan
alan
Oct 6, 2016 at 7:53 am
nice article thanks. i tinker around in my garage and get by.
my wife is canadian. we head up to muskoka usually once a year. when we are on the 403 bridge i look over at hamilton and wonder who would wanna live in hamilton. now i know!
Wesley
Oct 5, 2016 at 10:57 pm
Great article Ryan. I have all these tools but some are less costly like club scout. Folks don’t forget there are plenty of places like harbor freight to get tools that will perform same function for significantly less cost than golf specific suppliers.
Ryan Barath
Oct 6, 2016 at 1:08 am
Exactly!
I really tried to stress that you can stretch your dollar by purchasing either used or more cost effective options with certain tools. This is also very effective since most people are only going to go as far as using the tools irregularly and because of that lighter duty machines can be just as effective.
Travis S
Oct 5, 2016 at 10:55 pm
If you had to guess how much would everything cost for this complete setup? Just the necessities tools and machines not the extra parts like ferrules, tape and etc?
Ryan Barath
Oct 6, 2016 at 1:10 am
from new you’re looking at probably close to $5000 but if going used like I did and if you are willing to invest some time in building a few things yourself you can do it for less than half.
Travis S
Oct 5, 2016 at 10:52 pm
What a great story I just started tinkering this year and installed a vice. I would kill for all that and appreciate your enthusiasm and modest cost effective setup. Keep up the good work!
Grizz01
Oct 5, 2016 at 10:17 pm
If you are building your own clubs and tinkering around. You don’t need all that crap.
KK
Oct 5, 2016 at 7:02 pm
Missing hotmelt setup. Otherwise absolutely fantastic.
Ryan Barath
Oct 5, 2016 at 9:25 pm
100%
I have used them many times before, but just like with the chop saw, I don’t want to buy a cheap one at the moment and I’m waiting to buy the champ model used on tour vans.
DJ
Oct 5, 2016 at 4:15 pm
Regarding dust collection systems. A really good club fitter I went too never had a vacuum system to control dust, specifically when cutting graphite shafts. He had to quit his business since all those years of breathing graphite led to him losing 40% lung capacity. Reason enough to invest in a high quality system if you are going to make this more than a hobby.
Ryan Barath
Oct 5, 2016 at 8:57 pm
Exactly!
Breathing in any sort of small particles for a long period of time is never good. Its the exact reason I do all of my finishing work and grind work in a proper metal shop, and with a dust mask.
John G
Oct 5, 2016 at 3:15 pm
Nice article for beginner but we know that when one starts repairing/rebuilding/building clubs from everywhere, tools and parts really-really add up fast.
When I started many years ago, most all my tools came from Mitchell and this or that special tool or part is always on going.
Steven
Oct 5, 2016 at 2:25 pm
Wow, that is an impressive setup. I don’t know if I want to build or alter clubs, but looking at the setup makes me want to try.
Blade Junkie
Oct 5, 2016 at 1:02 pm
You don’t know how lucky you are in the USA having big houses, basements and huge garages to put all this stuff. Many of us in the UK are making do with a 6′ x 3′ garden shed LOL.
Jason Thompson
Oct 5, 2016 at 10:58 am
I’m curious what large scale workshops you have built? I know the guys who did Modern Golf’s and you weren’t even employed there.
NFG
Oct 5, 2016 at 10:49 am
I want to be like this guy, sweet set up!! My work shop is small but I can do what I need to do.
alexdub
Oct 5, 2016 at 10:43 am
Great write-up! This is one of the better features from GolfWRX in a while. Who doesn’t love repair shop man caves>?
Ryan Barath
Oct 5, 2016 at 8:59 pm
Thanks!
This really was a subject I wanted to cover and share. I’m glad you like it.
Christopher
Oct 5, 2016 at 10:20 am
Can you share your plans you used for that bench ruler. I like that setup!
Ryan Barath
Oct 5, 2016 at 9:04 pm
Here’s the Link to my GolfWRX post from last year where I posted exactly how I made it.
http://www.golfwrx.com/forums/topic/1197824-my-very-easy-diy-bench-ruler-plans-why-spend-when-you-can-spend-and-be-accurate-home-shop-pics-incd/page__p__11807904__hl__+build%20+bench%20+ruler#entry11807904
RAT
Oct 5, 2016 at 10:02 am
Interesting , gone from just a little to making it a vocation. Start up – pick 3 of the most important, forget the small hand tools and etc.
Jim
Oct 5, 2016 at 9:59 am
Drill Press is a must for accurate, straight/tight hosel bores.
Tom
Oct 5, 2016 at 12:04 pm
amen to that
Tom
Oct 5, 2016 at 9:05 am
Great hobby to get involved in if your a serious golfer. I do it so that I can buy inexpensive sets of irons. Take measurements, make adjustments for junior player just starting he game.
David W.
Oct 5, 2016 at 8:23 am
Good stuff! Not going to build anything myself, but a great read.
Charlie
Oct 5, 2016 at 7:54 am
Were you seeing just how much you could bend a Mizuno MP T11 wedge before it snaps?
Ryan Barath
Oct 5, 2016 at 9:08 pm
I wasn’t sure someone would catch that or not.
It was a Mizuno wedge I bent completely flat: 0 LIE, 0 LOFT. I thought it was going to break when i did it but it just kept going. I actually have two, 1 is a paper weight (pictured) and the other is an assembled club that’s around 14″ long. It looks hilarious and is fun to try and hit a ball with.